Hansa C27hs O&M Manual - Issue 1 - 04/10/2016
© Hansa Chippers 2016
4
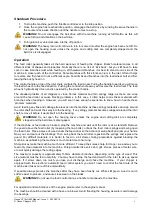
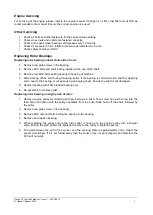
Shutdown Procedure
1. To stop the machine, push the throttle control lever to the idle position.
2. Once the engine has reached idle position, disengage the belt drive by winding the swivel handle in
the counter clock-wise direction until the handle comes to a stop.
WARNING!
Do not disengage the belt drive with the machine running at full throttle, as this will
cause friction and vibration on the belt drive.
3. Turn ignition key anti-clockwise into the off position.
WARNING!
The heavy rotor will continue to turn for some time after the engine has been shut off. Do
not open the housing cover unless the engine and cutting disk are completely stopped and the
belt drive is disengaged.
Operation
The feed roller generally takes all the hard work out of feeding the chipper. Branch material comes in all
different kinds of shapes and properties. Normally there is no risk of ‘kick back’, but you still have to take
care in case branches twist while feeding in. With awkward branches, it is best to stand to one side of the
machine in close reach of the control bar. Some branches with thick forks can jam in the inlet. Often it helps
to reverse and then feed it in at a different angle. Feed limbs and branches into the feed wheel butt end first,
leaving the bushy head on.
The control handle on top of the inlet chute controls the feed wheel. Pulling the handle towards you will move
the feed wheel into the feed direction. Pushing the control handle away will reverse the feed wheel. The feed
wheel is hydraulically driven and is operated by the control handle.
The dreaded problem of all chippers is vines, fibrous material and thin springy twigs, as these can wrap
around the feed roller or cause blocking problems. In this case, it often helps to mix these materials with
branches when feeding in. However, you will soon have enough experience to know how to handle these
‘problem’ materials.
Avoid feeding any flax and cabbage tree leaves into the machine as these stringy materials can wrap around
the rotor shaft and work their way into the bearing. If any stringy material becomes wrapped around the rotor
shaft, remove it before it works itself into the bearing.
WARNING!
Do not open the housing cover unless the engine and cutting disk are completely
stopped and the belt drive is disengaged.
If the machine or feed roller is blocked, stop the machine and wait until the rotor is at a standstill. Remove
the guard above the feed roller (by loosening the two bolts), unhook the feed roller springs and swing open
the feed roller. Place a piece of wood under the feed roller so that it cannot swing back and jam your hands.
Now you can clear out the blockage. Then swing back the feed roller, reposition the springs and replace the
guard. For difficult materials, it is better to feed in a bit slower, taking precautions against blocking the
machine, as unblocking the machine is much more time consuming.
Sharp knives make the machine much more efficient. To keep the knives sharp for longer, we advise you to
feed only clean material into the machine. Foreign matter like soil, sand, grit, stones, pieces of metal, wire,
etc. will quickly damage the cutting edges.
The maximum capacity is approximately 150mm diameter branches, depending on the type of wood. This
size material must be fed in carefully. You may have to stop the feed and wait for the rotor to pick up speed
again. If it slows down too much, you lose your discharge and choke the machine. If your chipper is
equipped with the electronic automatic feed control system you won
’t need to control the feed rate of the
machine as it takes care of this automatically.
If possible always process the branches after they have been freshly cut. While still green, wood is much
softer, easier to process, and causes less wear on the blades.
WARNING!
Do not use the feed control bar as a handle to manoeuvre the machine.
For operation and maintenance of the engine, please refer to the engine manual.
The machine should be cleaned with a hose or a blower. Avoid flooding the housing, as water could damage
the bearings.

