background image

8

English

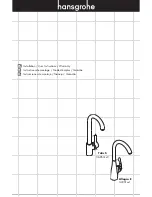
14801xx1 Installation

Position the faucet and sealing ring on 
the mounting surface.

Install the fiber washer, metal washer, 
and mounting nut.  Tighten the tensioning 
screws.

Install the hot and cold supply hoses on 
the stops.  

Use two wrenches, as 
shown, to prevent the hoses 
from twisting and becoming 
loosened from the faucet.

Turn on the water and check all connec-
tions for leaks.

Содержание Talis S

Страница 1: ...EN Installation User Instructions Warranty FR Instructions de montage Mode d emploi Garantie ES Instrucciones de montaje Manejo Garant a Allegro E 14801xx1 Talis S 06857xx0...

Страница 2: ...mber Please read over these instructions thoroughly before beginning installa tion Make sure that you have all tools and supplies needed to complete the installation Keep this booklet and the receipt...

Страница 3: ...a del calentador de agua Consideraciones para la instalaci n Para obtener mejores resultados la instalaci n debe estar a cargo de un plomero profesional matriculado Antes de comenzar la instalaci n le...

Страница 4: ...4 5 1 max 2 15 6 1 10 13 2 25 Talis S 06857xx0 Allegro E 14801xx1...

Страница 5: ...teel optik 92 rubbed bronze Allegro E 14801xx1 Talis S 06857xx0 96468xx0 96461000 92730000 88744xx0 14099001 95049000 92646000 97523000 97558000 97662000 96059000 95008000 06985xx0 96338000 96468xx0 9...

Страница 6: ...ace is greater than 1 or if there is insu cient space omit the plastic washer Tighten the mounting nut Tighten the tensioning screws Connect the hot and cold supply lines to the stops Use two wrenches...

Страница 7: ...dans le sch ma Serrez fermement l aide des cl s Ouvrez l eau V ri ez l tanch it de tous les raccords Instalaci n del grifo 06857xx0 Coloque el aro de sellado y el grifo sobre la super cie de montaje...

Страница 8: ...ce Install the ber washer metal washer and mounting nut Tighten the tensioning screws Install the hot and cold supply hoses on the stops Use two wrenches as shown to prevent the hoses from twisting an...

Страница 9: ...mement l aide des cl s Ouvrez l eau V ri ez l tanch it de tous les raccords Instalaci n del grifo 14801xx1 Coloque el aro de sellado y el grifo sobre la super cie de montaje Instale la arandela de bra...

Страница 10: ...10 User Instructions Instructions de service Manejo on ouvert abierto off ferm cerrar...

Страница 11: ...aucets and ttings Immediately rinse any overspray from the Hansgrohe product Damage to the product caused by improper care or the use of improper cleaning agents is not covered by the warranty If a co...

Страница 12: ...para eliminar completamente el resto de detergente La utilizaci n de limpiadores a vapor no est permitida las altas temperaturas pueden da ar los productos Indicaciones importantes Los residuos de pr...

Страница 13: ...h respect to Axor products THIS WARRANTY DOES NOT COVER AND HANSGROHE WILL NOT PAY FOR A Conditions malfunctions or damage not resulting from defects in material or workmanship B Conditions malfunctio...

Страница 14: ...r rights that vary from state to state TO THE EXTENT PERMITTED BY LAW ANY IMPLIED WARRANTIES OF MERCHANTABILITY AND FITNESS FOR A PARTICULAR PURPOSE ARE LIMITED TO THE DURATION OF THE EXPRESS WARRANTY...

Страница 15: ...15...

Страница 16: ...Hansgrohe Inc 1490 Bluegrass Lakes Parkway Alpharetta GA 30004 Tel 770 360 9880 Fax 770 360 9887 www hansgrohe usa com US Installation Instructions Part No 90551004 Revised 7 2013...

Отзывы: