


5
Replacement Parts / Pièces détachées / Repuestos
xx = colors / couleurs / acabados
00 = chrome
62 = oil rub bronze
80 = steel optik
92 = rubbed bronze
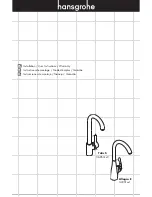
Allegro E
14801xx1
Talis S
06857xx0
96468xx0
96461000
92730000
88744xx0
14099001
95049000
92646000
97523000
97558000
97662000
96059000
95008000
06985xx0
96338000
96468xx0
96461000
92730000
96059000
95008000
95049000
92646000
97662000
94071001
96521xx0
98597xx1
96455xx0
97558000


