TP808-i User Manual
82
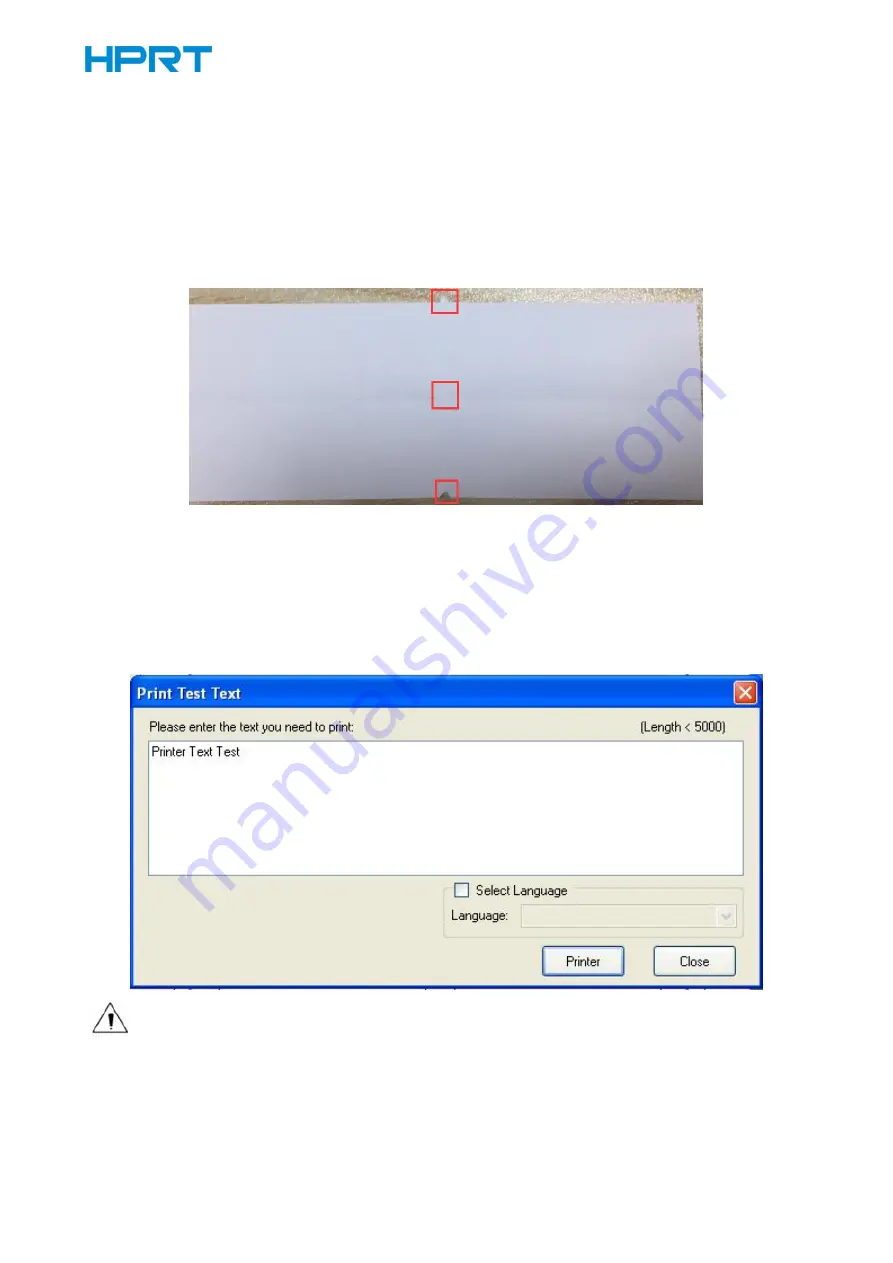
3) Partial Cut Test
Click the “Partial Cut Test” and the paper will be cut automatically. Cutting method is half-cutting
(half-cutting: Not all cut off, between the two sheets of paper to leave a connection point).
As shown in the figure:
4) Print Test Text
Click "Print Test Text", input the text you want to print. When you click "Print", the printer starts
printing text content. Such as: Print Text Test.
Note: The language option in the lower right corner is checked according to the input text.
(For example: The input is Simplified Chinese, the language is checked for Simplified
Chinese, the printer prints the input text according to the setting options, and if you
check other languages, the printer does not print the text)
Содержание TP808-i
Страница 10: ...TP808 i User Manual 6 2 2 Appearance and Components Front Rear Inside Cover Open Deflector Rod...
Страница 34: ...TP808 i User Manual 30 3 Paper 4 Offset Click on Manager add or delete paper...
Страница 36: ...TP808 i User Manual 32 Cut Paper Cut Distance 0 5 10 15 20mm End Document...
Страница 38: ...TP808 i User Manual 34 Cash Drawer...
Страница 39: ...TP808 i User Manual 35 Custom Command...
Страница 40: ...TP808 i User Manual 36 Logo...
Страница 42: ...TP808 i User Manual 38 Click Download Click Add to add a logo BMP format is recommended...
Страница 44: ...TP808 i User Manual 40 Select Printer properties in Devices and Printers then click Preference...
Страница 45: ...TP808 i User Manual 41 Click the Advanced then click Logo...
Страница 47: ...TP808 i User Manual 43 Then click OK...
Страница 48: ...TP808 i User Manual 44 Click Print Test Page to view the printing effect...
Страница 50: ...TP808 i User Manual 46 Code Page 1 Click Watermark Set watermark to print BMP format is recommended...
Страница 51: ...TP808 i User Manual 47 2 Click Halftone to set the halftone...
Страница 52: ...TP808 i User Manual 48...
Страница 55: ...TP808 i User Manual 51 Add Barcode firstly...
Страница 56: ...TP808 i User Manual 52 Set the Font Name and the Barcode Option...
Страница 57: ...TP808 i User Manual 53 Click the Printer Setting Choose the Display Language for Properties...
Страница 59: ...TP808 i User Manual 55...
Страница 60: ...TP808 i User Manual 56...
Страница 61: ...TP808 i User Manual 57...
Страница 64: ...TP808 i User Manual 60 5 Select the System Font for example Arial...
Страница 65: ...TP808 i User Manual 61 6 Select the font to that you went to replace...
Страница 66: ...TP808 i User Manual 62 7 Click Set...
Страница 67: ...TP808 i User Manual 63...
Страница 69: ...TP808 i User Manual 65 3 Set the Ports...
Страница 70: ...TP808 i User Manual 66 4 Click Advanced to set the printing time...
Страница 72: ...TP808 i User Manual 68 3 Choose TP808 i then click Next...
Страница 76: ...TP808 i User Manual 72 6 Click Install 7 Click Finish TP808 i Utility Tool is installed successfully...
Страница 78: ...TP808 i User Manual 74 2 Choose the appropriate printer type and port Then click OK Take TP808 i for example...
Страница 91: ...TP808 i User Manual 87 2 Click Send by Hex input the content Convert text to HEX or send ESC command...
Страница 97: ...TP808 i User Manual 93 9 2 2 6 Parameter Setting You can set Arabic Character Transform for example WPC1256...
Страница 99: ...TP808 i User Manual 95 Function Setting Choose the item and click Setting...
Страница 107: ...TP808 i User Manual 103 Figure Printer IP Address Figure Host IP Address...
Страница 108: ...TP808 i User Manual 104 Figure Host IP Address 2 Set the same network segment Figure Printer IP Address...
Страница 110: ...TP808 i User Manual 106 USB Port Setting Click Virtual serial port setting and restart the printer...
Страница 112: ...TP808 i User Manual 108 3 Return to the printer utility and click Modify Printer...
Страница 113: ...TP808 i User Manual 109 4 Change the port to COM7...


