background image

Technical Support : +82-2-3452-8966 / [email protected] 9 /31          

3. Installation 

3.1 Packing Inspection

3.2 Installation 

▶ Our contact information is written on the box and on the outer cover of the manual.

3.2.1 Environmental Requirement 

•Check packing conditions carefully, before unpacking. 
•Contact Hanil Scientific Inc. immediately if any damage is found. 
•Check the delivery for completeness

Installation on hard and flat ground

•The Centrifuge should be installed on a hard and flat floor. 

•If the centrifuge is installed on an inclined floor, the shaft may bend due to the 

weight of the rotor. 

Good ventilation

•For air circulation and safety, maintain a safety clearance of 30cm around the 

device while the rotor is spinning.  

Constant temperature/humidity 

•The Centrifuge is equipped with a sensitive electronic software which can 

react easily to humidity and temperature. 

•Avoid direct light or heater, place the device in the ambiance of controlled 

temperature and air. 

Avoid any corrosive gas 

•Install the centrifuge in a place where corrosive gas is not generated. 

•Sulfur dioxide gas and chlorine gas may cause corrosion. 

Leveling 

•The shaft should be placed exactly vertical on a horizontaliy flat bench by the 

leveling tool.

Содержание Supra R17

Страница 1: ...User Manual Supra R17 High Speed Centrifuge Place of Purchase Serial No Date of Purchase...

Страница 2: ...fic Inc If you have any questions contact our Technical Support Center 82 2 3452 8966 techsupport ihanil com www ihanil com The appearance or specifications of the device is subject to partial change...

Страница 3: ...Rotor 13 3 6 Loading Tubes 14 4 Operation 15 4 1 Control Panel 15 4 2 Setting RPM RCF 16 4 3 Setting Run Time 17 4 4 Setting Temperature and Fast Cool 18 4 5 Setting Acceleration Deceleration 19 4 6 S...

Страница 4: ...lancing work of samples should be done in advance before operation 8 To ensure safe use of the device do not expose the device to strong acids strong bases cesium salt or alkaline detergents 9 If the...

Страница 5: ...or circuit breakers and overcurrent protection devices be installed near the device 2 Use a power cord only provided with the device 3 Use sockets with a protective earth conductor and suitable power...

Страница 6: ...www ihanil com 6 31 2 Product Description 2 1 Structure Lid Chamber Display Control panel Emergency lid open hole Power switch Caster...

Страница 7: ...ical Support 82 2 3452 8966 techsupport ihanil com 7 31 2 Product Description User manual Power code Rotor locking tool Emergency lid open tool Grease Lubricant Bubble leverler Spanner 2 2 Delivery Pa...

Страница 8: ...CC DEC ramps 9 10 steps Temperature range 20 to 40 Fast cool Yes Time control Pulse Timed 10 hr continu Noise level 56 dB Program memory 100 Imbalance cutoff tracking Yes Rotor identification Automati...

Страница 9: ...stalled on an inclined floor the shaft may bend due to the weight of the rotor Good ventilation For air circulation and safety maintain a safety clearance of 30cm around the device while the rotor is...

Страница 10: ...eler on top of the device Try to locate all bubbles in the center of the Bubble Leveler with rotating the red gear which is in caster of the device 2 Adjust the height of four wheel which is at the bo...

Страница 11: ...cket on the right back of the device turn on the earth leakage breaker switch 2 Turn on a power switch on the right side of the device With beeping sound right before setting value is displayed The de...

Страница 12: ...4 Opening Closing the Lid For opening the lid press the LID button Should touch the LID button when the lid is closed Lid LED shows off Close the lid until hearing clank shut When the lid is opened th...

Страница 13: ...in use 3 Installation 1 Before installing the rotor remove any foreign object or moisture 2 Load the rotor vertically onto the motor shaft 3 Turn the lid handle until it secured Installing Turn the h...

Страница 14: ...s should be loaded symmetrically Do not exceed the maximum rated speed of the tube Same volume of sample should be put on tubes Check symmetric loading by balancing tubes with a scale 1 Check the maxi...

Страница 15: ...40 C Use to reach rapid refrigeration up to the setting temperature touch for more than 2 seconds for Fast Cool ACC DEC Use to set the acceleration deceleration level from 1 to 9 steps 0 in decelerat...

Страница 16: ...set the number of sound and volume 1 Press the RPM RCF button once or twice Press once RPM mode Press twice RCF mode 2 Press the numeric buttons until the required RPM RCF is display If you do not pre...

Страница 17: ...time once the actual run speed reaches to the set speed value and stops when the deceleration begins AT SET SPEED mode 4 3 2 Setting Run Minute Hour 1 Press the TIME button once MIN value on LED is f...

Страница 18: ...to set temperature If you touch button you can set minus degree values If you touch button twice minus degree is cleared If you do not touch the number button for 15 seconds the setting mode is cleare...

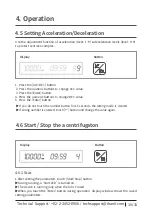
Страница 19: ...nning only when the lid is closed When you touch the Enter button during operation display window shows the saved setting parameters 4 6 1 Stat 4 6 Start Stop the a centrifugaton 4 5 Setting Accelerat...

Страница 20: ...ng the set speed the centrifugation is decelated and stopped 1 Set the desired speed Refer to 4 3 Setting Speed 2 Press the Pulse button 1 Press the Start Stop button When you touch the Start Stop but...

Страница 21: ...KEY LOCK button again in the key lock mode the key lock mode is cleared 2 Press the PROG twice SAVE is turned on the display window 3 Press the numeric buttons to change input Program number If you d...

Страница 22: ...button If you do not touch the number button for 15 seconds the setting mode is cleared If wrong number is entered touch button and change the value again 1 Touch SOUND button Sound LEVEL_03 appears o...

Страница 23: ...e than 2seconds Sound rPt appears on the display window 3 Fix the value by touching ENTER button The number of finishing sound 0 99 0 silent 99 99 times 2 Touch the number buttons to change the value...

Страница 24: ...ck release hole in the front body of the device and take out the white rubber closure 2 Insert the emergency lid open tool into the hole and revolve it counter clockwise until the lid is released Wait...

Страница 25: ...ft 1 Always make special attention to clean the motor shaft to avoid any imbalance problem due to the contaminants 2 After using the device take out the rotor from the shaft and clean the shaft with d...

Страница 26: ...on 1 Wipe up the moisture in the chamber with a soft cloth 2 Leave the centrifuge lid open after centrifugation Remove the condensation water 1 There is a drain cap on the leftside of the device Remov...

Страница 27: ...ot solved in shortly open the lid with emergency lid open tool manually for safety of sample Can t close the lid Remove the dirt at the lid latch and then close the lid completely again If the lid see...

Страница 28: ...nd then check the voltage of the Power supply V Hz Use AVR to provide proper power E5 HighVoltage If the power input of Power supply V Hz is 10 more than required power this message is appeared Shut o...

Страница 29: ...or place of purchase E15 Motor Temp Sensor If the motor temperature sensor can t recognize this message is appeared No user action Please call Hanil tech support or place of purchase E16 Comp Temp Sen...

Страница 30: ...7 1 mm Incl a coupling bolt lid 10 mL Round 16 3 x 74 5 85 1 17 000 27 496 A15 12 Hole angle 30 Max Capacity 12 x 15 mL Size x H 222 7 x 106 mm Max height for tube fit 121 mm Incl a coupling bolt lid...

Страница 31: ...TR15 50 29 x 100 98 9 15 000 24 878 15 mL Round 17 x 94 92 8 15 000 23 344 15 mL Conical TR15c 50 17 x 105 93 9 15 000 23 621 A85 6 Hole angle 25 Max Capacity 6 x 85 mL Size x H 209 1 x 112 mm Max he...

Страница 32: ...RECYCLABLE...

Отзывы: