34
8
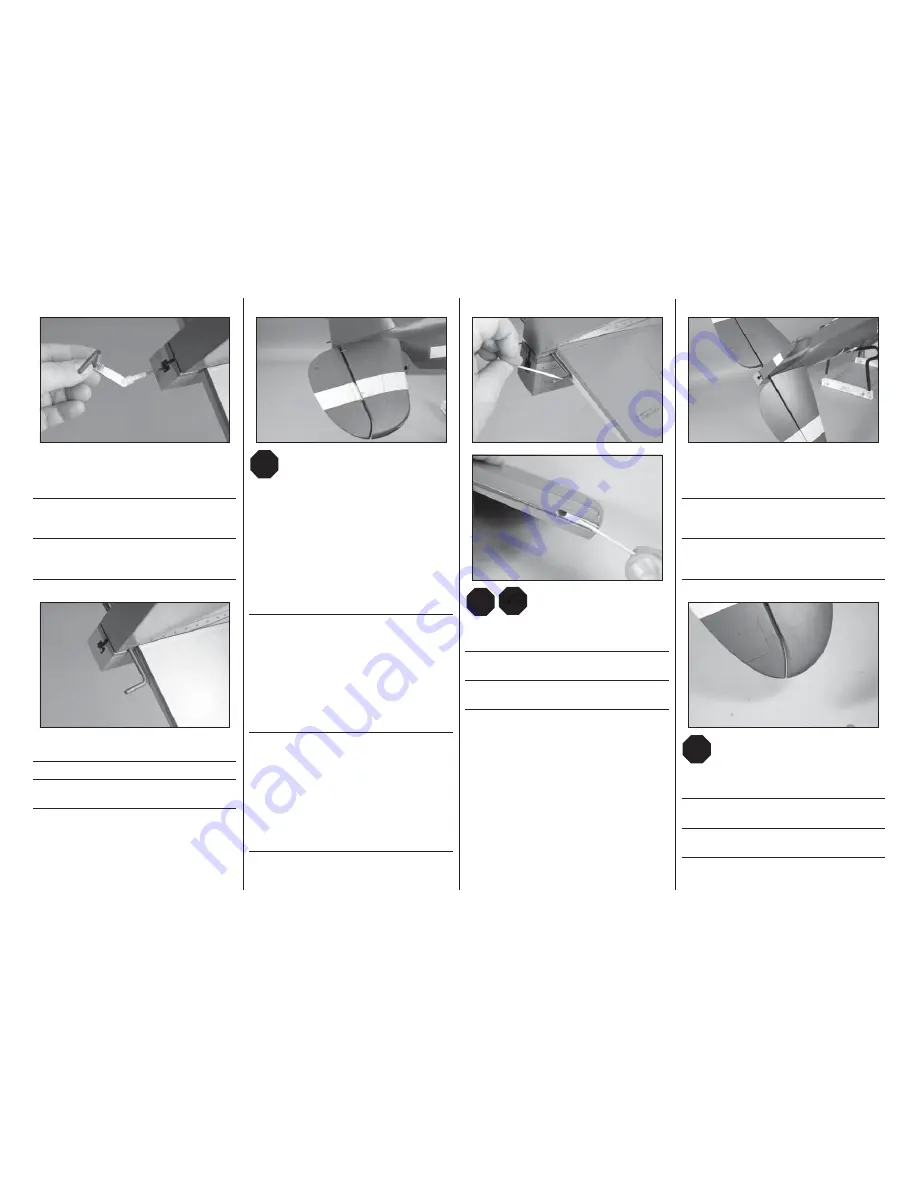
Attach the clevis to the horn on the elevator joiner wire. Slide
the silicone tubing over the forks of the clevis to secure it to
the control horn.
Verbinden Sie den Gabelkopf mit dem Horn des
Höhenruderbügels. Schieben Sie zur Sicherung den
Silikonschlauch über den Gabelkopf.
Fissare la cambra alla squadretta di controllo sul cavo di
giunzione dell’elevatore. Far scorrere il tubo in silicone sulle
forcelle della cambra per fi ssarlo alla squadretta di controllo.
9
Fit the joiner in position in the rear of the fuselage.
Setzen Sie den Verbinder in die Öffnung am Heck ein.
Posizionare in fusoliera il fi lo di acciaio di giunzione
dell’elevatore.
10
L
R
L
R
Use a pin vise and 1/16-inch (1.5mm) drill bit to drill a hole
in the center of each hinge slot to allow the CA to wick into
the hinge. Drill holes in stabilizer and elevators at this time.
Place a T-pin in the center of the six elevator hinges. Slide
the hinges into position with the T-pin resting against the
edge of the control surface. Check the fi t of the elevators to
the stabilizer and joiner wire. With the radio system on and
the elevator servo centered, check that the elevators are in
alignment with the stabilizer. If not, adjust the clevis until the
elevators are in the neutral position. Once fi t and adjusted,
remove the elevators from the stabilizer.
Bohren Sie mit dem 1,5mm Handbohrer ein Loch in die Mitte
jeden Scharnierschlitzes damit der Sekundenkleber besser
eindringen kann. Bereiten Sie das Höhenruder und Leitwerk
vor. Stecken Sie eine T-Nadel in die Mitte jeden Scharnieres
und stecken diese bis zur Nadel in die Schlitze. Überprüfen Sie
die Passung und Ausrichtung der Ruder zum Höhenleitwerk
und Verbinderdraht bei dem Aufsetzen und dann mit
eingeschalteter Anlage. Justieren Sie falls notwendig die
Gabelköpfe bis das Höhenruder neutral steht. Entfernen Sie
nach der Einrichtung die Höhenruder vom Leitwerk.
Praticare un foro da 1,5mm nel centro di ciascuna fessura
delle cerniere per consentire alla colla CA di colare nella
cerniera. A questo punto praticare i fori nello stabilizzatore
e nell’elevatore. Mettere uno spillo con testa a T al centro di
ognuna delle 6 cerniere dell’elevatore e metterle in posizione
in modo che lo spillo resti contro al bordo della superfi cie di
controllo. Verifi care l’unione tra stabilizzatore, elevatore e fi lo
di giunzione. Se fosse necessario, regolare le forcelle fi nché
l’elevatore non è centrato. Quando tutto è a posto, togliere
l’elevatore dallo stabilizzatore.
11
L
R
L
R
30
Apply epoxy to the joiner wire and stabilizer where they contact
each other.
Streichen Sie die Kontaktstellen des Bügels und Ruder mit
Epoxy ein.
Applicare la resina epossidica al cavo di giunzione e allo
stabilizzatore nei punti in cui essi si toccano.
12
Fit both elevators to the stabilizer, pressing the joiner tightly
into the elevators. Use isopropyl alcohol and a paper towel to
remove any excess epoxy before it begins to cure.
Passen Sie beide Höhenruder an die Leitwerke und drücken
Sie an. Wischen Sie mit einem Papiertuch und Ispropylalkohol
überfl üssiges Epoxy ab bevor es trocknet.
Unire gli elevatori e lo stabilizzatore premendo il fi lo di
giunzione. Togliere gli eccessi di epoxy con un fazzoletto di
carta e alcol isopropilico prima che cominci a indurire.
13
L
R
L
R
Align the elevator with the end of the stabilizer. Make sure
both side are aligned equally.
Richten Sie das Höhenruder mit dem Leitwerk aus. Stellen Sie
sicher, dass beide Seiten gleich ausgerichtet sind.
Allineare l’elevatore con entrambi i terminali dello
stabilizzatore.


