Subject to change without notice
29
(1)
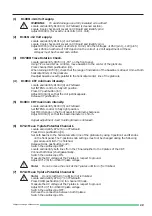
R1008: +141 Volt supply.
WARNING:
To avoid damage use a fully insulated screwdriver!
Locate and identify R1008 (1) on PS-Board (screened section).
Locate 8 pole checkpoint socket on XY-Board and identify pin 2.
Adjust R1008 (1) for e141Volts (± 0.1 Volt).
(2)
R1016: +12 Volt supply.
Locate and identify R1016 (2) on PS-Board.
Locate 8 pole checkpoint socket on XY-Board and identify pin 4.
Adjust R1016 (2) for e12Volts (± 10mV). All other vo185V (pin 1), -12V (pin 5)
and -1950V on cathode of CRT depend on the c12 Volt adjustment. All these
voltages must be checked and verified.
(3)
VR7000: Trace Rotation Check.
Locate and identify VR703 (3) „TR“ on the front panel.
Using Y-Pos.I and X-Pos. controls, move baseline to the center of the graticule.
Press channel I GD pushbutton (in!).
When turning VR703 (3), check that the range of inclination of the baseline is at least 1mm at both
horizontal limits of the graticule.
Readjust baseline exactly parallel to the horizontal center line of the graticule.
(4)
R1004 : CRT minimum intensity.
Locate and identify R1004 (4) on PS-Board.
Set INTENS. control to fully left position.
Press XY pushbutton (in!).
Adjust R1004 (4) so that the dot just disappears.
Release XY pushbutton.
(5)
R1003 : CRT maximum intensity.
Locate and identify R1003 (5) on PS-Board.
Set INTENS. control to fully right position.
Set FOCUS knob on the front panel for optimum sharpness.
Adjust R1004 (5) so that the beam diameter is 1.5mm.
Repeat adjustment 4 and 5 until optimum is obtained!
(6)
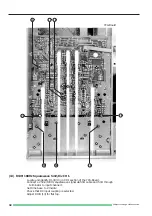
R712: Mean Y-plate Potential Channel I.
Locate and identify R712 (6) on YPA-Board.
Press DUAL pushbutton (in!).
Set both beams to the horizontal center line of the graticule by using Y-position I and II knobs
on the front panel. The Y-position knob settings must not be changed during the following
procedure until item 7) is finished.
Release DUAL pushbutton (out!).
Switch the oscilloscope OFF.
Locate and identify both lines from the Y-final amplifier to the Y-plates of the CRT.
Connect both lines (short)galvanically.
Switch the oscilloscope ON.
Measure the DC voltage at the Y-plates in respect to ground.
Adjust R712 (6) for +85Volt Y-plate voltage.
Note:
Do not remove the short at the Y-plates until item 7) is finished.
(7)
R714: Mean Y-plate Potential Channel II.
Note:
Do not start item 7) until item 6) is finished.
Locate and identify R714 (7) on YPA-Board.
Press CHI/II pushbutton (in!) for channel II mode.
Measure the DC voltage at the Y-plates in respect to ground.
Adjust R714 (7) for +85Volt Y-plate voltage.
Switch the oscilloscope OFF.
Remove the connection between both Y-plates.
Switch the oscilloscope ON.
Содержание HM 303-4
Страница 1: ...Instruments Oscilloscope HM 303 4 E N G L I S H 4S 0303 04E0 10 JUN 1998 SERVICE MANUAL HM303 4...
Страница 3: ...Subject to change without notice 2...
Страница 5: ...Subject to change without notice 4 Y Preamplifier CH I YP Board...
Страница 6: ...Subject to change without notice 5 Y Preamplifier CH II YP Board...
Страница 7: ...Subject to change without notice 6 Y Intermediate Amplifier and Trigger Amplifier YP Board...
Страница 8: ...Subject to change without notice 7 YPA Board Top side...
Страница 9: ...Subject to change without notice 8 YPA Board Top side...
Страница 10: ...Subject to change without notice 9 XY Amplifier YF Amplifier OS Circuit...
Страница 11: ...Subject to change without notice 10 XY Board Top side...
Страница 12: ...Subject to change without notice 11 XY Board Top side...
Страница 13: ...Subject to change without notice 12 Sync Amplifier...
Страница 14: ...Subject to change without notice 13 Time base...
Страница 15: ...Subject to change without notice 14 Sweep Generator...
Страница 16: ...Subject to change without notice 15 TB Board...
Страница 17: ...Subject to change without notice 16 CRT Board...
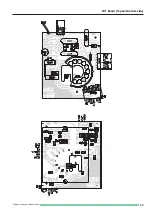
Страница 18: ...Subject to change without notice 17 CRT Board Top and Bottom side...
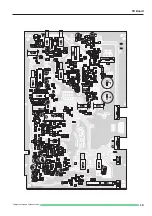
Страница 20: ...Subject to change without notice 19 PS Board Top side...
Страница 21: ...Subject to change without notice 20 PS Board Bottom side...
Страница 22: ...Subject to change without notice 21 Component tester Calibrator...
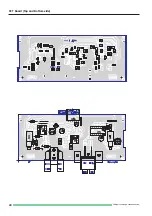
Страница 23: ...Subject to change without notice 22 CCT Board Top and Bottom side...
Страница 24: ...Subject to change without notice 23 Front control board...
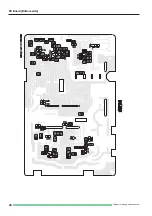
Страница 25: ...Subject to change without notice 24 Front Control board Top and Bottomside...
Страница 26: ...Subject to change without notice 25 Adjustment Procedure...
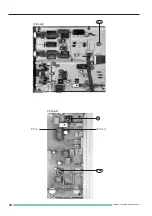
Страница 29: ...Subject to change without notice 28 2 1 PS Board Front panel 6 7 YPA Board 4 5 Pin 2 Pin 4 PS Board 3 XY Board...
Страница 31: ...Subject to change without notice 30 10 12 7 11 9 8 YPA Board PS Board...
Страница 35: ...Subject to change without notice 34 A C D B 24 B D C A 23 YPA Board 21 A D B C...
Страница 37: ...Subject to change without notice 36 25 YPA Board 27 B 30 A C B A 26 XY Board Pin 5 28 29 Pin 1 TB Board...
Страница 39: ...Subject to change without notice 38 YPA Board 35 32 34 31 33 TB Board XY Board...
Страница 41: ...Subject to change without notice 40 37 36B Pin 14 Pin 1 CT Board 36A XY Board...

