31
Appendix C – Target Calibration
Before a new target can be used, it should be calibrated. If the target is purchased as part of a system, it will be calibrated
at the factory and the resulting calibration factors will be included with the target.
If the user wants or needs to calibrate a target, the process involves moving or tilting a target a known amount from center
or zero and observing the actual readings. The calibration factors are then calculated and used by the software to adjust
the actual target reading to match the actual target displacement.
Four calibration factors (+V, -V, +H, -H) must be set for each two-axis target. A four-axis target (T-261, T-266, T-267
and T-212) requires eight factors (+V, -V, +H, -H, for center
and
for slope). Calibration factors may be entered manually,
or calibration may be done automatically by the program.
Calibration Setup
1.
Mount the laser and target.
Note:
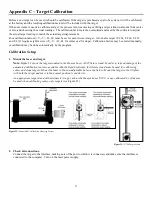
shows the target mounted in the Hamar Laser A-807 fixture stand. In order to take advantage of the
automated calibration features available with the Read8 software, this fixture stand must be used for calibrating
center and slope targets. Mount the laser in the non-adjustable hole on the fixture. Mount the target in the tilt plate
with both the target and laser in the normal position (cord down).
An appropriate target stand with micrometer stage, such as the Hamar Laser T-230, or any calibrated x-y slide may
be used when calibrating center-only targets
(
.
Figure 22—Model A-807 Calibration Mounting Fixture
2.
Check all connections.
Connect the target to the interface, making note of the port to which it is connected, and make sure the interface is
connected to the computer. Turn on the laser power supply.
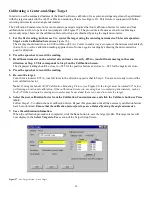
Figure 23—T-230 Target Stand
Содержание L-702
Страница 1: ......
Страница 7: ...4 L 702 L 702SP Laser Dimensions...
Страница 28: ...25 7 Lathe9 Step 3 and Results Screen...


