5
N
ote – Faulty transfer of measured values
• In isolated cases, interference – for example, from a
WLAN network, a computer or a television set – can cause
the transfer of measured values between the measuring
station, wireless rain gauge and base station to fail.
• In this case, you must resynchronise the stations by
briefly removing the batteries from all stations and
reinserting them.
• If the measured values are not transferred again once
the batteries are inserted, replace the batteries with
new ones.
• If necessary, select a new location for the base station in
order to avoid possible interference in the future.
6.2. Basic and manual settings
Automatic setting using the DCF signal
• After the base station has been switched on for the first time
and successful transmission has been established between
the base station, measuring station and wireless rain gauge,
the clock will automatically search for a DCF signal. During
the search, the wireless symbol (4) will flash.
• When the radio signal is received, the date and time are
automatically set.
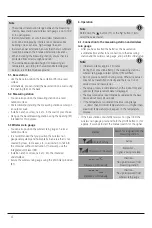
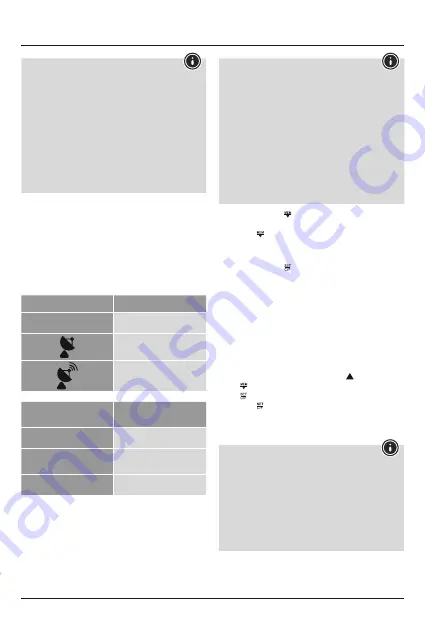
Radio icon
Signal strength
No symbol
No reception
Poor
Excellent
Radio icon
Searching for the
DCF signal
Flashing display
Active
Constant display
Successful – signal is being
received
No display
Error – signal search ended
Note – Time settings
• If, during initial setup of the device, a DCF radio signal
is not received within the first few minutes, the search is
aborted. The radio symbol disappears.
• If there are reception problems, we recommend leaving
the clock to sit overnight, since interference is generally
less at night.
• In the meantime, you can start a manual search for the
DCF radio signal at another location or you can manually
set the time and date.
• The clock automatically continues to search for the DCF
radio signal on a daily basis (1:00 a.m., 2:00 a.m. and
3:00 p.m.). If the signal is received successfully, the
manually set time and date are overwritten.
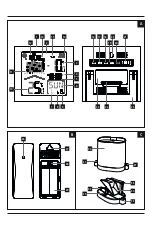
• Press and hold the ‘ ’ button (18) to start the manual
search for the DCF radio signal.
• Press the ‘ ’ button (18) again to interrupt the manual
search for the DCF radio signal.
Manually setting the date/time
• Press and hold the ‘ ’ button (16) for approximately 3
seconds to make the following settings one after the other.
• Time zone
• 12/24-hour format
• Hour
• Minute
• Year
• Month
• Day
• Language setting for the day of the week
• Setting of the rain measuring unit (mm/inch)
• To select the individual values, press the ‘ ’ button (17) or
the ‘ ’ button (18) and confirm each selection by pressing
the ‘ ’ button (16).
• Press the ‘ ’ button (16) to adopt the set value displayed
and to skip.
• If you do not make an entry for 10 seconds, you
automatically exit Settings mode.
Note – Time zone
• The DCF signal can be received over long distances, but
always transmits the current Central European Time in
Germany. Make sure you account for the time difference
in countries with another time zone.
• If you are in Moscow, the time is 3 hours later than in
Germany. This means that you should set +3 for the
time zone. The clock then automatically sets the time to
3 hours after the DCF signal received or relative to the
manually set time.
Содержание Rainy
Страница 28: ...27 4 4 1 29 32 30 35 34 Micro 30 32 23 Micro 4 2 29 AA Mignon 32 30 35 34 Micro 30 32 23 Micro 5...
Страница 29: ...28 6 100 2 6 5 5 1 25 22 5 2 27 5 3 33 31 6 17 18 6 1 2 15 10 3 45 3 LIGHT 1...
Страница 30: ...29 WLAN 6 2 DCF DCF 4 DCF DCF DCF DCF 01 00 02 00 03 00 18 DCF 18 DCF 3 16 12 24 17 18 16 16 10 DCF 3 3 DCF 3...
Страница 47: ...46 6 100m 2 m 6 5 ft 5 1 25 22 5 2 27 5 3 33 31 6 17 18 6 1 2 15 45 LIGHT 1 3...
Страница 101: ...100 5 6 100 2 6 5 5 1 25 22 5 2 27 5 3 33 31 6 17 18 6 1 2 15 10 3 45 LIGHT 1 3...
Страница 102: ...101 Wi Fi 6 2 DCF DCF 4 DCF DCF DCF DCF 01 00 02 00 03 00 18 DCF 18 DCF 16 3 12 24 inch 17 18 16 16...


