background image

6

4. Informations and notes before getting started

Note – Optimal reception

Please note:

Always pull the antenna out completely.

We recommend you adjust the antenna vertically to

ensure optimal reception.

Try various different positions if necessary to get the

best reception.

5. Getting started
5.1 Radio – Connecting and starting up

Connect the network cable to a properly installed and

easily accessible network socket. The power supply unit is

suitable for mains voltages between 100 and 240 V, and

is thus operable on almost any AC power grid. Please note

that a country-specific adapter may be necessary.

You can find an appropriate selection of Hama products at

www.hama.com.

Note

Only connect the product to a socket that has been

approved for the device.

When using a mult-socket power strip, make sure

that the sum power draw of all the connected devices

does not exceed its maximum throughput rating.

The electrical socket must always be easily accessible.

If you will not be using the product for a long period

of time, disconnect it from mains power.

Once the product has been connected to mains power,

initialisation takes place.

5.2. General notes on use

Notes on use

When a selection among menu items is to be made

(such as

Yes

or

No

), the one currently selected is

marked with < >.

In menus offering a variety of different options (such

as DRC, Language and so on), the currently selected

option is marked with *.

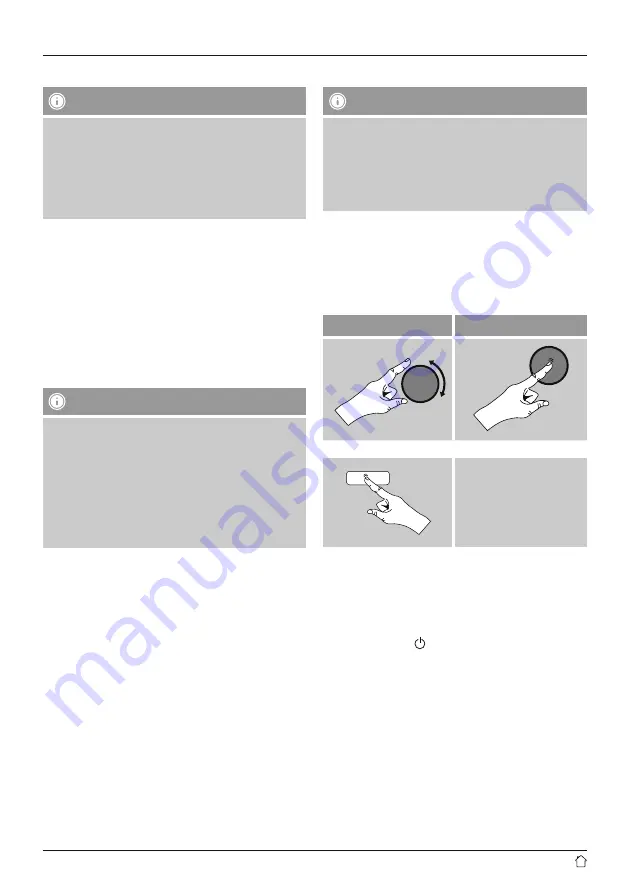
Navigation and controls

Select among menu items by turning [

enter/navigate

].

Confirm the selection by pressing [

enter/navigate

].

This procedure is indicated in these operating instructions

by the following symbols:

Selection (navigate)

Confirmation (enter)

Some features can be

accessed by means

of shortcut buttons.

Pressing shortcut buttons

is indicated here by this

symbol.

After pressing a shortcut button, navigate amongst the

menu items using [

enter/navigate

].

Volume adjustment / mute

You can turn the volume up (right) or down (left) by

turning [

volume/

] accordingly.

Содержание DR1510

Страница 1: ...GB Operating Instructions Digital Radio Digitalradio 09 45 00054826 DR1510 ...

Страница 2: ...DAB 174 240 MHz FM 87 5 108 MHz Sensitivity DAB DAB 97 99 dBm FM 105 109 dBm Power Consumption Operation 12 W Standby 1 W Input Output Aux in 3 5 mm Earphone Jack USB Jack for firmware grade Presets DAB DAB 30 FM 30 Codec DAB MP2 AAC Bluetooth AAC SBC UI Languages English French German Italian Finnish Dutch Danish Norwegian Polish Swedish Slovak Czech Package Content Quick Guide Dimension WxHxD 29...

Страница 3: ...09 45 A B 2 7 9 1 11 12 13 14 10 8 4 5 3 6 ...

Страница 4: ... access to the menu Back one menu level 4 mode Changing operating mode Bluetooth DAB FM Aux in 5 pair Direct access to pairing mode 6 alarm Direct access to alarm clock settings 7 memory List save favourites 8 enter navigate Rotate Select Press Confirm 9 2 8 LCD 10 Activating Snooze B Rear 11 Headphone socket 12 AUX IN socket 13 UPDATE PORT socket 14 Antenna ...

Страница 5: ...sets 10 7 4 1 Save favourites 10 7 4 2 Access favourites 11 7 5 Audio setting 11 8 Auxiliary Input 11 9 Bluetooth 11 9 1 BIuetooth pairing 12 9 2 Automatic Bluetooth connection after successful pairing 12 10 Sleep 12 11 Alarms 13 11 1 Alarm settings 13 11 2 Activating deactivating the alarm 13 11 3 Activate deactivate alarm in standby mode 13 11 4 Stopping the alarm Snooze function 13 12 System se...

Страница 6: ...mono System Bluetooth System Auxiliary input System System Sleep Off 15 Minutes 30 Minutes 45 Minutes 60 Minutes 90 Minutes Equaliser My EQ Treble Bass Normal Classic Jazz Pop Rock Rede Time Set Time Date Auto check setting Update from Any Update from DAB Update from FM No update Set 12 24 hour Set 12 hour Set 24 hour Set date format DD MM YYYY MM DD YYYY Backlight Power on Niedrig ...

Страница 7: ...4 Power on Low High Standby Low Medium High Language Factory Reset Software Upgrade SW Version ...

Страница 8: ...ration instructions 3 Safety Notes The product is intended for private non commercial use only Protect the product from dirt moisture and overheating and use it in dry rooms only As with all electrical devices this device should be kept out of the reach of children Do not drop the product and do not expose it to any major shocks Do not operate the product outside the power limits given in the spec...

Страница 9: ...aximum throughput rating The electrical socket must always be easily accessible If you will not be using the product for a long period of time disconnect it from mains power Once the product has been connected to mains power initialisation takes place 5 2 General notes on use Notes on use When a selection among menu items is to be made such as Yes or No the one currently selected is marked with In...

Страница 10: ...ion search in DAB operating mode is automatically started when you switch the radio on for the first time English is the default language for the radio s menu structure Set up your desired language as described in 12 3 Language 6 DAB The radio receives all established digital radio frequencies in the range of 174 MHz to 240 MHz band III channel 5A to 13F After pressing mode repeatedly activate ope...

Страница 11: ... single frequency block When sorting by ensemble the stations are displayed according to how they are distributed across the frequency blocks 6 3 Station list You can access the station list in DAB mode at any time via two methods a If a station is already playing simply turn enter navigate The radio will then display the station list b menu Station list 6 4 Edit station list To remove stations th...

Страница 12: ...ot be deleted If all 30 station memory slots are fi lled and you wish to save a new station choose one of the occupied slots The station in this slot will be overwritten with the new station 6 6 DRC Dynamic Range Control Some radio stations in the DAB network support an audio level control that is activated at varying volumes during playback If the audio level suddenly rises during playback DRC au...

Страница 13: ...tion is found 7 3 Manual station search When you make station settings manually you can define the desired frequency yourself and tune into stations that were ignored during automatic station search because their signals were too weak Turn enter navigate left 0 05 MHz right 0 05 MHz until you see the desired frequency Wait a moment until playback of the received station signal begins 7 4 Presets Y...

Страница 14: ...peakers After pressing mode repeatedly activate operating mode AUX mode Connect your mobile terminal device to the audio in the AUX IN socket of the radio using a 3 5 mm TRS stereo cable Start and control audio playback using the controls of the connected terminal device 9 Bluetooth You can pair your terminal device with the radio using Bluetooth and use it as a playback device You can control pla...

Страница 15: ...e sure that your Bluetooth capable terminal device is on and Bluetooth is activated Press pair repeatedly until the terminal device you would like to pair with the radio is shown on the display The devices will be automatically connected If necessary open the Bluetooth setting on your terminal device and select DR1600 Start and control audio playback using the controls of the terminal device Note ...

Страница 16: ...e one off alarm Volume You can set the volume at which the alarm sound should be played This setting makes it irrelevant how loud you last listened to the radio Note It is recommended to allow the radio to update the time automatically This ensures that the time is always correct even if there is a separation of power supply for example a power cut 11 2 Activating deactivating the alarm Select Ala...

Страница 17: ...layback is already started when you modify these settings you can hear the changes in the audio immediately Confirm your settings by pressing enter navigate once more After configuring all the settings press menu on the radio and confirm the settings 12 2 Time Date To access the time settings proceed as follows menu System Time Auto update Update from Any from DAB from FM If automatic time and dat...

Страница 18: ...er all settings made previously such as custom favorites and station lists are permanently deleted 12 5 Software update We are constantly developing new software features and improvements for our radios to fix problems add functionality etc We recommend that you keep your radio s software up to date You can find information on performing an update separately on the enclosed sheet and or you can do...

Страница 19: ...otes 15 Service and Support Please contact Hama Product Consulting if you have any questions about this product Hotline 49 9091 502 115 German English Further support information can be found here www hama com 16 Recycling Information Note on environmental protection After the implementation of the European Directive 2002 96 EU and 2006 66 EU in the national legal system the following applies Elec...

Страница 20: ...eneral terms of delivery and payment are applied 00054826 07 16 Hama GmbH Co KG 86652 Monheim Germany www hama com The Bluetooth word mark and logos are registered trademarks owned by Bluetooth SIG Inc and any use of such marks by Hama GmbH Co KG is under license Other trademarks and trade names are those of their respective owners ...

Отзывы: