Hama Baby-Control BC-300 Скачать руководство пользователя страница 9

18

19

2. And connect them with the units.

3. Supply Power : DC 6V

Note:

• User can also install 3 alkaline AAA batteries instead of the supplied

rechargeable batteries.

• Or directly operated by the supplied adaptors.

Testing Before First Time Usage

Test the Transmitter emission and the Receiver reception.

• Place Transmitter and Receiver in room where you intend to use it.

• Set both Transmitter and Receiver to the same channel (01 or 02) by switching

the OFF/CH1/CH2 channel switch. Selected channel will be shown on the

top right corner of the LCD screen.

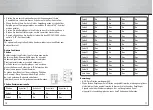
• Set both Transmitter and Receiver to the same pilot tone when using. By

selecting a Dip switch(ON/DIP/1/2/3/4) at the battery compartment for different

pilot tones to ensure privacy. There are 16 combinations of pilot tone for use

selection. (Please refer to the PILOT TONES COMBINATION TABLE)

NOTE:

It is important that with both units the switch settings are the same because if

this is not the case the transmitter and the receiver will not be able to connect to

one another.

Transmitter emission:

1. By using the SENSITIVITY knob you can turn in the sensitivity of the

transmitter individually, according to your wishes.

2. As soon as the transmitter transmits a signal the “Baby calling ” icon will be

flashed on the LCD screen. During the entire transmission the LCD backlight

is activated.

3. If the transmitter hears hardly any noise, it automatically switches to the

energy saving mode. “Baby sleeping” icon shown on the LCD screen and the

LCD backlight will automatically be turned off.

Receiver reception:

1. By turning the volume knob from right side the receiver will be turned on. After

turning it on the LCD display is activated and indicates you that the unit is

ready for operation. The channel being used will be displayed in the top right

of the LCD screen. By turning the volume more you can adjust is as you wish.

2. If the unit receives a signal, the LCD backlight lights up automatically during

the entire transmission and the “Baby calling” icon flashes.

3. A few seconds after the unit receives no more signals, the receiver is

automatically switched to energy saving mode. The “Baby sleeping” icon will

be shown and the LCD backlight will automatically turned off.

Set Up & Use

IMPORTANT!

Test sound reception before use and whenever location of

transmitter is changed. (Refer to Testing Before First Time Usage)

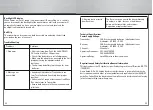
1. Transmitter detects sound levels within a range of 1 to 2 meters (3 to 6.5 feet)

for NORM setting.

2. Place transmitter in the same room with child. Point microphone directly

toward child location, such as crib or playing area.

3. Set both Receiver and Transmitter to the same channel (01 or 02) and pilot

tone.

4. Push transmitter SENSITIVITY switch to a desired position.

5. Adjust different detecting sound level sensitivity by switching the SENSITIVITY

switch.

6. The receiver will go to energy saving mode and “Baby sleeping” icon shown

when it doesn‘t detect sound from the surrounding area.

7. Place receiver where you stay and hear it.

8. Set the receiver to the same channel and pilot tone with the transmitter by

switching OFF/CH1/CH2 switch and Dip switch.

9. Rotate VOLUME knob to adjust volume.

10.Turning off by slide the OFF/CH1/CH2 switch to “OFF” position.

Note:

• Position the Transmitter at least 1 meter away from the baby for transmission.

• Plug the adaptor into the nearest standard household electrical outlet.

Содержание Baby-Control BC-300

Страница 1: ...corresponding companies Errors and omissions excepted and subject to technical changes Our general terms of delivery and payment are applied Hama GmbH Co KG D 86651 Monheim Germany www hama com 000926...

Страница 2: ...teriefach 4 Mikrofon 8 AC DC Stromquellenbuchse 5 Empf nger 1 Antenne 5 G rtelclip 2 Lautst rkeregler 6 Aufh nger 3 Power Kanalschalter AUS CH1 CH2 7 Batteriefach 4 Lautsprecher 8 AC DC Stromquellenbu...

Страница 3: ...das Batteriefach wieder 7 Batterietipps Wenn das Produkt f r l ngere Zeit nicht in Gebrauch ist ziehen Sie die Stecker beider Einheiten Nehmen Sie die leeren Batterien aus den Ger ten da es sonst zum...

Страница 4: ...er das Signal Baby ruft sendet blinkt das Symbol auf dem LCD W hrend der gesamten bertragung leuchtet das Hintergrundlicht Wenn der Sender kaum Ger usche empf ngt schaltet er automatisch in den Engeri...

Страница 5: ...asst den Empf nger sich nur dann einzuschalten wenn Ger usche z B Aufwachen des Babys vom eigenen Sender kommen Es stehen dem Benutzer 16 verschiedene Pilott ne zur Auswahl Diese k nnen mit dem Dip Sc...

Страница 6: ...berpr fen Sie ob die Batterien korrekt eingelegt sind berpr fen Sie ob der Adapter korrekt am Ger t angeschlossen ist falls Sie den Adapter anstelle von Batterien verwenden 13 2 Mitteilung nicht bermi...

Страница 7: ...rgy saving mode Battery icon Baby calling icon constantly changing display readouts Full battery level Low battery level reminds you to change the batteries Empty and ashing batteries change is a must...

Страница 8: ...exhausted batteries from the units otherwise battery leakage and corrosion can damage them Non rechargeable battery is not to be recharged Rechargeable batteries are only to be charged under adult su...

Страница 9: ...right side the receiver will be turned on After turning it on the LCD display is activated and indicates you that the unit is ready for operation The channel being used will be displayed in the top ri...

Страница 10: ...14 Off Off On Off Code 15 Off Off Off On No Code Off Off Off Off Remarks OFF No pilot tone is selected If no pilot tone is selected for Receiver indicates an almighty code is selected In this status...

Страница 11: ...f range or lost connection Move Receiver closer to Transmitter Ensure both units are in the same channel and pilot tone 3 Hearing static or rustle from Receiver The Receiver is too near to the transmi...

Страница 12: ...surveillance pour b b de qualit Veuillez lire toutes les instructions avant d utiliser le syst me de surveillance et conservez les pour de futures r f rences Contenu et caract ristiques Transmetteur...

Страница 13: ...partiment des piles Conseil pour les piles Si vous n utilisez pas le produit pendant un long moment d branchez les deux appareils de la prise domestique Et enlevez les piles ou les piles us es des app...

Страница 14: ...ransmet le signal l ic ne B b appelle clignotera sur l cran LCD Pendant toute la dur e de l mission l clairage LCD est activ Si le transmetteur ne per oit pas de bruit il pass automatiquement en mode...

Страница 15: ...qui marche par exemple sont transmis par son propre transmetteur Il y a 16 signaux sonores pilotes diff rents pouvant tre s lectionn s par l utilisateur avec la position DIP sur le compartiment des pi...

Страница 16: ...position CH ou CH2 V ri ez que les piles sont correctement install es Assurez vous que l adaptateur est bien branch l appareil si vous utilisez l adaptateur plut t que les piles Les piles de l appare...

Страница 17: ...H1 CH2 7 batterijvak 4 microfoon 8 AC DC poort 35 Ontvanger 1 soepele antenne 5 riemclip 2 volumeregelaar 6 haakjes 3 power kanaalschakelaar UIT CH1 CH2 7 batterijvak 4 luidspreker 8 AC DC poort Hoofd...

Страница 18: ...ijvak weer 37 Batterijtips Trek als het product gedurende langere tijd niet gebruikt wordt de stekker van beide units uit het stopcontact Neem de lege batterijen uit de units omdat ze anders kunnen le...

Страница 19: ...uze instellen 39 Zodra de zender het signaal baby roept zendt knippert het symbool op het LCD Tijdens de totale overdracht brandt de achtergrondverlichting Als de zender nauwelijks geluiden registreer...

Страница 20: ...zodat u het kind kunt horen Stel de ontvanger en zender op hetzelfde kanaal in 01 of 02 en kies tevens dezelfde pilottoon Indien de volumeregelaar verder gedraaid wordt kan het volume naar wens ingest...

Страница 21: ...2 keuzeschakelaar de CH1 of CH2 stand Controleer of de batterijen correct geplaatst zijn Controleer of de voedingsadapter goed op het toestel is aangesloten als u gebruikmaakt van de adapter 43 2 Geen...

Страница 22: ...el cargador de bater a Bater as recargables provistas Icono de alarma fuera de alcance Canal CH01 CH02 Icono Beb durmiendo modo de ahorro de energ a Icono de bater a Bater a llena Nivel bajo de carga...

Страница 23: ...los polos positivo y negativo con los que se ilustran en el compartimiento 4 Cierre la puerta del compartimiento Consejos sobre las bater as Si no va a usar el equipo durante un periodo prolongado des...

Страница 24: ...smisor env a una se al el icono Beb llamando parpadear en la pantalla LCD Durante toda la transmisi n se activa la luz de fondo de la pantalla Si el transmisor apenas percibe ruidos cambiar autom tica...

Страница 25: ...aci n Gracias a la codi caci n el receptor se enciende s lo si se transmiten ruidos p ej del beb que camina desde el transmisor Seg n las caracter sticas ambientales puede seleccionar uno de entre 16...

Страница 26: ...est bien conectado a la unidad en caso de usarlo en lugar de las bater as Las bater as pueden tener poca energ a Cambi las por nuevas 2 No se transmiten mensajes El nivel de sensibilidad del sonido d...

Страница 27: ...no 8 Presa di alimentazione 55 Ricevitore 1 Antenna morbida 5 Fermo cintura 2 Volume 6 Gancio di ssaggio 3 Accensione cambio CANALE OFF CH1 CH2 7 Scomparto Batterie 4 Speaker 8 Presa di alimentazione...

Страница 28: ...uso delle batterie Scollegare il prodotto dalle prese quando non viene usato per lungo tempo e rimuovere le batterie per evitare corresioni dovute alla fuoriuscita di liquido Smaltire le batterie in...

Страница 29: ...un segnale l icona Baby calling lampeggia Durante la trasmissione il display resta illuminato 59 In assenza di rumori la Trasmittente automaticamente passa in modalit rispiarmo di energia Il Bimbo dor...

Страница 30: ...ene OFF Nessun tono selezionato Se non viene selezionato nessun tono per il Ricevitore il segnale viene ricevuto non importa quale tono sia impostato nella Trasmittente Allarme assenza di campo e cont...

Страница 31: ...stesso canale e tono pilota 3 Trasmittente e Accendere le unit Assicurarsi che si usino lo stesso canale e tono pilota Batterie scariche sostituire le batterie 63 Alimentazione Trasmittente 3 batterie...

Страница 32: ...k 64 65 AC Baby calling Baby Monitor 1 2 0 8 3 OFF CH1 CH2 4 5 7 6 8 AC DC 1 5 2 6 3 7 OFF CH1 CH2 8 AC DC 4 LCD O CH01 CH02 Baby sleeping...

Страница 33: ...66 67 AC AC Baby Monitor Jack AC Baby Monitor 1 2 3 3 x AAA 4 LCD 1 6V 2 3 9...

Страница 34: ...68 69 1 2 3 9 1 DC 2 3 DC 6V 3 01 02 OFF CH1 CH2 LCD Dip ON DIP 1 2 3 4 16 1 SENSITIVITY 2 Baby calling LCD LCD 3 Baby sleeping LCD 1 LCD LCD 2 LCD Baby calling 3 Baby sleeping LCD 1 1 2 3 6 5...

Страница 35: ...by calling 16 DIP 71 1 2 3 4 Code 1 On On On On Code 2 On On On O Code 3 On On O On Code 4 On On O O Code 5 On O On On Code 6 On O On O Code 7 On O O On Code 8 On O O O Code 9 O On On On Code 10 O On...

Страница 36: ...72 OFF LCD Baby calling 73 1 OFF CH1 CH2 CH1 CH2 2 3 AC 230V DC 6V...

Страница 37: ...74 3 AC 230V DC 6V 2 CH1 864 875MHZ CH2 864925 MHZ 800 CE R TTE 1999 5 E Hama GmbH Co KG 1999 5 E http www hama com 75...

Отзывы: