background image

● 

The


oven


should


be


cleaned


after


every


time


use

.

● 

Cool


the


oven


completely


before


cleaning

.

 
● 

Never


clean


the


appliance


with


pressurized


hot


steam


cleaned

.

● 

The


oven


chamber


should


only


be


washed


with


warm


water


and


a


small


amount


of


washing

-

up


liquid

.

-

Close


the


oven


door

.

-

Set


the


temperature


knob


to


50

,

and


the


function


knob


to


the


bottom

heater


position

.

-

Heat


the


oven


chamber


for


approximately


30


minutes

.

-

Open


the


oven


door

,

wipe


the

chamber


inside


with


a


cloth


or


sponge

and


wash


using


warm


water


with

washing

-

up


liquid

.

●  

After


cleaning


the


oven


chamber


wipe


it


dry

.

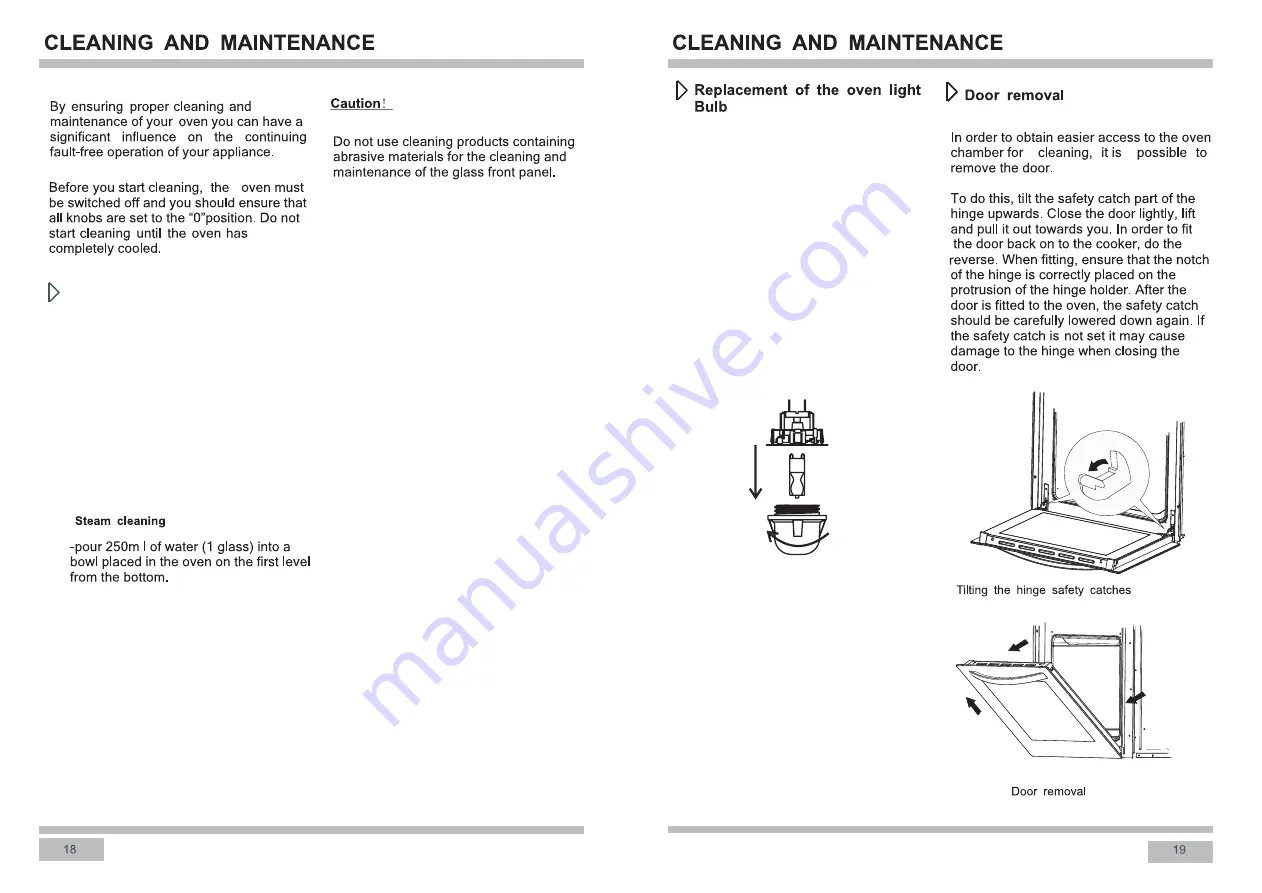
Oven cleaning

Before any maintenance is started
involving electrical parts, the
appliance must be disconnected
from the power supply.


If the oven has been in use, let the 
oven cavity and the heating elements 
cool down before attempting any

maintenance.

Changing the bulb 


Unscrew the protective cover.  We 

   recommend that you wash and dry the 
   glass cover at this point.

   Carefully remove the old bulb and 

   insert the new bulb suitable for high 

   temperatures (300

º

C) having the 

   following specifications: 220-240V, 
   50Hz, 25W, G9 fitting.

   Refit the protective cover.

IMPORTANT
Never use screwdrivers or other

utensils to remove the light cover.
This could damage the enamel of the 
oven or the lampholder. Remove only
by hand.

IMPORTANT

Never replace the bulb with bare 
hands as contamination from your 
fingers can cause premature failure. 
Always use a clean cloth or gloves.

Please note:


The bulb replacement is not covered 

   by your guarantee

l


l

l

Содержание HWO60S11TPX1

Страница 1: ...HWO60S11TPX1 Cod 0040304193 User Manual Built in Electric Oven ...

Страница 2: ...18 20 21 27 Recipes 28 ...

Страница 3: ... information concerning this By recycling materials or other parts from used devices you are making a significant contribution to the protection of our environment Information on appropriate disposal centers for used devices can be provided by your local authority The appliance and its accessible parts become hot during use Care should be taken to avoid touching heating elements Children less than...

Страница 4: ...4 Oven door 2 Display 1 Oven operation buttons 3 Oven door handle 4 3 ...

Страница 5: ...ve the ambient temperature Make an opening with the dimensions given in the diagram for the oven to be fitted The appliance must be earthed Insert the oven completely into the opening without allowing the four screws in the places shown in the diagram to fall out Before attempting the connection check whether the voltage indicated on the rating plate corresponds to the actual mains voltage Mains l...

Страница 6: ...ure selector at the same time can turn on off the oven Above is the control panel diagram actual function please refer to product Select or set a function must press button Also will show the heating status total 5 sections each present 20 of the setting temperature After oven stop working temperature display show the residue heat information 5 sections each stand for 20 of setting temperature do ...

Страница 7: ...dren away Set time before use The temperature scope is 50 250 defrost is 20 60 Long press and can speed up temperature setting The clock can be set when the ON OFF button in OFF position Automatic shut off feature Each mode has a maximum working time auto shut off function noted in the Working Hours Temperature 20 120 C 121 200 C 201 250 C 24 h 6 h 4 h When select oven cook time its prior to the a...

Страница 8: ... icon both flashing Touch button or the alarm signal will go off or it will be turned off automatically after period of time 6 If you want to cancel the cooking time you can set the cooking time to 0 00 Automatic operation Touch button to set end time only after set cook time Set end time when the ON OFF button is on oven is working and cook time already set 1 Touch button for 3 times the end of c...

Страница 9: ...tic function select Pyrolytic on the Function Selector Display then touch the Boost Pyrolytic key for 5 seconds to confirm the selection This oven can clean itself by a process known as pyrolysis heating the cavity to a temperature of approximately 430 C This will burn off the residue from spattering and spillages caused by cooking Pyrolytic programmes should be used when the oven smokes during pr...

Страница 10: ...appliance must be disconnected from the power supply If the oven has been in use let the oven cavity and the heating elements cool down before attempting any maintenance Changing the bulb Unscrew the protective cover We recommend that you wash and dry the glass cover at this point Carefully remove the old bulb and insert the new bulb suitable for high temperatures 300ºC having the following specif...

Страница 11: ...ntre Some minor faults can be fixed by referring to the instructions given in the table below Before calling the customer support centre or the service centre check the following points that are presented in the table 0 00 ...

Страница 12: ......

Страница 13: ......

Страница 14: ...400 400 5 5 240 240 240 240 9 9 13 13 1 chicken halved 1 chicken halved 1400 1400 3 3 220 220 230 230 240 240 250 250 28 28 33 1 side 33 1 side 23 23 28 2 side 28 2 side Fish Fish Salmon fillets Salmon fillets 400 400 4 4 240 240 240 240 19 19 22 22 Fish in aluminium foil Fish in aluminium foil 500 500 4 4 230 230 230 230 10 10 13 13 Toast Toast 4 slices of white bread 4 slices of white bread 200 ...

Отзывы: