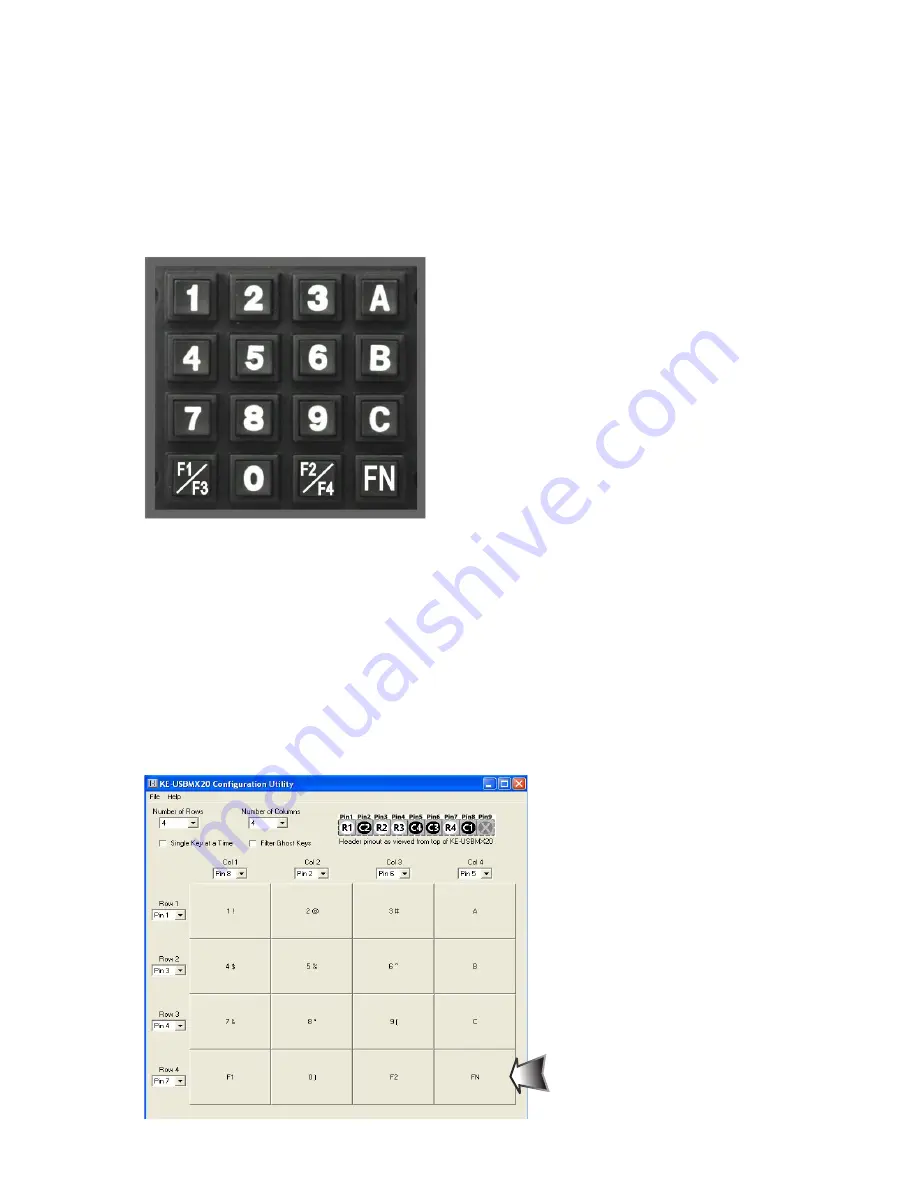
Sample KE-USBMX20 Configuration
9
16
The following exercise demonstrates how to program the KE-
USBMX20 to scan a keypad. The keypad used in the example is
a 4 Column by 4 Row matrix (16 key) device.
This example uses the
keypad shown above.
The back of the keypad has eight pins. This
header plugs directly into the KE-USBMX20
connector. In this example, we align pin 1 of the
keypad header with pin 1 of the KE-USBMX20.
The included keying plug can be placed in to
pin 9 on the KE-USBMX20 to help with proper
header alignment.
The keypad matrix layout is shown in the figure above. Note
that the Row and Column signals are intermixed on the keypad.
The KE-USBMX20 can be configured to scan the keypad with it
plugged directly into the header with no added wiring.
KE-USBMX20 Configuration with FN key
The KE-USBMX20 allows assignment of a key as a “Function”
key. This key produces no keystroke itself, but when held down,
it alters the keystroke sent by the rest of the matrix. This feature
is useful when the keypad has dual legends or needs to respond
with different case letters.
This example uses the keypad
shown on the left. The keys “A”,”B”,
and “C” will be programmed to
send lower case characters when
the FN key is not held. If the FN is
held, upper case characters will be
sent for the “A”, “B”, and “C” keys.
Numeric Keys “0”-”9” will send the
same character regardless of FN.
The key “F1/F3” will send the F1 keystroke when FN is not
held, and send the F3 keystroke if FN is held when the key is
pressed. The key “F2/F4” will send the F2 keystroke when FN is
not held, and send the F4 keystroke if FN is held when the key
is pressed.
Using the same techniques in the previous example, set up the
rows and columns as before. Assign the matrix with the keys
assigned as shown below.
Note the use of the
“FN” key for this matrix
position.
The “FN” key produces
no keystroke of it’s
own, but will select and
alternate matrix table
if held when pressing
other keys.


