Haglof DP II Скачать руководство пользователя страница 22

User Manual

Version: 1.2

DP II

Revised: 2015-03-16 15:47

18

  |  © Haglöf Sweden AB 2013/Rev. 201503

Digitech® Tape

The Digitech® Tape is an electronic measuring tape for lengths 

up to 7.5m/yds. The Digitech Tape is assembled on the compu-

ter terminal. Measured lengths are automatically transferred to 

the computer terminal, which registers and stores the infor-

mation with the press of a button. The Digitech Tape has no 

battery or display. It is supported by the computer terminal and 

uses its display for result feature. The resolution is approximately 

1mm with the accuracy of 1cm/10m. The Digitech Tape should 

not be permanently assembled on the terminal but removed 

after the measuring work is performed.
More recent models of the Digitech Tape will fit both the 

Digitech Professional and the DP II computer calipers, with 

a special adjusted serial port where the tape is mounted. If you 

have an older version of the Digitech Tape, this will not fit the 

DP II caliper! 

Assembling the Digitech Tape

1. 

Put the caliper jaws to 0 cm.

2. 

Assemble the Digitech Tape by lowering the down part of 

the serial port into the port of the Digitech Tape.

3. 

Push the Digitech Tape forward for a firm lock.

Removing the Digitech Tape

1. 

Put the caliper jaws to 0 cm.

2. 

Press down the lock of the Digitech Tape and push the 

tape in opposite direction until finish.

3. 

Fold out the tape from the port.

DP232

The DP II SmartScale can communicate with external hand-

held computers through the accessory DP232. Data from the 

DP II SmartScale is sent serially via the accessory DP232 to 

the handheld, and it is synchronized with a SmartScale and a 

DP Radio enter button.

DP Keyboard

The Digitech Keyboard contains a multitap keyboard for 

quicker registration of extensive field data. Numbers and 

signs A-Z, including ÅÄÖÜ
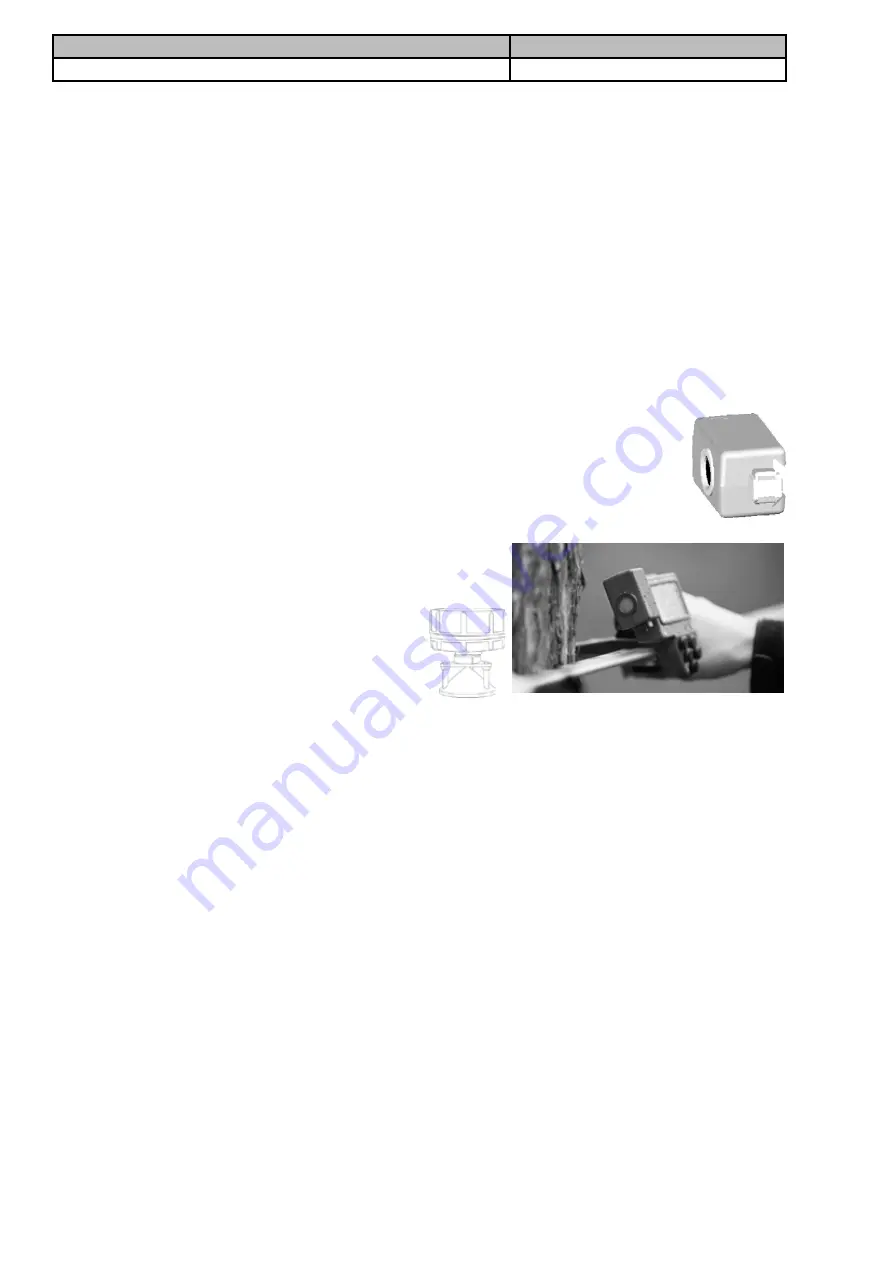
DP DME

The DP DME accessory to the DP II caliper can quickly 

and accurately deliver information on distance from the 

plot centre. Together with data from the caliper on the tree 

diameter, the answer is given if the tree is 

within or outside of the plot borders. The 

DP DME uses ultrasound technology 

to determine distances and works with a 

Transponder T3, often placed on a plot 

staff in the plot centre.

Accessories


USB for serial adapter


Serial adapter


DP II wrist band and holder for the DP II terminal


DP Radio, remote Radio Enter button


Calibration guide 50 cm


Carrying holster


Measuring tape, mechanical 15 m


Factor gauge


Marktax marking system


Display protection


GPS (Bluetooth)


Barcode scanner


Printer


More accessories are available, ask your distributor for 

details. 

Accessories, some examples

Содержание DP II

Страница 1: ... Haglöf Sweden AB 2013 Rev 201503 DP II User Manual English ...

Страница 2: ... with versatility and focus on user adaptation and ruggedness Haglöf Sweden works for constant and continual improvement Our goal is to make your measurement work more effi cient while producing more accurate results Adaptability compatibility and flexibility are some of the means to reach this goal A large software library with hundreds of software solutions enables completely new users a quick s...

Страница 3: ...al on theWrist Holder 7 Removing the ComputerTerminal from theWrist Holder 7 DP Radio Button 8 Changing the Battery 8 Synchronizing the DP Radio Enter Button 8 Turn off on the DP Radio Function 8 Synchronization with the SmartScale 9 Display 9 Battery Indicator 9 Charging the ComputerTerminal 9 How to Charge 9 PC Communication 10 Connection to PC 10 BLUETOOTH 10 Example Send File to the ComputerTe...

Страница 4: ...14 Charger info 14 Flashdisc c 14 Blue terminal 14 SmartScale 14 Unique jaw design 14 Robust Design 14 Rechargeable Batteries Environmental Concern 15 Charging the SmartScale 15 Foldable Jaws 15 How to adjust jaws angle 15 Handle lock 16 Adjusting the Handle 16 Calibration 16 Angle Measuring 16 Calibrating the inclinometer 17 Calibrate the zero angle 0 17 Controlling the SmartScale 17 Maintenance ...

Страница 5: ...uilt in rechargeable Li ion batteries for environmental concern SmartScale measuring system with wireless radio communication Flexible use and optional placing of computer terminal Built in USB communication for quick and safe data transmission Serial RS232 communication Built in Bluetooth Updated technology secure data storage SD card and great memory capacity 1GB Proven precise and energy conser...

Страница 6: ...03 16 15 47 2 Haglöf Sweden AB 2013 Rev 201503 DP II 1 DP II SmartScale 2 DP II computer terminal 3 Quick release attachment for the computer terminal 4 Adjustment screws for the handle 5 Loudspeaker 6 USB interface and contact for battery charge 7 Enter button ...

Страница 7: ...Manual Revised 2015 03 16 15 47 DP II Haglöf Sweden AB 2013 Rev 201503 3 DP II ComputerTerminal 1 LCD Display 2 IR receiver 3 Enter button 4 Arrow buttons 4ea 5 Serial Port 6 Loudspeaker 7 USB interface and contact for battery charge ...

Страница 8: ...Scale 1 Foldable jaws 2 Lock for the foldable jaws 3 Assembly point for quick release attachment for the computer terminal 4 Enter button 5 LED Indicator 6 Scale 7 Movable handle 8 Handle lock 9 Contact position for battery charger 10 Quick release attachment for the computer terminal 11 Adjustments screws for the handle ...

Страница 9: ...special ordered excluding the serial port The unit weight and size will be less without the serial port 2 System Description Detachable ComputerTerminal The DP II Computer Terminal can be detached from the movable handle and the SmartScale This is practical for example when transferring data to your office PC When performing tree inventory in dense tree stands with thick and low branches it can be...

Страница 10: ...es where the caliper SmartS cale is used as a stand alone unit See below for more details The arrow buttons 3 are used to navigate in the program and to enter data By pressing two buttons at the same time different functions can be activated such as turn on backlit display shut off computer terminal and more No Icone Key s Function 1 Left Step left 2 Right Step right 3 Up Step up 4 Down Step Down ...

Страница 11: ...nal and lock it by folding the clamp down 4 3 Operating Procedure How to Disassemble the ComputerTerminal 1 Lift the clamp to the upright position 2 Lift the computer terminal straight up and pull the lower part of the terminal outward Assembling the ComputerTerminal on the Wrist Holder The computer terminal can be used as a stand alone hand held computer and attached onto the DP II Wrist holder a...

Страница 12: ...lways dispose of old batteries in special battery containers Synchronizing the DP Radio Enter Button The DP Radio is synchronized with the computer terminal When assembling a new DP Radio Button the synchroni zation needs to be made as follows 1 Disassemble the DP Radio Button and battery accor ding to point 1 and 2 above 2 Press 5 6 times on the DP Radio Button to drain it completely 3 Assemble t...

Страница 13: ...ocess In normal cases the terminal software will automatically go to USB mode The image shows the display when the terminal is in USB mode Synchronization with the SmartScale The computer terminal needs to be synchronized with the SmartScale measuring scale to connect the radio units Functions for connection are available in the system menu Note that the synchronization is made on an open chan nel...

Страница 14: ...ith Bluetooth technology you can work with wireless communication to the Internet or to other electronic in struments with Bluetooth Energy consumption is compa rably low Bluetooth is built in the computer terminal for communication to external devices such as GPS scanners and printers The DP II terminal supports Master and Slave mode Master Master mode is most common to use and set under menu SET...

Страница 15: ...e is inherited by the next program when upgrading and uses the same product code Delete older program versions after a new version has been started to reuse licenses Transfer programs to the DP II 1 Reset the DP II by giving a short press on all five 5 buttons on the terminal at the same time The DP II resets 2 Put the USB cable Mini B in the DP II USB adapter 3 Put the other end Type A in the PC ...

Страница 16: ...settings START Start the last used application and press ENTER to execute the application A license number should normally be stated before starting to use an application You can run an applica tion for five 5 days as trial before stating a license number This number can be purchased from your DP II distributor and stated in the following menu SELECT PROGRAM SELECT PROGRAM Use the SELECT PROGRAM m...

Страница 17: ... Flash disc such as available space on the internal flash disc is displayed Receive file Use Kermit to send files from PC or other caliper to the computer terminal FORMAT C The flash disc can be zero set by formatting it All stored data and programs are deleted Settings There are different settings that need to be considered in the system menu depending on software used in the DP II Serial port Bl...

Страница 18: ...can be performed thanks to the extra robust design and a strong well balanced and light weight aluminum chassis DP II SmartScale excl plastic details Test Menu Most menus under TEST MENU are used for service and error detection and not by DP II users Scale Test for scale calibration and radio contact between the SmartScale and the computer terminal DigitechTape Control and calibration of the Digit...

Страница 19: ...according to the image The charging time is approxi mately 3 hours A LED indicator lights up when charging the Smart Scale When the LED light blinks it is time to charge the battery The indicator goes out when the battery is fully charged The computer terminal will warn when measuring if the DP II SmartScale has low battery capacity Foldable Jaws The measuring scale has foldable jaws that can be l...

Страница 20: ...asure angles and to calculate heights The Gator Eyes laser pointers accessories are recommended to use as aim The Gator Eyes are factory assembled on the caliper jaws specify on order and consist from two pow erful green laser pointers visible at long range and used to measure diameters from a distance and or as aiming guides when measuring angles and heights Remember that the use of laser pointer...

Страница 21: ...r chin Press Enter to store this 0 angle 3 Control measure this 0 angle ControllingtheSmartScale Controls of the SmartScale is made in the application used or in the menu SETTINGS TESTS and Scale A calibration guide is used to control the measuring scale art no 16 102 1007 If you cannot access a calibration guide use the scale print Control that the displayed diameter value is consistent with the ...

Страница 22: ...gitechTape 1 Put the caliper jaws to 0 cm 2 Press down the lock of the DigitechTape and push the tape in opposite direction until finish 3 Fold out the tape from the port DP232 The DP II SmartScale can communicate with external hand held computers through the accessory DP232 Data from the DP II SmartScale is sent serially via the accessory DP232 to the handheld and it is synchronized with a SmartS...

Страница 23: ...USB 2 0 MSD Mass storage device Bluetooth SPP OPP External serial port via adapter USB CDC via adapter Built in IR Vertex receiver Temperature 20C 60C 4F 140F Clock Clock with calendar and time Batteries Rechargeable Li ion battery Charging through USB interface Energy consumption one week per charge depending on software application Angle accuracy 0 4 degrees Angle resolution 0 1 degrees Weight 1...

Страница 24: ...d including interference that may cause undesired operation Packet Contents Depending on selected configuration the DP II packet will include different items as stated below Length of the SmartScale is always stated at order 50cm 60cm 65cm 80cm 95cm 100cm 102cm 18 24 30 36 Configuration Opt A Opt B Opt C Opt D Opt E SmartScale with mechanical enter button X X SmartScale with DP Remote Radio Enter ...

Страница 25: ...Version 1 2 User Manual Revised 2015 03 16 15 47 DP II Haglöf Sweden AB 2013 Rev 201503 21 ...

Страница 26: ...acturer to detect prior to assembling and shipping of the product may occur Haglöf Sweden AB can in no case be responsible for problems of this nature and has no liability for any loss of business profits savings consequential damages or other damages resulting from use of the products described Signs of misuse cosmetic damage accidents or equal automatically withdraw the warranty The warranty is ...

Страница 27: ...Version 1 2 User Manual Revised 2015 03 16 15 47 DP II Haglöf Sweden AB 2013 Rev 201503 23 ...

Страница 28: ... Haglöf Sweden AB 2013 Rev 201503 Haglöf Sweden AB Klockargatan 8 SE 882 30 Långsele Ph 46 620 255 80 Fax 46 620 205 81 www haglofsweden com ...

Отзывы: