4600 Series Narrow Stile Trim
Installation Instructions
I-ED01164
Rev 3, Rev Date: 8/4/2017
27390048
Page 3 of 5
Hager Companies 139 Victor Street, St. Louis, MO 63104 (800) 325-9995 www.hagerco.com
1.
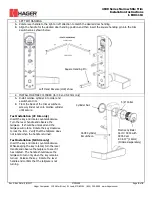
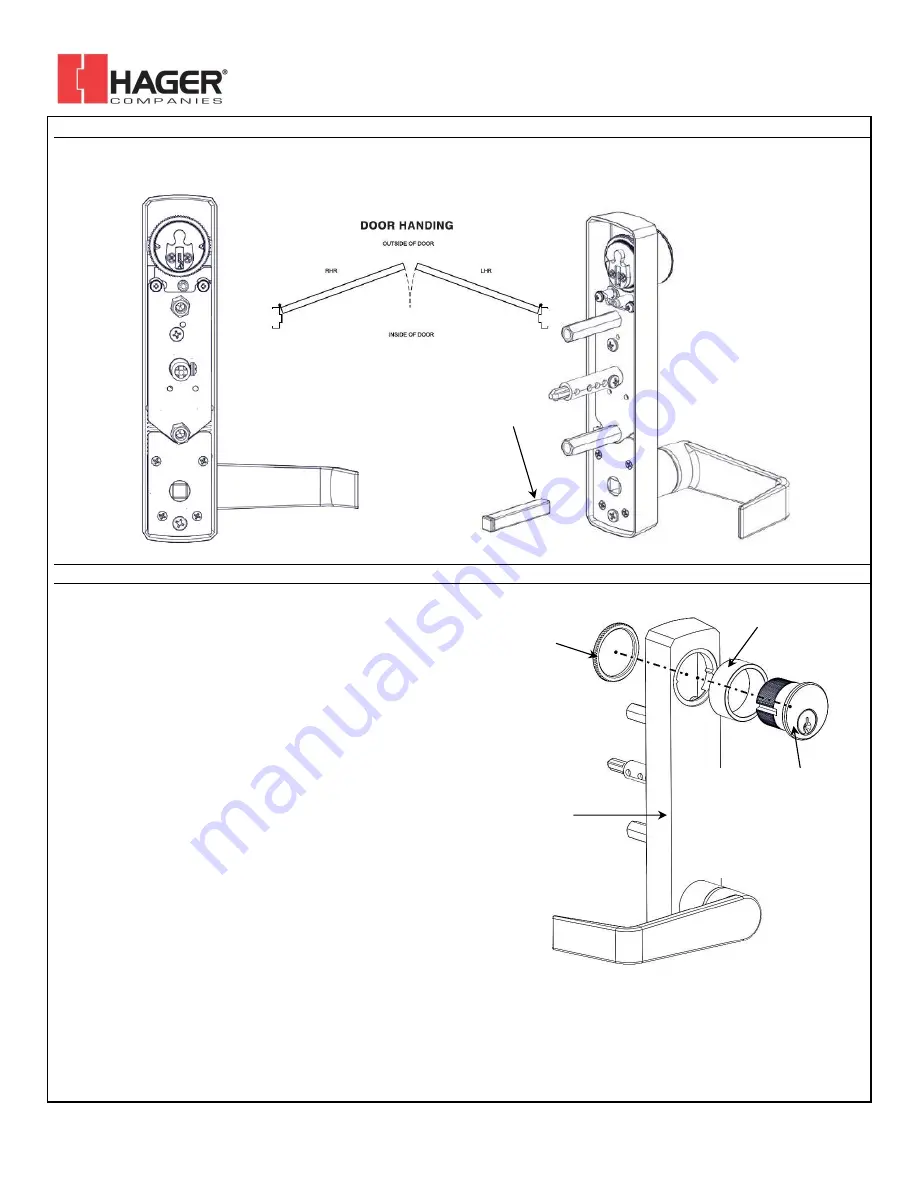
SET TRIM HANDING
A.
Rotate lever handle to the right or left direction to match the desired door handing.
B.
Align the handle for the desired door handing position and then insert the square handing pin into the trim
escutcheon as shown below.
2.
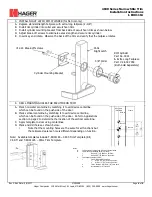
INSTALL MORTISE CYLINDER (for CE and NK trim only)
A.
Install mortise cylinder into collar and
escutcheon trim.
B.
From the back of the trim escutcheon
screw cylinder nut onto mortise cylinder
until secure.
Test Installation (CE trim only)
Insert the key and rotate counterclockwise.
Turn the lever handle and observe the
tailpiece. It should be unlocked and the
tailpiece will rotate. Rotate the key clockwise
to lock the trim. Verify that the tailpiece does
not rotate when the handle is turned.
Test Installation (NK trim only)
Insert the key and rotate counterclockwise.
While keeping the key rotated, turn the lever
Handle and observe the tailpiece to see if it
has rotated. The handle should cause the
tailpiece to turn only when the key remains
turned. Release the key. Rotate the lever
handle and confirm that the tailpiece is not
turning.
Left Hand Reverse (LHR) show
Square Handing Pin
Cylinder Nut
5/8” Collar
46CE Cylinder
Escutcheon
Mortise Cylinder
Part # 3902 with
3976 Cam
R 0.637” (16mm)
(Ordered separately)


