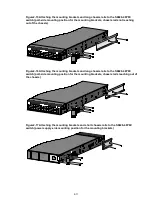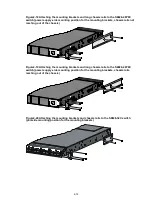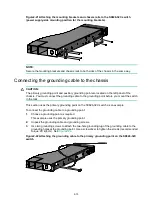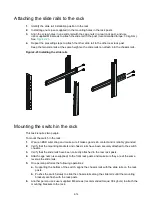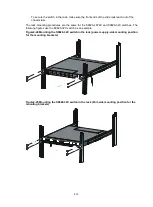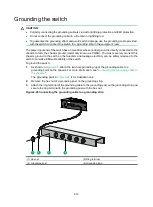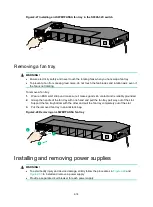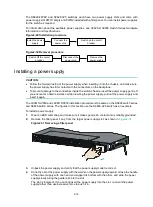
2-5
Installing the switch in a 19-inch rack
Rack-mounting procedures at a glance
Figure2-2 Rack-mounting procedure
NOTE:
If a rack shelf is available, you can put the switch on the rack shelf, slide the switch to an appropriate
location, and attach the switch to the rack with the mounting brackets.
Follow these guidelines when you install the switch in a 19-inch rack:
•
The distance between the front and rear posts of the rack must meet the requirements
described in
•
To secure the switch to the rack, you must install not only mounting brackets, but also chassis
rails and slide rails.
Rack-mounting requirements
Figure2-3 S6826-48Y8C chassis dimensions (mounting brackets installed at the port side)
(1) Power supply handle
(2) Mounting bracket
Figure2-4 S6826-48Y8C chassis dimensions (mounting brackets installed at the power
supply side)
(1) Power supply handle
(2) Mounting bracket
Attach the
mounting
brackets to
both sides of
the switch
Attach chassis rails to
both sides of the switch
Connect the grounding
cable to a grounding
point
Select the mounting
position (power supply side
or port side) for the
mounting brackets
Install the
switch in the
rack
Attach slide
rails to the
rack
43.6 mm
(1.72 in)
460 mm
(18.11 in)
26 mm
(1.02 in)
1
2
43.6 mm
(1.72 in)
460 mm
(18.11 in)
26 mm
(1.02 in)
1
2


