


101
1.
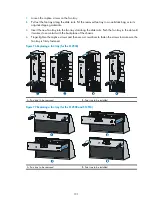
Loosen the captive screws on the fan tray.
2.
Pull out the fan tray along the slide rails. Put the removed fan tray in an antistatic bag or in its
original shipping materials.
3.
Insert the new fan tray into the fan tray slot along the slide rails. Push the fan tray in the slot until
it makes close contact with the backplane of the chassis.
4.
Finger-tighten the captive screws and then use a screwdriver to fasten the screws to make sure the
fan tray is firmly fastened.
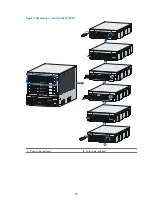
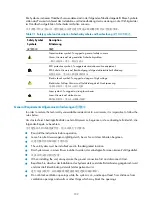
Figure 76
Replacing a fan tray (for the S12504)
A: Fan tray to be removed
B: Fan tray to be installed
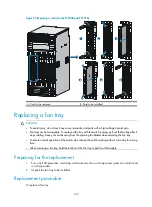
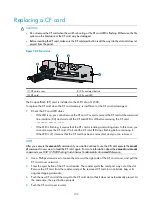
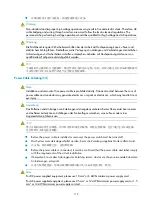
Figure 77
Replacing a fan tray (for the S12508 and S12518)
A: Fan tray to be removed
B: Fan tray to be installed
Содержание S12500 Series
Страница 40: ...30 Figure 28 Installing an upper expansion cable management bracket 1 2 3 4 5 6 7...
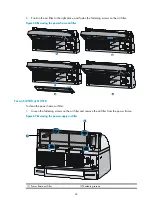
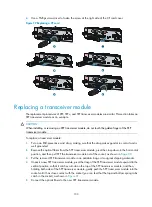
Страница 109: ...99 Figure 74 Replacing a card for the S12504 A Card to be removed B Card to be installed...
Страница 149: ...139 Figure 85 Loopback operation on an optical transceiver...
Страница 164: ...154 Figure 100 Example of a device label...
Страница 167: ...157 Figure 104 Network cable management...


