background image

802.1x 
H3C Low-End Ethernet Switches Configuration Examples 

Chapter 3  Enterprise Network Access 

Authentication Configuration Example


3-16 


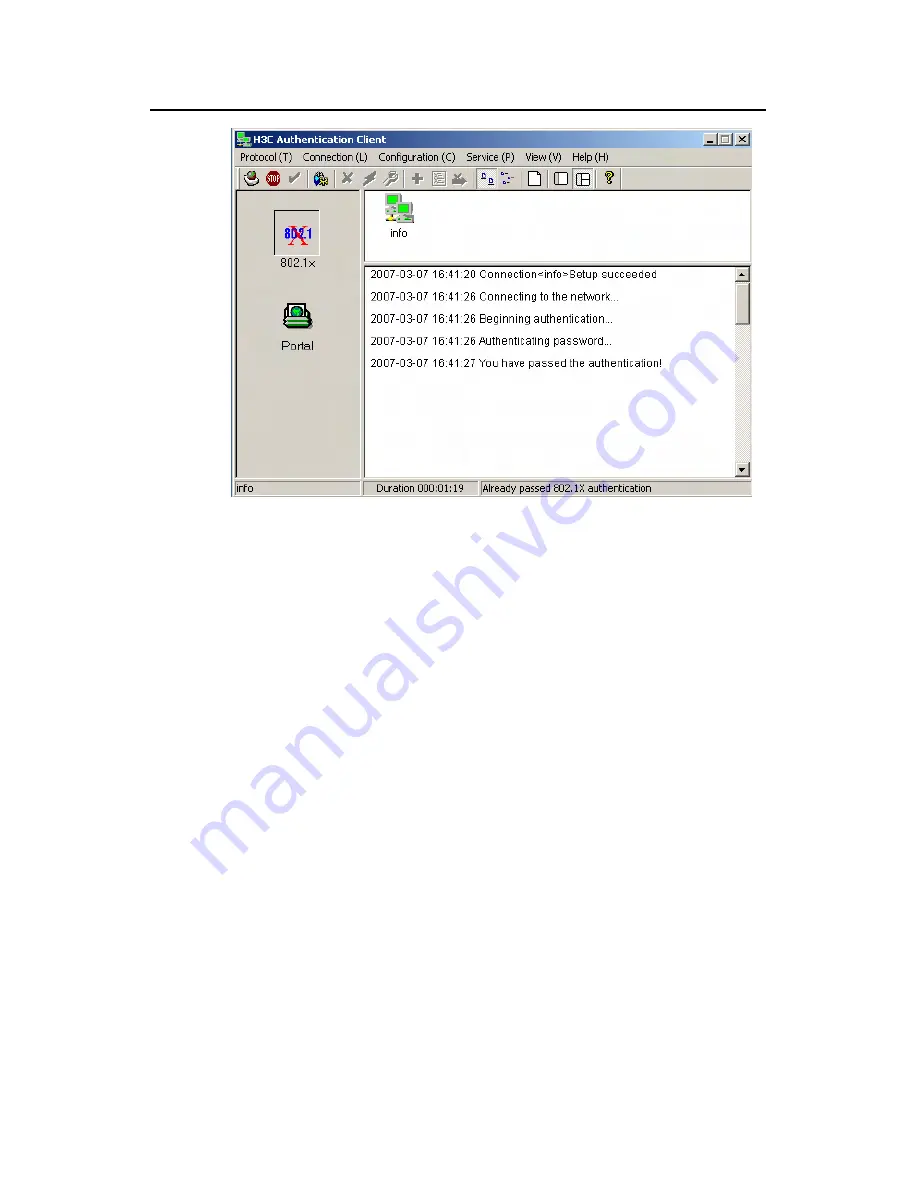
Figure 3-21 

Page prompting that the Authentication succeeds 

3.3.4  Verifying Configuration 

To verify that the configuration of Guest VLAN is taking effect, check that users can 

access VLAN 10 before 802.1x authentication or the 802.1x authentication fails.  

To verify that the dynamically assigned VLAN is taking effect, check that users can 

access VLAN 100 after 802.1x authentication succeeds. At the same time, 802.1x 

authentication cooperates with CAMS to complete accounting and real time monitoring.  

To verify that the configuration of IP-to-MAC binding is taking effect, check that users 

can be re-authenticated and access the Internet when the device reboots abnormally. If 

the configured IP-to-MAC binding is different from that on the CAMS, the user cannot 

access the Internet. 

3.3.5  Troubleshooting 

I. Symptom: 802.1x authentication failed 

Solution: 

z


Use the 

display dot1x

 command to verify 802.1x is enabled globally and on the 

specified ports.  

z


Verify the username and password are set correctly.  

z


Verify the connection works well.  

z


Use the 

debugging dot1x packet

 command to verify the switch receives and 

sends EAP and EAPoL packets normally.  

Содержание LS-5100-16P-SI-OVS-H3

Страница 1: ...g the DHCP Relay Agent 1 8 1 2 3 Configuring DHCP Snooping 1 9 Chapter 2 Configuration Examples 2 1 2 1 DHCP Server Configuration Example 2 1 2 1 1 Network Requirements 2 1 2 1 2 Network Diagram 2 2 2...

Страница 2: ...document describes DHCP configuration and application on Ethernet switches in specific networking environments Based on the different roles played by the devices in the network the functions and appl...

Страница 3: ...ng on the models the H3C low end switches can support part or all of the following DHCP functions DHCP server z DHCP server using global address pool interface address pool z IP address lease configur...

Страница 4: ...perating principles and applications of the functions 1 2 1 Configuring the DHCP Server The DHCP server can be configured to assign IP addresses from a global or interface address pool These two confi...

Страница 5: ...for DHCP clients domain name domain name Required By default no domain name is configured for DHCP clients Configure DNS server addresses for DHCP clients dns list ip address 1 8 Required By default...

Страница 6: ...ient ID is bound to an IP address statically Note z To configure a static binding you need to specify the IP address and the MAC address or client ID z A static address pool can be configured with onl...

Страница 7: ...t Option 82 dhcp server relay information enable Optional By default the DHCP server supports Option 82 2 Use the following commands to configure IP address allocation through the interface address po...

Страница 8: ...Return to system view quit Specify the IP addresses to be excluded from automatic allocation dhcp server forbidden ip low ip address high ip address Optional By default all the IP addresses in an inte...

Страница 9: ...s On multiple interfaces dhcp server netbios type b node h node m node p node interface interface type interface number to interface type interface number all Optional By default no NetBIOS node type...

Страница 10: ...the DHCP server supports Option 82 1 2 2 Configuring the DHCP Relay Agent Use the following commands to configure the DHCP relay agent Table 1 4 Configure DHCP relay agent Operation Command Descripti...

Страница 11: ...gy for the DHCP relay agent to handle request packets containing Option 82 dhcp relay information strategy drop keep replace Optional By default the strategy is replace Enter VLAN interface view inter...

Страница 12: ...figuration Examples Chapter 1 DHCP Functions Overview 1 10 Operation Command Description Specify the port connected to the DHCP server as a trusted port dhcp snooping trust Optional By default all the...

Страница 13: ...t with a lease period of two days and exclude the IP addresses of the DNS server WINS server and mail server from allocation z Assign IP addresses to the DNS server WINS server and the mail server in...

Страница 14: ...re version Release 1510 are used in this example II Configuring DHCP server z Configure address allocation for the devices in the HQ Configure the IP address of VLAN interface10 on the DHCP server in...

Страница 15: ...den ip 10 214 10 3 10 214 10 5 z Configure address allocation for the devices in the Branch Create a global address pool named br for the Branch and specify the range and lease period of the IP addres...

Страница 16: ...n the HQ and serves as the DHCP server to assign IP addresses to the workstations in the Office branch The branches are connected to an IRF intelligent resilient framework Fabric that serves as the ce...

Страница 17: ...HCP Option 82 so that the DHCP relay agent keeps the original filed unchanged upon receiving DHCP messages carrying Option 82 z Enable the DHCP server to support DHCP Option 82 so that it assigns the...

Страница 18: ...nect four devices to form a Fabric for centralized management of the devices in the Fabric For details see related sections in the operation manuals for the S3600 series II Configuring the DHCP relay...

Страница 19: ...witchA Vlan interface25 address check enable SwitchA Vlan interface25 quit Configure the address entry update interval on the DHCP relay agent SwitchA dhcp relay hand enable SwitchA dhcp security trac...

Страница 20: ...ge lease period and the gateway address LAB system view LAB dhcp enable LAB dhcp server ip pool lab2 LAB dhcp lab2 network 192 168 19 0 255 255 255 0 LAB dhcp lab2 expired day 2 LAB dhcp lab2 gateway...

Страница 21: ...Network diagram for DHCP snooping configuration Enable DHCP snooping and enable Option 82 support for DHCP snooping Snooping system view Snooping dhcp snooping Snooping dhcp snooping information enab...

Страница 22: ...re 02080006 is a fixed value and 000fe234bc66 is the MAC address of the DHCP snooping device In this example IP addresses are assigned based on port number only Therefore on the DHCP server only a mat...

Страница 23: ...dhcp pool dns server 192 168 100 2 Switch dhcp pool netbios name server 192 168 100 3 After the above mentioned configuration the DHCP server can automatically assign an IP address the gateway address...

Страница 24: ...tion Examples Chapter 3 Related Documents 3 1 Chapter 3 Related Documents 3 1 Protocols and Standards z RFC2131 Dynamic Host Configuration Protocol z RFC2132 DHCP Options and BOOTP Vendor Extensions z...

Страница 25: ...ueue Scheduling Algorithm plus Congestion Avoidance plus Packet Priority Trust 2 4 2 3 1 Network Requirements 2 4 2 3 2 Network Diagram 2 4 2 3 3 Configuration Procedure 2 4 2 4 Configuration Example...

Страница 26: ...ions on Ethernet switches in actual networking environments To satisfy different user needs the document covers various functions and applications like time based ACLs traffic policing priority re mar...

Страница 27: ...odel Function S3600 EI S3600 SI S5600 S5100 EI S5100 SI S3100 SI Basic ACL z z z z z z Advanced ACL z z z z z z Layer 2 ACL z z z z User defined ACL z z z Software bas ed ACL referenced by upper layer...

Страница 28: ...SI S5600 S5100 EI S5100 SI S3100 SI Local traffic mirroring z z z z Traffic measurement z z z z WEB Cache redirection z Note z means that the function is supported means that the function is not supp...

Страница 29: ...port match order Define an ACL rule rule rule id permit deny rule string The parameters criteria available for rule string vary with ACL types For details refer to the corresponding command manual Con...

Страница 30: ...4 to N 1 64 N is a natural number the switch takes the value N 1 64 Reference an ACL for traffic identification and re assign a priority to the matching packets traffic priority inbound outbound acl r...

Страница 31: ...current port only z In the globally defined WRR or WFQ queue scheduling algorithm you can modify the weight or bandwidth in port view if the weight or bandwidth of each queue cannot satisfy the needs...

Страница 32: ...rk topology Figure 2 1 shows the network topology of a company The environment is as follows z An S3600 switch serves as the central switch of the company The software version is Release 1510 z The de...

Страница 33: ...lowed maximum rate is 20 Mbps The DSCP priority of such packets at rates higher than 20 Mbps is modified as EF z For the packets with the CoS priority of 5 that are sent by PC 2 the allowed maximum ra...

Страница 34: ...riods H3C acl number 4010 H3C acl ethernetframe 4010 rule 0 permit cos 5 source 0012 0990 2241 ffff ffff ffff time range a002 H3C acl ethernetframe 4010 quit Apply rule 0 of ACL 3010 to the port Gigab...

Страница 35: ...z Configure the port GigabitEthernet1 1 2 to use the WRR queue priority algorithm and configure the weight of outbound queues as 1 1 1 5 1 10 1 15 z Configure the queue with an index of 4 on the port...

Страница 36: ...ling algorithm on the port GigabitEthernet1 1 2 and configure the weight of outbound queues as 1 1 1 5 1 10 1 15 H3C GigabitEthernet1 1 2 queue scheduler wrr 1 1 1 5 1 10 1 15 Configure the queue with...

Страница 37: ...3 Configuration Procedure Configure a workday period H3C system view System View return to User View with Ctrl Z H3C time range a001 8 30 to 18 00 working day Configure non workday periods H3C time r...

Страница 38: ...traffic statistic inbound ip group 3030 rule 1 Note The traffic redirect and traffic statistic commands work only with the permit rules in ACLs 2 5 Configuration Example of Local Traffic Mirroring 2 5...

Страница 39: ...ored to inbound ip group 3010 rule 0 monitor interface H3C Ethernet1 0 1 quit H3C interface Ethernet 1 0 2 H3C Ethernet1 0 2 mirrored to inbound ip group 3010 rule 0 monitor interface Note The mirrore...

Страница 40: ...her the egress port is tagged 8 When configuring a user defined ACL consider the following points for the offset length z All the packets that are processed by the switch internally have a VLAN tag On...

Страница 41: ...ons that reference system ACL rules include z 802 1x function after 802 1x is enabled globally and on a port ACL rules are referenced to apply z Cluster function the function is enabled by default ACL...

Страница 42: ...nt is 192 168 1 1 24 z The R D department gains access to the switch through the port Ethernet1 0 2 It belongs to VLAN 20 and the network segment is 192 168 2 1 24 z The administrative department gain...

Страница 43: ...3 Configuration Procedure Create VLAN 10 for the market department and assign an IP address 192 168 1 1 to the VLAN interface 10 H3C system view System View return to User View with Ctrl Z H3C vlan 10...

Страница 44: ...4 1 to the VLAN interface 40 H3C vlan 40 H3C vlan40 port Ethernet 1 0 4 H3C vlan30 quit H3C interface Vlan interface 40 H3C Vlan interface40 ip address 192 168 4 1 24 H3C Vlan interface40 quit Enable...

Страница 45: ...ion in Port View 1 1 1 2 3 Precautions 1 2 Chapter 2 802 1X Configuration Commands 2 1 Chapter 3 Enterprise Network Access Authentication Configuration Example 3 1 3 1 Network Application Analysis 3 1...

Страница 46: ...mple Keywords 802 1x and AAA Abstract This article introduces the application of 802 1x on Ethernet switches in real network environments and then presents detailed configurations of the 802 1x client...

Страница 47: ...herefore port or user based access control comes into being 802 1x is a port based network access control protocol It is widely accepted by vendors service providers and end users for its low cost sup...

Страница 48: ...ct only after the dot1x feature is enabled globally z You can configure dot1x parameters associated with Ethernet ports or devices before enabling dot1x However the configured dot1x parameters only ta...

Страница 49: ...or configuration information on other devices refer to related manuals Table 2 1 802 1x configuration commands To do Use the command Remarks Enable 802 1x globally dot1x Required Disabled by default I...

Страница 50: ...s of network application analysis Table 3 1 Network application analysis Network requirements Solution Access of users is controlled by authentication Enable 802 1x Users can only access VLAN 10 befor...

Страница 51: ...ers H3C system view H3C radius scheme cams H3C radius cams primary authentication 192 168 1 19 H3C radius cams primary accounting 192 168 1 19 H3C radius cams secondary authentication 192 168 1 20 H3C...

Страница 52: ...Enable dot1x in port view H3C Ethernet1 0 3 dot1x Use the display command to view the configuration associated with 802 1x and AAA parameters H3C display dot1x interface ethernet1 0 3 Global 802 1x pr...

Страница 53: ...0 Error Packets 0 Controlled User s amount to 0 H3C display radius scheme cams SchemeName cams Index 1 Type extended Primary Auth IP 192 168 1 19 Port 1812 Primary Acct IP 192 168 1 19 Port 1813 Seco...

Страница 54: ...guration of CAMS authentication authorization and accounting server consists of four parts z Creating an accounting policy z Adding a service z Adding an account user z Configuring the access device T...

Страница 55: ...CAMS configuration console On the navigation tree select Charges Management Accounting Policy to enter the Accounting Policy Management page as shown in Figure 3 4 Figure 3 4 Accounting Policy Manage...

Страница 56: ...dollars as shown in Figure 3 6 Figure 3 6 Accounting Attribute Settings Click OK A monthly payment accounting policy is created III Adding a service 1 Enter the Service Config page Log in the CAMS con...

Страница 57: ...z VLAN Assignment VLAN 100 z Authentication Binding Bind user IP address and bind user MAC address Figure 3 8 Add Service Click OK A service type is added IV Adding an account user 1 Enter the Accoun...

Страница 58: ...ce z Prepaid Money 100 dollars z Bind multiple IP address and MAC address enable z Online Limit 1 z Max Idle Time 20 minutes z Service Information abc Figure 3 10 Add Account Click OK An account user...

Страница 59: ...e item to enter the Access Device Configuration page to modify access device configuration like IP address shared key and authentication and accounting ports Figure 3 12 Access Device Configuration VI...

Страница 60: ...em Configuration page and click Validate Now to make the configuration take effect immediately Figure 3 15 Validate Now on System Management page 3 3 3 Configuring the Supplicant System You need to in...

Страница 61: ...erprise Network Access Authentication Configuration Example 3 12 I Starting up H3C authentication client Figure 3 16 H3C authentication client II Creating a connection Right click the 802 1x Authentic...

Страница 62: ...es Configuration Examples Chapter 3 Enterprise Network Access Authentication Configuration Example 3 13 Figure 3 17 Create an 802 1x connection III Configuring connection attributes Click Next to ente...

Страница 63: ...Switches Configuration Examples Chapter 3 Enterprise Network Access Authentication Configuration Example 3 14 Figure 3 18 Set special properties Keep default settings and click OK The prompt page appe...

Страница 64: ...s Chapter 3 Enterprise Network Access Authentication Configuration Example 3 15 Figure 3 19 Page prompting that a connection is created successfully IV Initiating the connection Double click the info...

Страница 65: ...time 802 1x authentication cooperates with CAMS to complete accounting and real time monitoring To verify that the configuration of IP to MAC binding is taking effect check that users can be re authen...

Страница 66: ...rs can access network resources without 802 1x authentication z Use the display dot1x command to verify 802 1x is enabled globally and on the specified ports z Use the display interface command to ver...

Страница 67: ...2 2 2 Configuration Commands 2 2 2 3 Configuring an H3C Switch as an SSH Client 2 6 2 3 1 Configuration Procedure 2 7 2 3 2 Configuration Commands 2 7 Chapter 3 SSH Configuration Example 3 1 3 1 SSH C...

Страница 68: ...Keywords SSH RSA Abstract This article introduces the application of SSH on the H3C low end Ethernet switches in real network environments and then presents detailed configurations of the involved SSH...

Страница 69: ...nd against the man in the middle attacks SSH uses the client server mode by which the SSH server accepts the connection requests from SSH clients and provides authentication SSH clients can establish...

Страница 70: ...SSH server For such configuration refer to the related user manual 1 3 2 Configuring an SSH Client I Using SSH client software There are many kinds of SSH client software such as PuTTY and OpenSSH Yo...

Страница 71: ...Password authentication For detailed command refer to Password authentication Configure a public key manually copy the public key from the client public key file to the SSH server For detailed command...

Страница 72: ...public command to display the RSA public key after creating RSA key pair through the corresponding commands z Manually copy the RSA public key to the SSH server Thus the SSH server has the same public...

Страница 73: ...the SSH user ssh user username service type stelnet sftp all Optional stelnet by default Set SSH authentication timeout time ssh server timeout seconds Optional By default the timeout time is 60 seco...

Страница 74: ...d with the ssh user authentication type command takes precedence Note For common configuration commands refer toTable 2 2 III Configuring the client RSA public key manually Table 2 4 Configure the cli...

Страница 75: ...h user username assign rsa key keyname Required If you issue this command multiple times the last command overrides the previous ones Note For general configuration commands refer toTable 2 2 IV Impor...

Страница 76: ...s an SSH Client When the device connects to the SSH server as an SSH client you can configure whether the device supports first time authentication z First time authentication means that when the SSH...

Страница 77: ...o Disabling first time authentic ation and manually configurin g the server public key As shown inTable 2 6 you need to configure the server public key to the client in the case that the SSH client do...

Страница 78: ..._group1 dh_exchange_group prefer_ctos_cipher des aes128 prefer_stoc_cipher des aes128 prefer_ctos_hmac sha1 sha1_96 md5 md5_96 prefer_stoc_hmac sha1 sha1_96 md5 md5_96 Required In this command you can...

Страница 79: ...utomatically saves the public key Exit public key view and return to system view peer public key end Specify the host key name of the server ssh client server ip server name assign rsa key keyname Opt...

Страница 80: ...SSH Server for secure data exchange The host runs SSH2 0 client software Password authentication is required II Network diagram Figure 3 1 Network diagram of SSH server configuration using password a...

Страница 81: ...01 password simple abc H3C luser client001 service type ssh level 3 H3C luser client001 quit Specify the authentication method of user client001 as password H3C ssh user client001 authentication type...

Страница 82: ...window select SSH under Connection The window as shown in Figure 3 3 appears Figure 3 3 SSH client configuration interface 2 Under Protocol options select 2 from Preferred SSH protocol version z As s...

Страница 83: ...SH connection between the host SSH client and the switch SSH Server for secure data exchange The host runs SSH2 0 client software RSA authentication is required II Network diagram Figure 3 5 Network d...

Страница 84: ...e the authentication type of the SSH client named client 001 as RSA H3C ssh user client001 authentication type rsa Note Before performing the following steps you must generate an RSA public key pair u...

Страница 85: ...tion Example 3 6 Figure 3 6 Generate a client key pair 1 Note While generating the key pair you must move the mouse continuously and keep the mouse off the green process bar shown in Figure 3 6 Otherw...

Страница 86: ...Configuration Examples Chapter 3 SSH Configuration Example 3 7 Figure 3 7 Generate a client key pair 2 After the key pair is generated click Save public key and enter the name of the file for saving t...

Страница 87: ...pops up to prompt you whether to save the private key without any protection Click Yes and enter the name of the file for saving the private key private ppk in this case Figure 3 9 Generate a client k...

Страница 88: ...es the SSH client software Putty version 0 58 as an example z Launch PuTTY exe to enter the following interface Figure 3 10 SSH client configuration interface 1 In the Host Name or IP address text box...

Страница 89: ...nfiguration Examples Chapter 3 SSH Configuration Example 3 10 Figure 3 11 SSH client configuration interface 2 Under Protocol options select 2 from Preferred SSH protocol version z Select Connection S...

Страница 90: ...configuration interface 2 Click Browse to bring up the file selection window navigate to the private key file and click OK z From the window shown inFigure 3 12 click Open The following SSH client int...

Страница 91: ...between Switch A SSH Client and Switch B SSH Server for secure data exchange The user name for login is client001 and the SSH server s IP address is 10 165 87 136 Password authentication is required I...

Страница 92: ...vel to 3 H3C local user client001 H3C luser client001 password simple abc H3C luser client001 service type ssh level 3 H3C luser client001 quit Configure the authentication type of user client001 as p...

Страница 93: ...136 RSA authentication is required II Network diagram Figure 3 15 Network diagram of SSH client configuration when using publickey authentication III Configuration procedure 1 Configure Switch B Crea...

Страница 94: ...key public key code begin RSA key code view return to last view with public key code end H3C rsa key code 3047 H3C rsa key code 0240 H3C rsa key code C8969B5A 132440F4 0BDB4E5E 40308747 804F608B H3C r...

Страница 95: ...Omitted Note After generating an RSA key pair on the client you need to configure the RSA public key for the SSH server and finish the SSH server configuration before continuing to configure the SSH c...

Страница 96: ...am Figure 3 16 Network diagram of SSH client configuration III Configuration procedure 1 Configure Switch B Create a VLAN interface on the switch and assign an IP address for it to serve as the destin...

Страница 97: ...blic key end H3C rsa public key public key code begin RSA key code view return to last view with public key code end H3C rsa key code 3047 H3C rsa key code 0240 H3C rsa key code C8969B5A 132440F4 0BDB...

Страница 98: ...203 010001 Omitted 2 Configure Switch A Create a VLAN interface on the switch and assign an IP address which serves as the SSH client s address in an SSH connection H3C system view H3C interface vlan...

Страница 99: ...the public key name as Switch002 H3C rsa peer public key Switch002 RSA public key view return to System View with peer public key end H3C rsa public key public key code begin RSA key code view return...

Страница 100: ...nt 10 165 87 136 assign rsa key Switch002 Establish the SSH connection to server 10 165 87 136 H3C ssh2 10 165 87 136 Username client001 Trying 10 165 87 136 Press CTRL K to abort Connected to 10 165...

Страница 101: ...BGP Confederation Configuration Example 2 9 2 1 6 BGP Route Reflector Configuration Example 2 11 2 1 7 BGP Path Selection Configuration Example 2 14 Chapter 3 Comprehensive Configuration Example 3 1...

Страница 102: ...tents ii 3 4 1 Verifying the Configuration of Routing Policy and Static Routes 3 31 3 4 2 Verifying the BGP and IGP Interaction Configuration 3 32 3 4 3 Verifying the Route Backup Configuration 3 33 3...

Страница 103: ...n addition periodic RIP updating multicasts or broadcasts consume many network resources III OSPF OSPF is complicated to configure and requires high performance CPU and memory It is applicable to medi...

Страница 104: ...List Task Details Static route configuration 1 2 2 RIP configuration 1 2 3 OSPF configuration 1 2 4 BGP configuration 1 2 5 1 2 2 Static Route Configuration Table 1 3 Configure a static route Operati...

Страница 105: ...o filter incoming outgoing routes Optional 1 2 3 VII Setting RIP preference Optional 1 2 3 VIII Enabling load sharing among interfaces Optional 1 2 3 IX Configuring RIP route control Configuring RIP t...

Страница 106: ...ate packets rip work Optional By default all interfaces are allowed to send and receive RIP update packets III Specifying the RIP version on an interface Table 1 7 Specify the RIP version on an interf...

Страница 107: ...P routes on this interface rip metricout value Optional By default the additional routing metric added for outgoing routes on an interface is 1 V Configuring RIP route summarization Table 1 9 Configur...

Страница 108: ...advertised from a specified address filter policy acl number ip prefix ip prefix name export protocol process id Configure RIP to filter outgoing routes filter policy route policy route policy name e...

Страница 109: ...cess id cost value route policy route policy name Required By default RIP does redistribute any route from other protocols XI Configuring RIP timers Table 1 15 Configure RIP timers Operation Command R...

Страница 110: ...erface type interface number Set RIP 2 packet authentication mode rip authentication mo de simple password md5 rfc2453 key string rfc2082 key string key id Required If you specify to use MD5 authentic...

Страница 111: ...eived routes Optional 1 2 4 VII Configuring OSPF interface cost Optional 1 2 4 VIII Configuring OSPF route priority Optional 1 2 4 IX Configuring the maximum number of OSPF ECMP routes Optional 1 2 4...

Страница 112: ...work ip address wildcard mask Required By default an interface does not belong to any area II Configuring OSPF Area Attributes Table 1 22 Configure OSPF area attributes Operation Command Remarks Enter...

Страница 113: ...d Remarks Enter system view system view Enter interface view interface interface type interface number Configure the network type of the OSPF interface ospf network type broadcast nbma p2mp unicast p2...

Страница 114: ...abr summary ip address mask advertise not advertise Required This command takes effect only when it is configured on an ABR By default this function is disabled on an ABR Table 1 27 Configure ASBR ro...

Страница 115: ...cost on the interface ospf cost value Optional By default the interface calculates the OSPF cost according to the current baud rate on it For a VLAN interface on the switch a fixed value of 10 is use...

Страница 116: ...information of other protocols Configure OSPF to filter outgoing routes filter policy acl number ip prefix ip prefix name export protocol Optional By default OSPF does not filter advertised routes Ena...

Страница 117: ...uter on the interface ospf timer dead seconds Optional By default the dead time for the OSPF neighboring router on a p2p or broadcast interface is 40 seconds and that for the OSPF neighboring router o...

Страница 118: ...rks Enter system view system view Enter OSPF view ospf process id router id router id Disable OSPF packet transmission on a specified interface silent interface silent interface type silent interface...

Страница 119: ...ill in the MTU field when transmitting DD packets ospf mtu enable Optional By default the MTU value is 0 when an interface transmits DD packets That is the actual MTU value of the interface is not fil...

Страница 120: ...P TRAP messages by process ID 1 2 5 BGP Configuration Table 1 41 BGP configuration tasks Configuration task Remarks Related section Configuring Basic BGP Functions Required 1 2 5 I Importing routes Op...

Страница 121: ...is disabled Specify the AS number for the BGP peers peer group name as number as number By default a peer is not assigned an AS number Assign a description string for a BGP peer a BGP peer group peer...

Страница 122: ...mport the default route to the BGP routing table default route imported Optional By default BGP does not import default routes to BGP routing table Import and advertise routing information generated b...

Страница 123: ...t route advertising peer group name default route advertise route policy route policy name Required By default a BGP router does not send default routes to a specified peer peer group V Configuring ro...

Страница 124: ...ased BGP route filtering policy AS path ACL based BGP route filtering policy or IP prefix list based BGP route filtering policy is configured for a peer peer group VI Configure route advertisement fil...

Страница 125: ...fix list to filter BGP routes to a peer group peer group name ip prefix ip prefix name export Required Not configured by default VII Disable BGP IGP Route Synchronization Table 1 7 Disable BGP IGP rou...

Страница 126: ...Description Enter system view system view Enter BGP view bgp as number Configure the management preference of the exterior interior and local routes preference ebgp value ibgp value local value Optio...

Страница 127: ...ed peer group name ip address allow as loop number Optional By default the number of local AS number occurrences allowed is 1 Assign an AS number for a peer group peer group name as number as number O...

Страница 128: ...ame route update interva l seconds Optional By default the interval at which a peer group sends the same route update packet to IBGP peers is 15 seconds and to EBGP peers is 30 seconds Configure the n...

Страница 129: ...r Create an EBGP peer group group group name external Configure the AS number of a peer group peer group name as number as number Create an EBGP peer group Add a peer to a peer group peer ip address g...

Страница 130: ...roup XIII Configuring BGP RR Table 1 13 Configure BGP RR Operation Command Description Enter system view system view Enter BGP view bgp as number Configure the local router as the RR and configure the...

Страница 131: ...Route Policy Configuration Table 1 15 Route Policy Configuration Configuration task Remarks Related section Configuring an ip prefix list Optional 1 2 6 I AS path list configuration Optional 1 2 6 II...

Страница 132: ...em view system view Configure basic community list ip community list basic comm list number permit deny aa nn internet no export subconfed no advertise no export Optional By default no BGP community l...

Страница 133: ...x name Optional By default no matching is performed on the address of routing information Define a rule to match the routing cost of routing information if match cost value Optional By default no matc...

Страница 134: ...no export no advertise additive Optional Set next hop IP address for routing information apply ip next hop ip address Optional Set local preference of BGP routing information apply local preference lo...

Страница 135: ...nts 1 Requirement analysis A small company requires any two nodes in its network communicate with each other The network should be simple and stable The customer hopes to make the best use of the exis...

Страница 136: ...tic routes on Switch C SwitchC system view SwitchC ip route static 1 1 1 0 255 255 255 0 1 1 2 1 SwitchC ip route static 1 1 4 0 255 255 255 0 1 1 3 2 Configure the hosts Configure the default gateway...

Страница 137: ...n II Configuration procedure Note Only RIP related configurations are described below Before performing the following configurations make sure that the data link layer works normally and the IP addres...

Страница 138: ...environment assign proper priorities to interfaces 2 Network diagram Figure 2 3 shows the network diagram Device Interface IP address Router ID Interface priority Switch A Vlan int1 196 1 1 1 24 1 1 1...

Страница 139: ...1 area 0 0 0 0 network 196 1 1 0 0 0 0 255 Configure Switch D SwitchD system view SwitchD interface Vlan interface 1 SwitchD Vlan interface1 ip address 196 1 1 4 255 255 255 0 SwitchD Vlan interface1...

Страница 140: ...k Configuration Examples I Network requirements 1 Requirement analysis Devices in the network run OSPF to realize interconnection The network is split into three areas one backbone area and two non ba...

Страница 141: ...SwitchB system view SwitchB interface Vlan interface 1 SwitchB Vlan interface1 ip address 152 1 1 1 255 255 255 0 SwitchB Vlan interface1 quit SwitchB interface Vlan interface 2 SwitchB Vlan interface...

Страница 142: ...area 0 0 0 1 quit SwitchA ospf 1 quit Configure Switch B SwitchB ospf 1 area 1 SwitchB ospf 1 area 0 0 0 1 vlink peer 1 1 1 1 SwitchB ospf 1 area 0 0 0 1 quit Display the OSPF routing table on Switch...

Страница 143: ...ieve the goal 2 Network diagram Figure 2 5 shows the network diagram Device Interface IP address AS Switch A Vlan int 10 172 68 10 1 24 Vlan int 50 10 1 1 1 24 Switch B Vlan int 10 172 68 10 2 24 Swit...

Страница 144: ...eer 172 68 10 1 group confed1001 as number 1001 SwitchB bgp group confed1003 external SwitchB bgp peer 172 68 10 3 group confed1003 as number 1003 Configure Switch C SwitchC system view SwitchC bgp 10...

Страница 145: ...d active I internal D damped H history S aggregate suppressed Dest Mask Next Hop Med Local pref Origin Path I 8 1 1 0 24 156 10 1 2 0 100 IGP 1003 200 10 1 1 0 24 0 0 0 0 0 100 IGP Routes total 2 The...

Страница 146: ...Vlan int 4 194 1 1 2 24 200 Figure 2 6 Network diagram for BGP route reflector configuration 3 Configuration plan z Run EBGP between the peers in AS 100 and AS 200 Advertise network 1 0 0 0 8 z Run IB...

Страница 147: ...figure Switch C Configure the VLAN interface IP addresses SwitchC system view SwitchC interface Vlan interface 3 SwitchC Vlan interface3 ip address 193 1 1 1 255 255 255 0 SwitchC Vlan interface3 quit...

Страница 148: ...quirement is to control the data forwarding path from AS 200 to AS 100 The following give two plans to meet the requirement z Use the MED attribute to control the forwarding path for packets from AS 2...

Страница 149: ...dresses SwitchA system view SwitchA interface Vlan interface 2 SwitchA Vlan interface2 ip address 192 1 1 1 255 255 255 0 SwitchA Vlan interface2 quit SwitchA interface Vlan interface 3 SwitchA Vlan i...

Страница 150: ...icy apply_med_50 to routing updates to the peer group ex193 the peer 193 1 1 2 and apply_med_100 to routing updates to the peer group ex192 the peer 192 1 1 2 SwitchA bgp 100 SwitchA bgp peer ex193 ro...

Страница 151: ...chC ospf 1 area 0 0 0 0 network 193 1 1 0 0 0 0 255 SwitchC ospf 1 area 0 0 0 0 network 195 1 1 0 0 0 0 255 SwitchC ospf 1 area 0 0 0 0 quit SwitchC ospf 1 quit Enable BGP create a peer group and add...

Страница 152: ...t the routes destined for 1 0 0 0 8 SwitchC acl number 2000 SwitchC acl basic 2000 rule permit source 1 0 0 0 0 255 255 255 SwitchC acl basic 2000 rule deny source any SwitchC acl basic 2000 quit Crea...

Страница 153: ...Routing H3C Low End Ethernet Switches Configuration Examples Chapter 2 Configuration Examples 2 19 the local preference is not set for route 1 0 0 0 on Switch B so the route uses the default value 100...

Страница 154: ...istribution layer They provide access services for users The specific requirements are as follows z Fast convergence is required for AS 200 and AS 400 because their networks are quite large and compli...

Страница 155: ...hen redistributing BGP routes for filtering z Run OSPF in AS 400 The device in AS 400 connecting to AS 100 runs both OSPF and BGP Apply a routing policy when redistributing BGP routes for filtering z...

Страница 156: ...s or S5600 series Ethernet switches can serve as S100_1 S100_2 S400 S200 S300 z You can use other partially layer 3 capable switches as S300_B 3 1 3 Routing Protocols and Related Parameters on Devices...

Страница 157: ...P to advertise route updates but does not receive route updates and use static routing to access the ISP BGP and IGP Interaction Configuration Example IGP and BGP share routes Apply a routing policy f...

Страница 158: ...nfiguration z Configure S300 Run RIP on the interface with the IP address 206 1 4 0 S300 system view S300 rip S300 rip network 206 1 4 0 Disable RIPv2 route summarization S300 rip undo summary S300 ri...

Страница 159: ...and 166 1 0 0 S300_B system view S300_B rip S300_B rip network 162 1 0 0 S300_B rip network 166 1 0 0 Disable RIPv2 route summarization S300_B rip undo summary S300_B rip quit Run RIPv2 on VLAN interf...

Страница 160: ...its area ID as 0 S200 system view S200 ospf S200 ospf 1 area 0 S200 ospf 1 area 0 0 0 0 network 206 1 2 0 0 0 0 255 z Configure S200_0 Run OSPF on the interface connected to network 206 1 2 0 24 and...

Страница 161: ...igure 3 4 Network diagram for AS 400 configuration z Configure S400 Run OSPF on the interface connected to network 206 1 6 0 24 and specify its area ID as 0 S400 system view S400 ospf S400 ospf 1 area...

Страница 162: ...nt 23 196 2 3 3 24 400 Figure 3 5 Network diagram for BGP configuration z Configure S100_1 Configure the router ID of S100_1 as 1 1 1 1 S100_1 system view S100_1 router id 1 1 1 1 Enable BGP and speci...

Страница 163: ...er 196 2 3 3 in AS 400 into peer group 400 S100_2 bgp peer 196 3 1 1 group 100 S100_2 bgp peer 196 2 2 2 group 300 as number 300 S100_2 bgp peer 196 2 3 3 group 400 as number 400 Advertise networks 19...

Страница 164: ...00 Add peer 206 1 3 3 in AS 200 into peer group 200 S300 bgp peer 196 2 2 1 group 100 as number 100 S300 bgp peer 206 1 3 3 group 200 as number 200 Advertise networks 206 1 3 0 and 196 2 2 0 S300 bgp...

Страница 165: ...00_B through RIP allow S300_B to advertise routes to S300_A and forbid S300_B to receive routes advertised by S300_A Packets from S300_B to S300_A are forwarded through the default route II Network di...

Страница 166: ...apply a routing policy to redistribute routes with IP prefixes 162 1 1 0 24 162 1 2 0 24 162 1 3 0 24 162 1 4 0 24 166 1 3 0 24 and 166 1 4 0 24 only II Network diagram Figure 3 7 Network diagram for...

Страница 167: ...66 1 4 0 24 S300 ip ip prefix rip_import index 10 permit 162 1 1 0 24 S300 ip ip prefix rip_import index 20 permit 162 1 2 0 24 S300 ip ip prefix rip_import index 30 permit 166 1 3 0 24 S300 ip ip pre...

Страница 168: ...400 ospf S400 ospf 1 import route bgp route policy ospf_import 3 2 6 Route Backup Configuration Example I Network requirements As shown in Figure 3 8 implement route backup on S200_10 Run OSPF between...

Страница 169: ...ination IP addresses as 162 1 1 0 24 and 162 1 2 0 24 Specify the next hop IP address as 166 1 5 1 and the default preference to 200 S300_A system view S300_A ip route static 162 1 1 0 255 255 255 0 1...

Страница 170: ...24 162 1 4 1 24 300 S400_0 Vlan int 663 166 1 3 1 24 Vlan int 664 166 1 4 1 24 400 Figure 3 9 Network diagram for MED attribute configuration III Configuration procedure z Configure S100_1 Define a pr...

Страница 171: ...policy as200 Set the MED value of the route matching prefix list as300_1 to 200 S100_1 route policy as200 permit node 30 S100_1 route policy if match ip prefix as300_1 S100_1 route policy apply cost 2...

Страница 172: ...S100_2 route policy apply cost 200 S100_2 route policy quit Create node 20 with the permit matching mode in routing policy as300 Set the MED value of the route matching prefix list as200_2 to 200 S10...

Страница 173: ...tion on Devices 3 3 1 Displaying the Whole Configuration on Devices I S100_1 S100_1 display current configuration sysname S100_1 router id 1 1 1 1 vlan 11 vlan 15 vlan 31 interface Vlan interface11 ip...

Страница 174: ...cost 100 route policy as200 permit node 20 if match ip prefix as200_2 apply cost 100 route policy as200 permit node 30 if match ip prefix as300_1 apply cost 200 route policy as200 permit node 40 if m...

Страница 175: ...5 255 255 0 interface Cascade1 2 1 interface Cascade1 2 2 undo fabric port Cascade1 2 1 enable undo fabric port Cascade1 2 2 enable interface NULL0 bgp 100 network 196 2 2 0 network 196 2 3 0 network...

Страница 176: ...x as300_2 apply cost 100 route policy as300 permit node 50 if match ip prefix other ip ip prefix as200_1 index 10 permit 162 1 1 0 24 ip ip prefix as200_2 index 10 permit 162 1 2 0 24 ip ip prefix as3...

Страница 177: ...number 100 group 300 external peer 206 1 3 2 group 300 as number 300 preference 200 200 200 ospf 1 import route bgp route policy ospf_import area 0 0 0 0 network 206 1 2 0 0 0 0 255 route policy ospf...

Страница 178: ...1 1 1 255 255 255 0 ospf 1 area 0 0 0 10 network 166 1 1 0 0 0 0 255 area 0 0 0 0 network 206 1 2 0 0 0 0 255 V S200_10 S200_10 display current configuration sysname S200_10 vlan 621 to 622 vlan 661...

Страница 179: ...0 0 0 0 255 network 166 1 1 0 0 0 0 255 ip route static 0 0 0 0 0 0 0 0 166 1 5 2 preference 200 VI S300 S300 display current configuration sysname S300 router id 3 1 1 1 vlan 13 vlan 14 vlan 22 inter...

Страница 180: ...undo summary network 206 1 4 0 import route bgp route policy rip_import route policy rip_import permit node 10 if match ip prefix rip_import ip ip prefix rip_import index 10 permit 162 1 1 0 24 ip ip...

Страница 181: ...ss 166 1 5 2 255 255 255 0 rip undo summary network 206 1 4 0 network 166 1 0 0 import route static ip route static 162 1 1 0 255 255 255 0 166 1 5 1 preference 200 ip route static 162 1 2 0 255 255 2...

Страница 182: ...255 255 0 rip version 2 multicast rip undo summary network 166 1 0 0 network 162 1 0 0 filter policy 2000 import ip route static 0 0 0 0 0 0 0 0 166 1 2 1 preference 60 IX S400 S400 display current c...

Страница 183: ...number 100 group 100_2 external peer 196 2 3 2 group 100_2 as number 100 preference 200 200 200 ospf 1 import route bgp route policy ospf_import area 0 0 0 0 network 206 1 6 0 0 0 0 255 route policy...

Страница 184: ...5 255 0 ospf 1 area 0 0 1 44 network 166 1 3 0 0 0 0 255 network 166 1 4 0 0 0 0 255 area 0 0 0 0 network 206 1 6 0 0 0 0 255 3 4 Verifying the Configuration 3 4 1 Verifying the Configuration of Routi...

Страница 185: ...1 6 3 Vlan interface16 162 1 2 0 24 O_ASE 150 1 206 1 6 3 Vlan interface16 162 1 3 0 24 O_ASE 150 1 206 1 6 3 Vlan interface16 162 1 4 0 24 O_ASE 150 1 206 1 6 3 Vlan interface16 166 1 3 0 24 DIRECT...

Страница 186: ...0 24 O_ASE 150 1 166 1 1 1 Vlan interface661 166 1 1 0 24 DIRECT 0 0 166 1 1 2 Vlan interface661 166 1 1 2 32 DIRECT 0 0 127 0 0 1 InLoopBack0 166 1 3 0 24 O_ASE 150 1 166 1 1 1 Vlan interface661 166...

Страница 187: ...Table public net Destination Mask Protocol Pre Cost Nexthop Interface 0 0 0 0 0 STATIC 200 0 166 1 5 2 Vlan interface665 127 0 0 0 8 DIRECT 0 0 127 0 0 1 InLoopBack0 127 0 0 1 32 DIRECT 0 0 127 0 0 1...

Страница 188: ...TH starts with 100 and ends with 200 S400 ip as path acl 1 permit 100 200 Display the routes that match AS path ACL 1 S400 display bgp routing as path acl 1 Flags valid active I internal D damped H hi...

Страница 189: ...ms S400_0 tracert a 166 1 3 1 162 1 3 1 traceroute to 162 1 3 1 162 1 3 1 30 hops max 40 bytes packet 1 206 1 6 3 10 ms 4 ms 3 ms 2 196 2 3 2 13 ms 3 ms 5 ms 3 196 2 2 2 12 ms 5 ms 3 ms 4 206 1 4 1 12...

Страница 190: ...Example 2 1 2 1 1 Requirement Analysis 2 1 2 1 2 Configuration Plan 2 1 2 1 3 Network Diagram 2 2 2 1 4 Configuration Procedure 2 2 2 2 PIM SM plus IGMP plus IGMP Snooping Configuration Examples 2 8...

Страница 191: ...espectively Multicast group filtering in IGMP and IGMP Snooping is mainly described for this scenario 2 Deployment of PIM SM plus IGMP with and without IGMP Snooping respectively Simulated joining is...

Страница 192: ...y neighboring multicast router II PIM Protocol Independent Multicast PIM provides IP multicast forwarding by leveraging unicast routing tables generated by static routing or any unicast routing protoc...

Страница 193: ...hich carry multicast source information between these MSDP peers thus to allow multicast traffic to flow between different PIM SM domains V IGMP Proxy When a multicast routing protocol such as PIM DM...

Страница 194: ...e these tasks to configure IGMP Snooping Configuration task Remarks Enabling IGMP Snooping Required Configuring IGMP Snooping timers Optional Configuring fast leave processing Optional Configuring a m...

Страница 195: ...Optional By default the aging time of the multicast group member port is 260 seconds III Configuring fast leave processing 1 Configure fast leave processing in system view Follow these steps to config...

Страница 196: ...nfigure a multicast group filter igmp snooping group policy acl number vlan vlan list Required Disabled by default V Configuring the maximum number of multicast groups that can be joined on a port Fol...

Страница 197: ...seconds Configure a source IP address for general query messages igmp snooping general query source ip current interface ip address Optional The system default is 0 0 0 0 1 3 2 Configuring IGMP Compl...

Страница 198: ...lt Caution The following configurations in this chapter are implemented after multicast routing is enabled on the device and IGMP is enabled on the corresponding interface II Configuring IGMP version...

Страница 199: ...y count igmp robust count robust value Optional The system default is two Configure the IGMP other querier present interval igmp timer other querier present seconds Optional The system default is 120...

Страница 200: ...r in VLAN interface view To do Use the command Remarks Enter system view system view Enter VLAN interface view interface Vlan interface interface number Configure a multicast group filter igmp group p...

Страница 201: ...mand Remarks Enter system view system view Enter Ethernet port view interface interface type interface number Configure simulated joining igmp host join group address vlan vlan id Optional Disabled by...

Страница 202: ...erve as an IGMP proxy make sure that the IP address is not the lowest on this subnet to prevent this interface from being elected as the IGMP querier on the subnet as this will result in failure of mu...

Страница 203: ...im dm Required Configure the hello interval on the interface pim timer hello seconds Optional The system default is 30 seconds Configure a limit on the number of PIM neighbors on the interface pim nei...

Страница 204: ...e a legal C RP address range crp policy acl number Optional You can define the related IP address ranges in an ACL No legal C RP address range is configured by default Configure to filter the register...

Страница 205: ...SDP view msdp Required Create an MSDP peer connection peer peer address connect interface interface type interface number Required You need to configure related parameters on both devices between whic...

Страница 206: ...system view system view Enter MSDP view msdp Add an MSDP peer in a mesh group peer peer address mesh group name Required An MSDP peer does not belong to any mesh group by default Note z Before groupin...

Страница 207: ...tering multicast sources in SA messages Optional Configure a filtering rule for receiving or forwarding SA messages Optional 1 Configure the RP address in SA messages Follow these steps to configure t...

Страница 208: ...default Enable the router to send SA requests to the designated MSDP peer peer peer address request sa enable Optional By default upon receiving a new Join message a router does not send an SA reques...

Страница 209: ...w system view Enter MSDP view msdp Configure a filtering rule for receiving or forwarding SA messages peer peer address sa policy import export acl acl number Optional By default no filtering rule is...

Страница 210: ...e uplink backup for the directly attached stub network N1 which comprises multicast receivers Host C and Host D 3 All the Layer 3 switches run RIP for unicast routing and run PIM DM for multicast rout...

Страница 211: ...an int102 192 168 3 1 24 Ethernet1 0 2 Switch D Vlan int300 10 110 5 1 24 Ethernet1 0 1 Vlan int103 192 168 1 2 24 Ethernet1 0 2 Vlan int101 192 168 2 2 24 Ethernet1 0 3 Vlan int102 192 168 3 2 24 Eth...

Страница 212: ...k 10 110 1 0 SwitchA rip quit The configuration on Switch B Switch C and Switch D is similar to the configuration on Switch A III Configuring the multicast protocols Enable IP multicast routing on Swi...

Страница 213: ...1 1 1 from Source and start receiving the multicast data on Host A and take the following steps to verify the configurations made on the switches 1 Check whether the multicast stream can flow to Host...

Страница 214: ...otal 1 entry Listed Matched 1 entry View the multicast group information that contains port information on Switch A SwitchA display mpm group Total 1 IP Group s Total 1 MAC Group s Vlan id 101 Total 0...

Страница 215: ...1 1 1 on Switch E SwitchE system view SwitchE acl basic 2000 rule deny source 224 1 1 1 0 SwitchE acl basic 2000 rule permit source any SwitchE acl basic 2000 quit SwitchE igmp snooping group policy...

Страница 216: ...d then display the multicast forwarding entries of Switch A Configure to filter the multicast group 224 1 1 1 on VLAN interface 100 of Switch A SwitchA system view SwitchA acl number 2000 SwitchA acl...

Страница 217: ...le and stable reception of multicast data Switch B and Switch C provide uplink backup for the directly attached stub network N1 which comprises multicast receivers Host C and Host D 3 Configure the PI...

Страница 218: ...2 Switch D Vlanint300 10 110 5 1 24 Ethernet1 0 1 Vlanint101 192 168 1 2 24 Ethernet1 0 2 Vlanint105 192 168 4 2 24 Ethernet1 0 3 Switch E Vlanint104 192 168 3 2 24 Ethernet1 0 3 Vlanint103 192 168 2...

Страница 219: ...itches as per Figure 2 2 The detailed configuration steps are omitted here II Configuring the unicast routing protocol Configure a router ID and enable OSPF on Switch A SwitchA system view SwitchA rou...

Страница 220: ...ese two switches Configure the group range to be served by the RP and configure a C BSR and a C RP on Switch D SwitchD system view SwitchD acl number 2005 SwitchD acl basic 2005 rule permit source 225...

Страница 221: ...witch E SwitchE display pim neighbor Neighbor s Address Interface Name Uptime Expires 192 168 9 1 Vlan interface102 02 47 04 00 01 42 192 168 2 1 Vlan interface103 02 45 04 00 04 46 192 168 3 1 Vlan i...

Страница 222: ...0 Protocol 0x1 IGMP never timeout Matched 1 S G entries 1 G entries 0 RP entry The information on Switch B and Switch C is similar to that on Switch A View PIM routing table entries on Switch D Switch...

Страница 223: ...ntry 0 RP entry View the information about multicast group entries created by IGMP Snooping on Switch F SwitchF display igmp snooping group Total 1 IP Group s Total 1 MAC Group s Vlan id 100 Total 1 I...

Страница 224: ...Configure Ethernet 1 0 21 as a simulated host to join multicast group 225 1 1 1 SwitchB system view SwitchB interface Vlan interface 200 SwitchB Vlan interface200 igmp host join 225 1 1 1 port Ethern...

Страница 225: ...ut Layer 3 devices Switch C connects to the multicast source through Ethernet 1 0 3 At least one receiver is attached to Switch B and Switch C respectively 2 Enable IGMP Snooping on Switch A Switch B...

Страница 226: ...g globally SwitchB system view SwitchB igmp snooping enable Enable IGMP Snooping ok Create VLAN 100 add Ethernet 1 0 1 through Ethernet 1 0 3 into VLAN 100 and then enable IGMP Snooping in this VLAN S...

Страница 227: ...GMP packet statistics on Switch B SwitchB display igmp snooping statistics Received IGMP general query packet s number 16 Received IGMP specific query packet s number 3 Received IGMP V1 report packet...

Страница 228: ...orts from the receivers View multicast group information on Switch A Switch A display igmp snooping group Total 1 IP Group s Total 1 MAC Group s Vlan id 100 Total 1 IP Group s Total 1 MAC Group s Rout...

Страница 229: ...Requirements To enable communication between receivers and multicast sources in different PIM SM domains use MSDP to establish MSDP peering relationships between the RPs of different PIM SM domains so...

Страница 230: ...Loop0 2 2 2 2 32 Vlan int101 192 168 1 1 24 Switch F Vlan int400 10 110 3 1 24 Loop0 1 1 1 1 32 Vlan int102 192 168 3 2 24 Loop0 3 3 3 3 32 SwitchG Vlan int100 10 110 10 1 24 Vlan int400 10 110 3 2 2...

Страница 231: ...SM on each interface and enable IGMP on VLAN interface 200 SwitchA system view SwitchA multicast routing enable SwitchA interface vlan interface 100 SwitchA Vlan interface100 pim sm SwitchA Vlan inte...

Страница 232: ...tchC pim SwitchC pim c bsr loopback 0 24 SwitchC pim c rp loopback 0 SwitchC pim quit The configuration on Switch D and Switch F is similar to the configuration on Switch C IV Configuring inter AS BGP...

Страница 233: ...C display bgp peer Peer AS num Ver Queued Tx Msg Rx Msg Tx Up Down State 192 168 1 2 200 4 0 950 945 15 41 14 Established View the information about BGP peering relationships on Switch D SwitchD displ...

Страница 234: ...t Count 192 168 1 2 Up 00 12 27 200 13 0 View the brief information about MSDP peering relationships on Switch D SwitchD display msdp brief MSDP Peer Brief Information Peer s Address State Up Down tim...

Страница 235: ...messages none Sending SA Requests status disable Minimum TTL to forward SA with encapsulated data 0 SAs learned from this peer 0 SA cache maximum for the peer none Input queue size 0 Output queue siz...

Страница 236: ...ation Guide 1 2 1 2 1 Configuring Basic VLAN Settings 1 2 1 2 2 Configuring Basic Settings of a VLAN Interface 1 4 1 2 3 Protocol VLAN Configuration 1 5 Chapter 2 Configuration Examples 2 1 2 1 VLAN C...

Страница 237: ...ples Keywords VLAN 802 1q VLAN interface protocol VLAN Abstract This document introduces how VLAN of the H3C series Ethernet switches is applied and configured in practical networking implementations...

Страница 238: ...S5600 z z z S5100 EI z z S3100 SI z S3100 52P z z Note z In the above table the solid dots z indicate that the corresponding models provide full support for the function the hollow dots indicate that...

Страница 239: ...workgroups by assigning them to different VLANs Follow these steps to create a VLAN and perform basic VLAN configuration To do Use the command Remarks Enter system view system view Create multiple VL...

Страница 240: ...erface type interface number Configure the port type port link type access trunk hybrid Optional By defaults all ports are access ports For an access port port access vlan vlan id For a trunk port por...

Страница 241: ...k mask length sub Required No IP address is assigned to any VLAN interface by default Configure the description of the current VLAN interface description text Optional By default the description of a...

Страница 242: ...col VLAN To do Use the command Remarks Enter system view system view Enter VLAN view vlan vlan id Create a protocol template protocol vlan protocol index at ip ipx ethernetii llc raw snap mode etherne...

Страница 243: ...about the protocol templates of the specified VLAN s display protocol vlan vlan vlan id to vlan id all Display information about the protocol templates of the protocol VLANs associated with the specif...

Страница 244: ...nts use Windows Use VLANs to fulfill the following z Employees of the same department can communicate with each other while employees of different departments cannot z The R D department and the marke...

Страница 245: ...tlines I Configuration on Switch A Figure 2 2 Network diagram for Switch A On Switch A assign the port connecting to the independent office area of the R D department and the port connecting to the in...

Страница 246: ...must be the same on both Switch A and Switch B Configure the port connecting to Core Switch A to permit the frames of all existing VLANs to pass through with VLAN tags III Configuration on Core Switc...

Страница 247: ...and Core Switch A to permit the frames of the VLAN created for the public servers to pass through besides the frames of the three departments As Core Switch B is the egress device for accessing the I...

Страница 248: ...nfiguration procedure z Configure Switch A Create VLAN 100 VLAN 200 and VLAN 300 SwitchA system view SwitchA vlan 100 SwitchA vlan100 quit SwitchA vlan 200 SwitchA vlan200 quit SwitchA vlan 300 Switch...

Страница 249: ...t link hybrid SwitchA Ethernet1 0 10 port hybrid vlan 100 300 untagged Associate Ethernet 1 0 10 with all the protocol templates of VLAN 100 and VLAN 300 SwitchA Ethernet1 0 10 port hybrid protocol vl...

Страница 250: ...ration procedure is the same as that on Switch B Create VLAN interface 100 and assign it IP address 192 168 30 1 Use this address as the IP address of the gateway for the R D department Allocate IP ad...

Страница 251: ...he configuration procedure is omitted here Create a VLAN interface on Core Switch B to forward traffic of the marketing department to the Internet and assign an IP address to the VLAN interface Assign...

Страница 252: ...mmended to enable DHCP Snooping on Switch A and Switch B to monitor the IP addresses of clients For detailed information about DHCP Snooping configuration refer to the user manual of the S3600 series...

Страница 253: ...VLAN H3C Low End Ethernet Switches Configuration Examples Chapter 3 Appendix 3 1 Chapter 3 Appendix 3 1 Protocols and Standards IEEE 802 1Q Virtual Bridged Local Area Networks...

Страница 254: ...1 2 Configuring Voice VLAN 1 1 1 2 1 Configuring a Voice VLAN in automatic mode 1 1 1 2 2 Configuring a Voice VLAN in manual mode 1 2 Chapter 2 Configuration Examples 2 1 2 1 Voice VLAN Configuration...

Страница 255: ...n Examples Abstract ii Voice VLAN Configuration Examples Keywords VLAN 802 1q voice VLAN Abstract This document introduces how voice VLAN of the H3C series Ethernet switches is applied and configured...

Страница 256: ...ple For how to configure voice VLAN on other models refer to their accompanied operation manuals z The configuration example in this guide provides only basic configuration procedures For detailed inf...

Страница 257: ...mode on the port voice vlan mode auto Optional Automatic mode applies by default 1 2 2 Configuring a Voice VLAN in manual mode Follow these steps to configure a voice VLAN in manual mode To do Use th...

Страница 258: ...he port undo voice vlan mode auto Required Automatic mode applies by default Return to system view quit Enter VLAN view vlan vlan id Access port Assign the specified port s to the VLAN port interface...

Страница 259: ...ed by within 100 minutes z Network requirements of the IP phones in the meeting rooms The company deploys IP phones in two meeting rooms The IP phone in meeting room 1 sends VLAN untagged voice traffi...

Страница 260: ...resses automatically they should send an untagged DHCP request to the DHCP server for an IP address upon their startup When the DHCP server receives a request it responds with a temporary IP address a...

Страница 261: ...r getting IP addresses within the voice VLAN configure VLAN 200 as the voice VLAN and configure the voice VLAN to operate in automatic mode on the port Thus the port can join exit the voice VLAN autom...

Страница 262: ...Switch B the configuration on Ethernet 1 0 1 is different from that on Ethernet 1 0 2 z Ethernet 1 0 1 The IP phones connected to Ethernet 1 0 1 are configured with an IP address manually and they se...

Страница 263: ...mode Access hybrid trunk VLAN400 pvid untagged Ethernet 1 0 2 Manual mode Trunk hybrid VLAN400 tagged GigabitEthernet 1 1 2 Trunk hybrid VLAN400 tagged In the following configuration Ethernet 1 0 1 i...

Страница 264: ...net 1 0 3 and GigabitEthernet 1 0 4 to the two VLANs respectively thus achieving Layer 3 forwarding Table 2 3 lists the interface and port configurations on Switch A Table 2 3 Interface and port confi...

Страница 265: ...ice VLAN on Ethernet 1 0 10 SwitchA Ethernet1 0 10 voice vlan enable Set the voice VLAN aging time to 100 minutes SwitchA Ethernet1 0 10 quit SwitchA voice vlan aging 100 Enable voice VLAN security mo...

Страница 266: ...hernet1 0 2 voice vlan enable SwitchB Ethernet1 0 2 quit Add an OUI address 00e3 f200 0000 with the description of Meeting room1 globally SwitchB voice vlan mac address 00e3 f200 0000 mask ffff ff00 0...

Страница 267: ...200 CoreSwitch Vlan interface200 dhcp select interface CoreSwitch Vlan interface200 quit CoreSwitch interface Vlan interface 400 CoreSwitch Vlan interface400 dhcp select interface Note For detailed i...

Страница 268: ...Voice VLAN H3C Low End Ethernet Switches Configuration Examples Chapter 3 References 3 1 Chapter 3 References 3 1 Protocols and Standards IEEE 802 1Q Virtual Bridged Local Area Networks...

Страница 269: ...net Switches 1 1 1 2 Configuration Guide 1 2 1 2 1 Configuring QinQ 1 2 1 2 2 Configuring Selective QinQ 1 3 Chapter 2 Configuration Examples 2 1 2 1 QinQ Configuration Example 2 1 2 1 1 Network Requi...

Страница 270: ...ract ii QinQ Configuration Examples Keywords QinQ selective QinQ Abstract This document introduces how to use and configure QinQ also known as VLAN VPN and selective QinQ on the H3C series Ethernet sw...

Страница 271: ...itches Feature right Model below QinQ Selective QinQ S3600 EI z z S3600 SI z z S5600 z z S5100 EI z z S5100 SI z S3100 SI z S3100 52P z Note z In the above table the symbol solid dots z indicate that...

Страница 272: ...QinQ To do Use the command Remarks Enter system view system view Enter Ethernet port view interface interface type interface number Enable QinQ vlan vpn enable Required Disabled by default For an acc...

Страница 273: ...er outer VLAN tag priority mapping are disabled Display information about all QinQ enabled ports display port vlan vpn Available in any view 1 2 2 Configuring Selective QinQ Follow these steps to conf...

Страница 274: ...QinQ H3C Low End Ethernet Switches Configuration Examples Chapter 1 QinQ Overview 1 4 Note QinQ and selective QinQ cannot be enabled on any port of a device with IRF Fabric enabled...

Страница 275: ...c by VLAN as follows z Customer 1 high priority for traffic of CVLANs 20 through 100 normal priority for traffic of CVLANs 200 through 300 and low priority for traffic of CVLAN 400 z Customer 2 high p...

Страница 276: ...to right in Figure 2 1 You can follow the same configuration idea to configure the devices for transmitting traffic from right to left I Configuration on the S3600 1 Figure 2 2 Configuration on the S...

Страница 277: ...priority 200 300 to 101 normal priority 400 to 102 low priority Enable basic QinQ Untagged multicast traffic to VLAN 500 Set the TPID on the port to 9100 Ethernet 1 0 10 Configure inter VLAN MAC addr...

Страница 278: ...ld change the TPID that the ports will use in the outer VLAN tags from 8100 the default to 9100 for interoperability sake II Configuration on S3600 2 Figure 2 3 Configuration on S3600 2 Configure Ethe...

Страница 279: ...thernet1 0 10 vlan vpn enable Enable selective QinQ on Ethernet 1 0 10 to tag the received tagged traffic with an SVLAN ID based on the CVLAN ID S3600 1 Ethernet1 0 10 vlan vpn vid 100 S3600 1 Etherne...

Страница 280: ...uit S3600 1 Ethernet1 0 20 vlan vpn vid 201 S3600 1 Ethernet1 0 20 vid 201 raw vlan id inbound 400 to 450 S3600 1 Ethernet1 0 20 vid 201 quit S3600 1 Ethernet1 0 20 vlan vpn vid 202 S3600 1 Ethernet1...

Страница 281: ...inQ on the S3600 2 as you have done on the S3600 1 Note that Ethernet 1 0 15 of S3600 2 corresponds to Ethernet 1 0 10 of S3600 1 Ethernet 1 0 20 of S3600 2 corresponds to Ethernet 1 0 20 of S3600 1 E...

Страница 282: ...rks 3 2 Reserved Protocol Type Values Because the position of the TPID field is the same as that of the protocol type field in a VLAN untagged frame you cannot set the TPID to any of the values in the...

Страница 283: ...iguring ARP Attack Prevention 1 7 1 4 Device Models that Supports ARP Attack Prevention 1 8 Chapter 2 Configuration Examples 2 1 2 1 Configuration Example for ARP Attack Prevention in DHCP Snooping Mo...

Страница 284: ...o implement ARP attack prevention in DHCP snooping mode or authentication mode on Ethernet switches so as to prevent ARP attacks including gateway spoofing spoofing gateway spoofing terminal user and...

Страница 285: ...cenarios where static and dynamic IP address allocation methods coexist and it can only prevent gateway spoofing attacks In this solution you do not need to configure attack prevention on access switc...

Страница 286: ...ay which then updates the IP to MAC binding of the client After that traffic from the gateway to the client is sent to the fake MAC address and the client cannot access the external network Gateway Sw...

Страница 287: ...n attacker Host B forwards invalid ARP reply messages to Host A and Host C respectively causing the two hosts to update the MAC address corresponding to the peer IP address in their ARP tables with th...

Страница 288: ...minal users and ARP MITM attacks from clients that obtain IP addresses dynamically DHCP snooping ARP attack detection Gateway spoofing spoofing gateway spoofing terminal users and ARP MITM attacks fro...

Страница 289: ...attack detection 1 2 3 ARP Attack Detection H3C low end switches can deliver received ARP packets request or reply to the CPU and use DHCP snooping to verify the validity of the ARP packets as follow...

Страница 290: ...the shut down port after the specified interval 1 2 5 Attack Prevention with the Support of a CAMS Server As shown in the following figure a Comprehensive Access Management Server CAMS as the service...

Страница 291: ...le DHCP snooping dhcp snooping Required Disabled by default Enter Ethernet port view interface interface type interface number Configure an IP static binding entry ip source static binding ip address...

Страница 292: ...cover enable Optional Disabled by default Configure ARP packet rate limit Configure the port state auto recovery interval arp protective down recover interval interval Optional By default when the por...

Страница 293: ...view 1 9 Feature Device model DHCP snooping ARP attack detection IP static binding ARP packet rate limit S3600 SI Release 1602 z z z z S3100 EI Release 2104 z z z z S3100 52P Release 1602 z z z z Note...

Страница 294: ...are located in Host area 1 which belongs to VLAN 10 and Host area 2 which belongs to VLAN 20 respectively and they are connected to the Gateway and the DHCP server through Switch A and Switch B respe...

Страница 295: ...2 1 3 Configuration Considerations z Enable DHCP snooping on Switch A and Switch B and configure their ports connected to the DHCP server as a DHCP snooping trusted port z Configure an IP static bindi...

Страница 296: ...1 0 1 through Ethernet 1 0 4 to VLAN 10 SwitchA system view SwitchA vlan 10 SwitchA vlan10 port Ethernet 1 0 1 to Ethernet 1 0 4 SwitchA vlan10 quit Configure the uplink port on Switch A Ethernet 1 0...

Страница 297: ...0 2 arp rate limit enable SwitchA Ethernet1 0 2 arp rate limit 20 SwitchA Ethernet1 0 2 quit SwitchA interface Ethernet1 0 3 SwitchA Ethernet1 0 3 arp rate limit enable SwitchA Ethernet1 0 3 arp rate...

Страница 298: ...2 quit SwitchB interface Ethernet1 0 3 SwitchB Ethernet1 0 3 arp rate limit enable SwitchB Ethernet1 0 3 arp rate limit 20 SwitchB Ethernet1 0 3 quit SwitchB interface Ethernet1 0 4 SwitchB Ethernet1...

Страница 299: ...obtain valid IP addresses The trusted ports and the ports connected to DHCP clients must be in the same VLAN z A DHCP snooping table only records IP to MAC bindings of clients that have obtained IP ad...

Страница 300: ...in Authentication Mode 2 2 1 Network Requirements In a campus network as shown in the following figure the hosts are connected to the gateway and servers through access switches The administrator need...

Страница 301: ...A on Switch A and Switch B z Configure the gateway s IP to MAC binding on the CAMS server which will provide the binding to clients for preventing gateway spoofing attacks 2 2 4 Configuration Procedur...

Страница 302: ...n default enable host Enable 802 1x globally SwitchA dot1x Enable 802 1x on Ethernet 1 0 2 SwitchA interface Ethernet1 0 2 SwitchA Ethernet1 0 2 dot1x SwitchA Ethernet1 0 2 quit Enable 802 1x on Ether...

Страница 303: ...host Enable 802 1x globally SwitchB dot1x Enable 802 1x on Ethernet 1 0 2 Ethernet 1 0 3 and Ethernet 1 0 4 SwitchB interface Ethernet1 0 2 SwitchB Ethernet1 0 2 dot1x SwitchB Ethernet1 0 2 quit Switc...

Страница 304: ...the RADIUS server CAMS 2 10 R0210 1 Enter the correct username and password on the login page to log in to the CAMS server 2 Create a service type Log in the CAMS server configuration page and then se...

Страница 305: ...in the CAMS server configuration platform and then select User Management Account User from the navigation tree to enter the Account Management page as shown in the following figure Figure 2 6 Accoun...

Страница 306: ...4 Configure an access device Log in the CAMS server configuration platform and then select System Management System Configuration from the navigation tree to enter the System Configuration page as sh...

Страница 307: ...red information such as IP address and shared key for the access device as shown in the following figure Figure 2 9 Add Access Device page Click OK and the following dialog box appears Figure 2 10 Ope...

Страница 308: ...shown in the following figure Figure 2 12 System Configuration page Select User Gateway Configuration and then click Modify Click Add to enter the Add Gateway Configuration page Take VLAN interface 1...

Страница 309: ...H3C Low End Ethernet Switches Configuration Examples ARP Attack Prevention Chapter 2 Configuration Examples 2 16 Figure 2 14 Wizard page 2 Select 802 1x protocol Click Next...

Страница 310: ...d Ethernet Switches Configuration Examples ARP Attack Prevention Chapter 2 Configuration Examples 2 17 Figure 2 15 Select 802 1x Select Common connection and then click Next Figure 2 16 Select Common...

Страница 311: ...itches Configuration Examples ARP Attack Prevention Chapter 2 Configuration Examples 2 18 3 Specify the username and password Click Next Figure 2 17 Specify the username and password 4 Set the connect...

Страница 312: ...et Switches Configuration Examples ARP Attack Prevention Chapter 2 Configuration Examples 2 19 Figure 2 18 Set the connection property 5 Complete the creation of the connection Figure 2 19 Complete co...

Страница 313: ...nformation about gateways configured on the CAMS server may not be completely received by an access switch because the total number of configured gateways exceeds the upper limit supported by the swit...

Отзывы: