background image

5

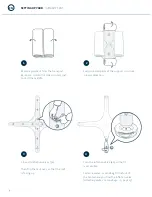
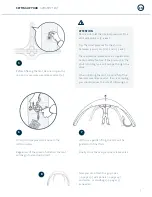
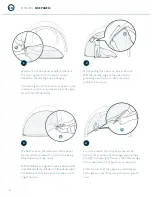
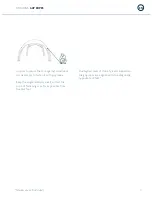
Attach the compressed air hose to the 
inflation valve.

Regardless of the speed of inflation, the tent 
will begin to stand up by itself.

With some gentle lifting, the tent will be 
guided to its final form.

Finally, close the overpressure release valve.

6

SETTING UP YOUR   

HUMANITY TENT

EN

5

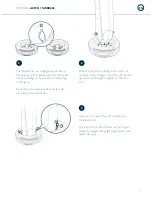
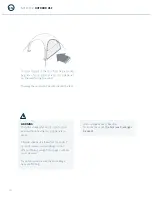
Before inflating the tent, be sure to open the 
cap on the overpressure release valve (5a). 

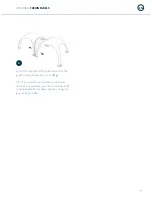
Now you can attach the guy ropes 

(→ page 29)

, side panels 

(→ page 24)

and water- or sandbags 

(→ page 25)


as needed. 

8

7

ATTENTION

Be sure not to let the internal pressure of the 
strut exceed  6 psi  (0.4 bar).

Tip: The ideal pressure for the strut is 
between  4 and 5 psi  (0.25 and 0.35 bar).

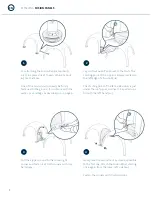
The overpressure release valve is a 

supplemental


backup safety feature. If the pressure in the 
strut is too high, air will escape through this 
valve.

When inflating the tent, be mindful of the 
overpressure release valve. If air is escaping, 
you should reduce the rate of inflowing air.

Содержание Humanity

Страница 1: ...1 HUMANITY TENT EN ASSEMBLY INSTRUCTIONS...

Страница 2: ...Instructions for use Safety warnings 3 Setting up your HumanityTent 4 Side Panels 6 Water andSandbags 7 Fusion Panels 8 Notes for outdoor use 10 Guy ropes 1 1 Takingdownyour HumanityTent 12 1 x Tent...

Страница 3: ...he wind That way the wind won t be able to enter the tent GYBE does not accept any liability for improper use of GYBE products CARE INSTRUCTIONS STORE IN A DRY PLACE Never store the tent when it is we...

Страница 4: ...valve Attaching water or sandbags page 25 Remove your tent from the transport backpack Unfold the rolled up tent just once in the middle Fully unroll all parts of the support structure in every direc...

Страница 5: ...se valve 5a Now you can attach the guy ropes page 29 side panels page 24 and water or sandbags page 25 as needed 8 7 ATTENTION Be sure not to let the internal pressure of the strut exceed 6 psi 0 4 ba...

Страница 6: ...through the square shaped metal ringonthetentfoot andfastenittothesidepanel 3a The beltstraps should be pulled to the point of a light tension While pulling the zipper up please be sure that the lead...

Страница 7: ...le 1a as indicated in the illustration 1 2 Place the tent foot roundly on the water or sandbag While doing so pull the soft shackle upward and through the eyelet on the tent foot Now slip the loop of...

Страница 8: ...both corners with the beltstraps Lay out the Fusion Panel next to the tents The starting point of the zipper is always located on the left edge of a Fusion Panel The starting point of the tent side z...

Страница 9: ...the tent feet of the second tent to the ground using the water or sandbags Tip If you want to set up the Fusion Panel without any wrinkles you need to increase the tension between the tents perhaps u...

Страница 10: ...to enter the tent WARNING The GYBE Humanity Tent can catch wind even without having the side panels in place At wind speeds of 4 Beaufort 15 knots 13 mph water and sandbags do not offer sufficient we...

Страница 11: ...th the diagonally opposite tent feet In order to secure the tent against wind loads it is necessary to fasten it with guy ropes Keep the angle relatively small so that the point of fastening is as far...

Страница 12: ...ure with the other two strut elements until the tent has completely deflated Now turn the tent upside down so that the roof is facing down and the valves up Open the four deflation valves nearest the...

Страница 13: ...ducts or if you need spare parts or extensions please do not hesitate to contact us at any time FURTHER INFORMATIONS www gybe design com info gybe design com is a division of Adventure Design GmbH Mit...

Страница 14: ...32 WWW GYBE DESIGN COM...

Отзывы: