19
System set up (how to connect)
1.
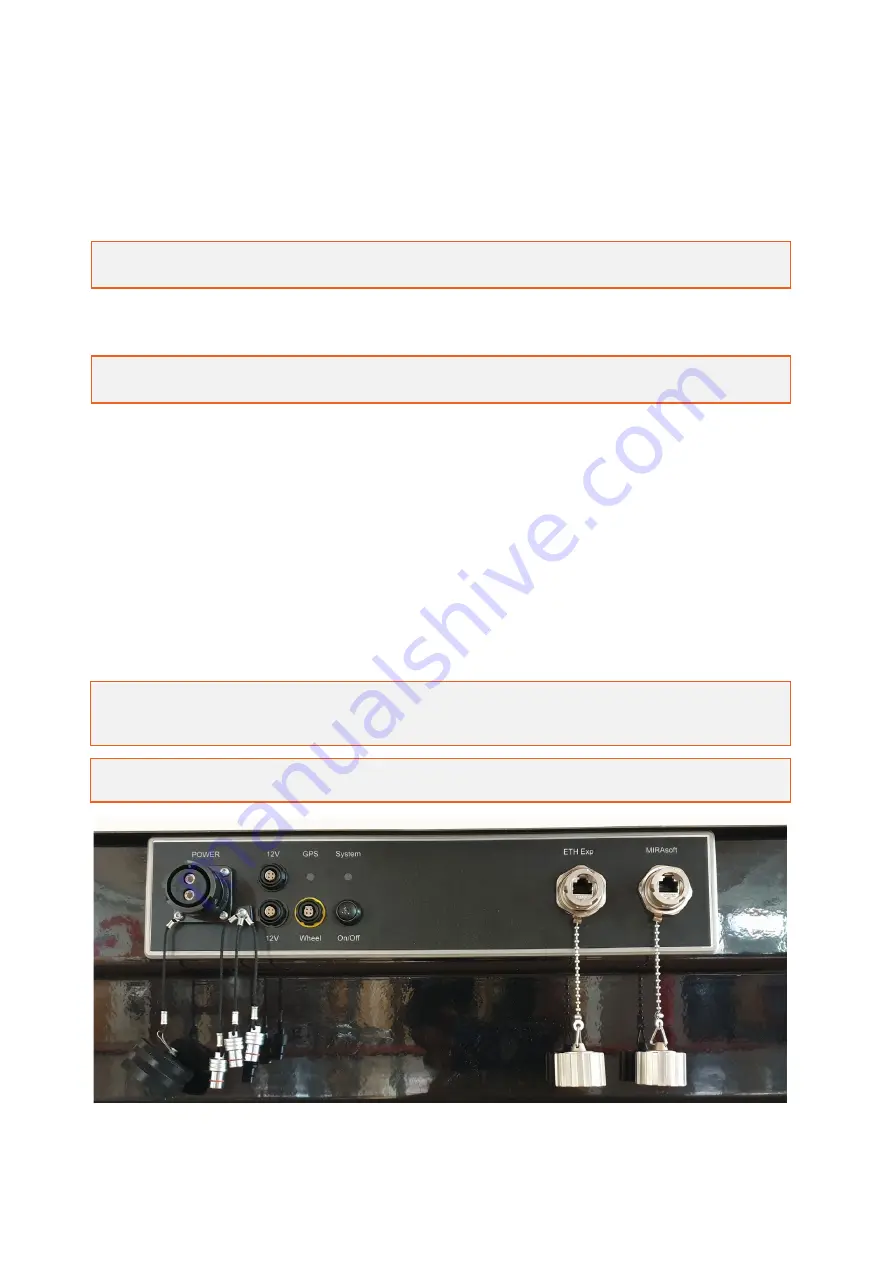
Connect the battery cable using the provided power cable to the Power connector on the
antenna box connector panel.
Note: Make sure to connect the battery with correct polarity (Red = “+”, Black = “-“) otherwise
a buzzer sound will be given when the cable is connected and the system will not start.
2.
Connect your GPS. We provide two 12V output connectors on the system’s connector panel.
Contact Guideline Geo for adapters for your brand of GPS.
Note: The 12V connectors are secured with a 2A e-fuse. The fuse will be restored after a power-
cycle.
3.
Connect the measuring wheel/encoder to the connector marked Wheel on the antenna
connector panel.
4.
Connect the Ethernet cable between the computer or tablet with MIRAsoft HDR installed and
the connector marked MIRAsoft on the connector panel.
5.
Power up the MIRA HDR system and wait for the MIRAsoft HDR System diode on the connector
panel to change from blinking to solid (this means that the hardware is ready for connecting to
MIRAsoft HDR).
6.
Start MIRAsoft HDR, the system automatically connects, and the software will report Ready.
7.
See the MIRAsoft HDR manual for a detailed guide on how to operate the software.
Note: The System diode will be blinking while the MIRA HDR system is booting. When the light
is steady, the system is ready to be connected to MIRAsoft HDR. The GPS diode will be blinking
until the internal GPS clock is ready to sync with the external GPS clock.
Note: Please use the dust caps for the connectors when there is no plug inserted. This prevents
dirt and moisture entering the antenna box and makes the system IP65 compatible.
Содержание MALA MIRA HDR
Страница 1: ...MAL MIRA HDR User Guide...


