background image


Rio R1

 2-1

2. Phone Functions & Input 


Phone Functions 

Tap Application Drawer > APPS tab > Phone.   


2.1 Voice Calls 


Making a call 
To make a call from the Phone screen 

1. Go to the Phone screen.


2. Use the keypad to input phone number.


3. Tap 

  then choose SIM1 or SIM2 to make 

the phone call.


NOTE:   
Tap 


to delete a number. Tap and hold 


to erase entire numbers. 
 

To make a call from Contacts 

1. Tap Application Drawer > APPS tab > Phone. 
2. Tap 

3. Tap a contact you want to call.   
4. If SIM2 inserted, there is a menu will pop up. 

You may select “SIM1” or “SIM2” to make a 
phone call.


To make emergency calls 

You have to unlock your device before making an 
emergency call. Enter the international 
emergency number 112, and tap SIM1 or SIM2 to 
make the emergency call.   

Содержание RIO R1

Страница 1: ...RIO R1 ...

Страница 2: ... text music and pictures are owned by or authorized by original manufacturers to GIGA BYTE COMMUNICATIONS INC Reproduction transfer distribution or storage of part or all of the contents in this document in any form without the prior written permission of GIGA BYTE COMMUNICATIONS INC is prohibited GIGA BYTE Group GIGA BYTE COMMUNICATIONS INC ...

Страница 3: ...this may cause a short circuit Keep the battery away from metal objects since this may cause a short circuit Do not use damaged or deformed batteries If the battery emits a foul odor discontinue use Keep the battery away from babies and small children If the battery leaks Do not allow the leaking fluid to come in contact with your skin eyes or clothing If already in contact rinse with clean water ...

Страница 4: ...or the European Council s recommended limit for mobile devices is the Specific Absorption Rate SAR and the SAR limit is 2 0 W kg averaged over 10 gram of body tissue It meets the requirements of the International Commission on Non Ionizing Radiation Protection ICNIRP For body worn operation this device has been tested and meets the ICNIRP exposure guidelines and the European Standard EN 62311 and ...

Страница 5: ... could void the EMC compliance and negate your authority to operate the product This product has demonstrated EMC compliance under conditions that included the use of compliant peripheral devices and shielded cables between system components It is important that you use compliant peripheral devices and shielded cables between system components to reduce the possibility of causing interference to r...

Страница 6: ...gh volume for prolonged periods of time Prevention of Hearing Loss Warning statement requirement under EN 60950 1 A12 To prevent possible hearing damage do not listen at high volume levels for long periods Note For France headphones earphones for this device are compliant with the sound pressure level requirement laid down in the applicable EN 50332 1 2000 and or EN50332 2 2003 standard as require...

Страница 7: ...ing on the phone browsing online or charging the battery the device may become warm In most cases this condition is normal Refer servicing to the provider or an authorized technician under the following conditions 1 The device has been damaged 2 When you follow the instructions to use your device it does not operate normally 3 The device has been exposed to water 4 Liquid has been spilled or an ob...

Страница 8: ...me Screen 1 11 Chapter 2 Phone Functions Input 2 1 2 1 Voice Calls 2 1 2 2 Using On Screen Keyboard 2 3 Chapter 3 Email Messages 3 1 3 1 Creating and sending a text message 3 1 3 2 Multimedia Message 3 2 3 3 Voice Message 3 3 3 4 E mail Accounts 3 3 3 5 Using E mail 3 5 Chapter 4 Using the Internet 4 1 4 1 Connecting to the Internet 4 1 4 2 Bluetooth modes 4 2 Chapter 5 Multimedia Applications 5 1...

Страница 9: ... News and Weather 6 9 6 15 Best Choice 6 9 6 16 FM Radio 6 9 6 17 Sound Recorder 6 10 6 18 Connecting your phone to a computer 6 10 6 19 File Explorer 6 10 6 20 Downloads 6 11 6 21 Google 6 11 6 22 Screenshots 6 11 Chapter 7 Managing Your Phone 7 1 7 1 Phone Settings 7 1 7 2 Managing Basic Settings 7 4 7 3 Protecting Your Phone 7 5 7 4 Resetting Your Phone 7 6 7 5 Specifications 7 7 ...

Страница 10: ...ing to music 3 P sensor Light sensor P Sensor The screen will turn off automatically when the device is close to the face during a phone call Light Sensor Adjust the brightness of the screen according to the environment 4 Front Camera Use this front Camera to take pictures or record video 5 Receiver The source of voice 6 Touch screen Display screen 7 Home Go back to Home Screen Press and hold to b...

Страница 11: ... The source of music and voice 16 Volume Press upward or downward to turn louder or down volume Press down key fully to enter vibration mode 17 Micro USB port Connect USB cable and the AC adapter to charge the battery mildly USB tethering Share your phone s mobile data connection via USB cable 1 2 Installing or uninstalling the SIM Card Battery and Memory Card To remove the back cover 1 Please tur...

Страница 12: ...And the cut off corner is facing toward the outside To install the SIM1 card To install the SIM2 card To remove the SIM card 1 First remove the battery 2 Use your finger to slide the SIM card out of card slot Battery Your phone comes with a rechargeable battery Battery life varies depending on the network used applications and the type of connections attached to your phone To install the battery M...

Страница 13: ...the cover into the slot from the top 2 Then press two point on the left and right of back cover fully until hearing clicks Memory card You may need a microSD card to store photos music videos and other data To install the memory card 1 Insert the memory card with the gold contact facing down 2 Push the memory card until it clicks into slot To remove the memory card 1 For safe removal tap Applicati...

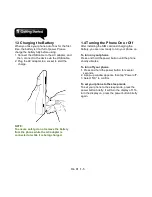
Страница 14: ...pter is connected or while it is being charged 1 4 Turning the Phone On or Off After installing the SIM card and charging the battery you are now ready to turn your phone on To turn on your phone Press and hold the power button until the phone shortly vibrates To turn off your phone 1 Press and hold the power button for several seconds 2 A pop up window appears then tap Power off 3 Select OK to co...

Страница 15: ...1 1 6 1 5 Lock Unlock There are four functions you may use when turning the device on or coming back from sleep mode Unlock the device Drag G icon on screen and slide to Unlock icon for unlocking the device ...

Страница 16: ...Rio R1 1 7 Taking pictures Drag G icon to Camera icon to taking some pictures Muting the speaker Drag G icon to Mute icon to mute the speaker ...

Страница 17: ...sallow Google to use My Location for Google search results and other Google services Then tap Next 4 Set up your name to personalize some apps Then tap Next 5 In the screen of Google services you could get some information about Google Term of Service from here 6 Finally tap Finish to complete the whole initial settings NOTE Some applications and functions needed to connect to the Internet such as...

Страница 18: ...d picture to contact information Searching for Contacts On Contact Screen do any of the following to easily search for contacts Tap Type the first few letters of the contact name to search The list is filtered when typing When finish searching you could tap to go back to the contacts screen Contact groups If you want to categorize the contacts please follow the steps as below To add Contact groups...

Страница 19: ...ge 3 You can select an account to save the import contacts 4 Select the Card files Please follow the steps in the submenu 5 You can check the import situation in the status bar Back up Contacts Export Contacts to SIM card 1 Tap Application Drawer APPS Contact 2 Tap Menu Import export Export to SIM card 3 You can select SIM1 or SIM2 If SIM2 card inserted Then tap OK 4 Select contacts you want or ch...

Страница 20: ...eep your most important shortcuts and folders Tap to launch Application Drawer Self defined Home Screen You can add the shortcuts and widgets How to Navigate Tap You can tap the icon on the screen to activate the application Press and Hold Press and hold the icon on the Home Screen to make it movable Press and hold an icon in the Application Drawer to add it to the Home Screen you want Slide Slide...

Страница 21: ... Battery is very low Battery is charging Network and Connection Maximum signal strength Fewer bars indicate lower signal strength Left icon is SIM1 signal WCDMA GSM Right icon is SIM2 signal GSM G E 3G H GPRS EDGE 3G HSDPA is in progress SIM1 supports GPRS EDGE 3G HSDPA networks SIM2 supports GPRS EDGE networks Wi Fi is connected Wi Fi is in progress Wi Fi Network is activated Airplane mode Portab...

Страница 22: ...ns Functions Enable disable Wi Fi Enable disable Bluetooth Enable disable GPS Enable disable mobile network Tap to adjust the brightness Recent apps list Recent apps list provides an efficient way of switching between recently used applications Switch to an app by touching it 1 Press and hold the Home key 2 A Recent app list screen will appear 3 Remove an item by swiping left or right 4 Or jump in...

Страница 23: ...e widgets 1 Tap and hold a widget icon which you want to delete on the screen The widget will enlarge and Remove will appear on the top of Home Screen 2 Drag the widget icon to the Remove to delete it Folders You can also add delete folders to your Home Screen and Favorites Tray To create folders 1 Tap and hold an app icon then drag it over to another app icon they will automatically create a new ...

Страница 24: ... Wallpapers 1 Long press any place on the Home Screens There is a menu that will pop up 2 Tap Wallpapers or Live Wallpapers 3 All system wallpapers are displayed You can tap to preview it 4 Tap Set wallpaper to set up your selection Set wallpaper from Pictures 1 Long press anywhere on the Home Screens There is a menu that will pop up 2 Tap Gallery you can view all pictures on the album 3 Tap to se...

Страница 25: ...he phone call NOTE Tap to delete a number Tap and hold to erase entire numbers To make a call from Contacts 1 Tap Application Drawer APPS tab Phone 2 Tap 3 Tap a contact you want to call 4 If SIM2 inserted there is a menu will pop up You may select SIM1 or SIM2 to make a phone call To make emergency calls You have to unlock your device before making an emergency call Enter the international emerge...

Страница 26: ... Quick response an incoming call When there is an incoming call you can quick response with message by sliding to Messaging icon on the screen To put a call on hold If you are having a call conversation you can tap to put the call on hold To switch between calls If you are having a call conversation and there is another incoming call slide the Talk icon to put the first call on hold and answer the...

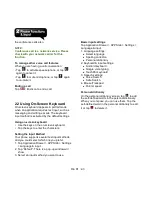
Страница 27: ...Tap the keys to enter the characters Setting the Input Method Your phone supports several text input methods and you could select which one you prefer 1 Tap Application Drawer APPS tab Settings Language input 2 Tap Default There is a pop up window will show 3 Select an input method you want to use Basic input settings Tap Application Drawer APPS tab Settings Language input 1 Language settings Sele...

Страница 28: ...rnative symbols Show alternative symbol on buttons You could slide down or long press the keyboard to input these symbols Skin Customize your own skin Keyboard layout Set portrait or landscape layout and some other functions Smart input Keyboard intelligence for western languages Languages Set up Multilanguage keyboard Dictionary management You can choose backup or restore your dictionary Help Abo...

Страница 29: ... delete words Switch different language inputs and methods Tap to activate the symbols and numerical keyboard Tap to move to the next text zone TouchPal Curve Input Using Curve let you type faster than normal IME Input a word by drawing through letters Put your finger on the first letter of the word and draw a path from letter to letter then lifting up your finger after the last letter And the pre...

Страница 30: ...w Always hide Voice Input key Voice input on main keyboard on symbols keyboard and off Add on dictionaries You can install Multilanguage dictionaries Auto correction Spacebar and punctuation automatically correct mistyped words Show correction suggestions Display suggested words while typing Advanced settings Options for expert users Using Android keyboard To toggle between upper and lower case le...

Страница 31: ... From Phone screen 1 Tap Application Drawer APPS tab Phone 2 Tap tab to view all call history 3 Tap a call contact from the call log 4 Tap icon to send the message 5 Compose your message 6 Tap to send your message You may select SIM1 or SIM2 If SIM2 inserted NOTE If you exit Messages before sending unsent message will be saved as a draft automatically Receiving and Managing Messages When you send ...

Страница 32: ...number in the To field 4 Tap to attach pictures capture picture video capture video audio record audio or slideshow file The message converts to a MMS message automatically 5 Enter your message with the on screen keyboard in Type message filed 6 Tap to send your message Send MMS from People screen 1 Tap Application Drawer APPS tab Contact 2 Tap a contact 3 Tap icon to write a message back 4 In the...

Страница 33: ...2 Enter your e mail address and Password Tap Next 3 Select the e mail account of types 4 The phone will retrieve the e mail settings automatically If the e mail settings are pre configured the e mail setup wizard displays a successful message If the e mail settings are not found manual setup is in process automatically You can follow the instructions to complete the settings 5 Enter Account name a...

Страница 34: ... Menu Settings 3 Tap one of your accounts If you have two more e mail accounts 4 Tap Inbox check frequency You can set how often to check for new e mail automatically To set up default account 1 Tap Application Drawer APPS tab Email 2 Tap Menu Settings 3 Tap one of your accounts If you have two more e mail accounts 4 Check Default account to set this account as a default one To select an account 1...

Страница 35: ...chments to an e mail message Before sending your message tap Menu Attach file and then choose an attachment you want to attach Receiving e mails E mails will be received automatically when your phone connects to wireless networks Reading e mails The Inbox displays the e mail headers When you open the e mail it shows the message of text unless the attachments Please download the e mail attachments ...

Страница 36: ...it on Begin to search the available Wi Fi networks 2 Detected networks are displayed below Tap one network then tap Connect 3 If you select an open network the connection is established automatically 4 To connect a secured connection you will be prompted for the password Enter the password then tap Connect 5 When Wi Fi is connected the connection icon will be displayed on the status bar To add Wi ...

Страница 37: ...PN network 5 After filling in all necessary information tap Save to finish the settings To start a data connection If you set up multiple data connections select the connection you want to use 1 Tap Application Drawer APPS tab Settings WIRELESS NETWORKS section More Mobile networks 2 Check Data enabled to enable data access over Mobile network 3 If you would like to use network when roaming please...

Страница 38: ...for a new device 3 Detected Bluetooth devices are displayed on the screen Tap one device to connect 4 Start to pair enter the password and then tap OK to finish pairing NOTE 1 The password enter on your phone must be the same one be entered on the device which you want to pair with The password is required at the first time once a partnership has been created the password will no longer require ag...

Страница 39: ...ge Tap to go to Review Screen You need to insert your SD card first Indicates capture mode Tap to switch to video or panorama mode Tap to take a photo Tap to configure camera settings Display the flash mode Tap to zoom in or out Tap to switch between rear and front camera 1 Tap Application Drawer APPS tab Camera The screen switches to landscape view automatically 2 Tap to take a picture ...

Страница 40: ...card first Indicates capture mode Tap to switch to camera or panorama mode Press to record video Tap to configure Camcorder settings Tap to zoom in or out Tap to switch between rear and front camera 1 Tap Application Drawer APPS tab Camera 2 Switch to recorder mode 3 Aim the phone at the subject 4 Tap to start to record tap again to stop recording ...

Страница 41: ...gain to finish recording Icon Function Indicates how long you record Displays the last panorama Tap to go to Review Screen You need to insert your SD card first Indicates capture mode Tap to switch to camera or video mode Press to record a panorama Reviewing a photo After taking a picture the function of reviewing a photo Tap to share your picture Icon Function Tap to share your picture ...

Страница 42: ...tions Camera Flash mode Auto On and Off White Balance Auto Incandescent Daylight Fluorescent and Cloudy Exposure 2 1 0 1 2 Scene mode Auto ASD Action Portrait Landscape Night Night Portrait Theatre Beach Snow Sunset Steady Photo Fireworks Sports Party Candlelight Backlight Flowers AR Store location Turn on off Picture size 5MP 3MP 2M 1 3M 1M SVGA VGA CIF QVGA QCIF Picture quality Super fine Fine N...

Страница 43: ...ion Unlimited 10 minutes and 30 seconds Color effect None Mono Sepia Negative Solarize Posterize Aqua 5 2 Viewing Photos and Videos To view photos in the album 1 Tap Application Drawer APPS tab Gallery 2 Tap one of picture folders to view the images in thumbnails 3 Tap an image to view 4 Slide the screen from left side to right side or from right side to left side to view all the photos in this al...

Страница 44: ...image Play video from the video file 1 Tap Application Drawer APPS tab Gallery Camera select a video file you want 2 Tap to play it Play video from Videos 1 Tap Application Drawer APPS tab Videos 2 Choose a video you want to play 3 The videos will be played automatically tap to stop playing 5 3 Music You have to copy your audio files to the storage card before playing music because the music playe...

Страница 45: ...ow playing list Displays the list of currently playing songs and those on queue for playback Tap to shuffle when it s green means the shuffle is on Tap to enable or disable the repeat function You can choose to repeat all songs or repeat current song Library Displays folder categories which could make searching for media files quickly and easily ...

Страница 46: ...t of each recording files to arrange its sequence To play music 1 Tap Application Drawer APPS tab Music 2 Tap Songs and all songs on the phone will be displayed 3 Tap to select a song and then it will play automatically Changing Playback options While playing music tap Menu button on the down right side of screen Tap Library to see all playlists Tap Party shuffle to play all songs in shuffle order...

Страница 47: ...Creating a new playlist Add songs to a specific playlist or create a playlist 1 Tap Application Drawer APPS tab Music 2 In Songs tab tap and hold a song you want to add then tap Add to playlist in the pop up submenu 3 Tap New to create a new playlist Input a name for the created playlist and then tap Save The song will be added to the new playlist automatically 4 You may check this new playlist in...

Страница 48: ...es Chrome Google s browser service Clock Sets up alarm clock Contact Stores names numbers e mail and other information Downloads To view files and items you ve downloaded from mail or any other sources like Play Store Dropbox Bring and share your photos docs and videos anywhere Email Sends and receives e mail messages File Explorer Manages all files FM Radio Listen to music news on the FM Radio Ga...

Страница 49: ...ther services Phone Makes and receives phone calls Play Store Find applications and fun games which you can download and install on your phone Search Google s search service Settings Configures the phone settings wireless settings and call settings of your phone Sound Recorder Record a voice note System Update Check the system update information Talk Google s instant messaging program Touchpal Key...

Страница 50: ...ark label and other information if needed 3 Tap Add to to save the bookmark to Home screen Bookmarks or Other Folder 4 Tap OK to save your settings Managing Bookmarks 1 While viewing a web page tap Menu Bookmarks You can view bookmarks HISTORY and SAVED PAGES Managing a Web Page The following table lists the Menu options Depending on the function some options may be unavailable On an open web page...

Страница 51: ...h a site s security Accept cookies Allow sites to save and read cookie data Clear all cookie data Clear all browser cookies Remember form data Remember data I type in forms for later use Clear form data Clear all the saved form data Enable location Allow sites to request access to your location Clear location access Clear location access for all websites Remember passwords Save usernames and passw...

Страница 52: ... web pages Labs Quick controls Slide thumb from the left or right edge to open quick controls and hide app and URL bars Fullscreen Use fullscreen mode to hide the status bar Slide Tab Transitions Swipe from the edge to reveal the next previous tab in the list WebGL enables WebGL 6 3 Calculator With Calculator you can perform basic arithmetic functions on your phone 1 Tap Application Drawer APPS ta...

Страница 53: ... time Depending on your settings of the synchronization Gmail on your phone may be synchronized with your Gmail account on the web automatically 1 Tap Application Drawer APPS tab Gmail 2 If you do not log in your Google Account tap NEW to create an account or tap Existing to sign in the Google account Please follow the on screen instruction to log in 3 Once logged in you can begin reading and send...

Страница 54: ...ur friends 1 Tap Application Drawer APPS tab Latitude 2 Tap and then follow the instructions Chink in your location 1 Tap Application Drawer APPS tab Latitude 2 Tap to search nearby places 3 Tap a place to check in your location 6 8 Local Use Google maps to search places that you want to find near your current location and the details about the location you select displays on the screen NOTE If yo...

Страница 55: ...enu End chat To view terms and privacy Tap Menu Settings your account Terms privacy To Sign out Tap Menu Sign out 6 12 YouTube YouTube is an online video streaming service that allows you to view search and upload videos To Play YouTube 1 Tap Application Drawer APPS tab YouTube 2 Videos are grouped into categories tap BROWSE tab Tap a category to watch the available videos 3 Tap a video to play To...

Страница 56: ... Best Choice For easy to use we recommend you the best software and functionality With this function you can find the web links to the services you need easily 1 Tap Application Drawer APPS tab Best Choice 2 Tap a desired function and then download it online 6 16 FM Radio You can listen to music news on the FM Radio Before use please insert the headset 1 Tap Application Drawer APPS tab FM Radio 2 ...

Страница 57: ...of the voice note and then tap the voice note you want to play it 6 18 Connecting your phone to a computer If you want to copy files between your computer and your phone storage Please have your device connect to PC with the USB cable first Tap and drag down Status Bar and tap Media device or USB Storage on your device Media device MTP Lets you transfer media files on Windows or using Android File...

Страница 58: ...will show Stream To check friends updates and share your messages locations pictures with your friends Profile To view your personal information posts and photos Messenger May start a conversation with friends here Hangout May start a hangout with friends here Photo To view pictures from your circles and upload pictures from your phone Circles To add new friends and create new circles Local lookin...

Страница 59: ...phone s mobile data connection via USB or as portable Wi Fi hotspot Wi Fi direct settings Set up peer to peer connectivity Mobile networks Set options for roaming networks APNs DEVICE Application Description Dual SIM Settings Configure dual SIM Set SIM name turn on off SIM card mobile network setting and call settings etc Preferred SIM settings Choose which SIM card uses for Voice UUSD MMI data SM...

Страница 60: ...ices Google s location Let apps use data service from sources such as Wi Fi and mobile networks to determine your approximate location GPS satellites Let apps use GPS to pinpoint your location Location Google search Let Google use your location to improve search results and other services Security Screen lock Lock screen with a slide face unlock pattern PIN or password Encrypt phone Require a nume...

Страница 61: ...iption Data time Automatic date time Check to use the provided values of the network Automatic time zone Use network provided time zone Set date Set up the date for your phone Set time Set up the time for your phone Select time zone Set up the time zone for your phone Use 24 hour format Set up the clock to 24 hour format Select date format Set up the preferred date format Accessibility TalkBack Pr...

Страница 62: ...em updates Update your phone and display the last check time Status Battery status battery level etc Legal information To view the legal information of phone Model number Display your phone of model name Android version Display your phone of Android version Kernel version Display your phone of kernel version Build number Display your phone of software version 7 2 Managing Basic Settings Date and T...

Страница 63: ...2 Drag the slider of brightness to the left to decrease the brightness or to the right to increase the brightness Tap OK to finish 3 Tap Automatic brightness to let device adjust brightness by itself To change the screen orientation 1 Tap Application Drawer APPS tab Settings Display 2 Check Auto rotate screen to adjust the screen automatically To display the screen when your device is charging 1 T...

Страница 64: ...de every time screen is off 1 Tap Application Drawer APPS tab Settings Security Screen lock Pattern 2 Draw the unlock pattern by connecting at least four dots Then tap Continue 3 Draw the unlock pattern again and then tap Confirm 4 If you want to disable the function please tap Application Drawer APPS tab Settings Security Screen lock Confirm the saved pattern and then tap None to disable it Set u...

Страница 65: ...00 2100 MHz Connectivity GPS GPS AGPS Wi Fi IEEE 802 11 b g n Bluetooth Bluetooth 3 0 USB Micro USB Audio Jack 3 5 mm stereo audio jack Digital Camera Rear Camera 5 0MP Color Camera with AF and Video Recording Front Camera 0 3MP External Memory Memory Card microSD supports up to 32GB Temperature Operating 15 C to 55 C SIM Card Slot Dual SIM card slot NOTE 1 Specifications are subject to change wit...

Отзывы: