background image

Page 17 

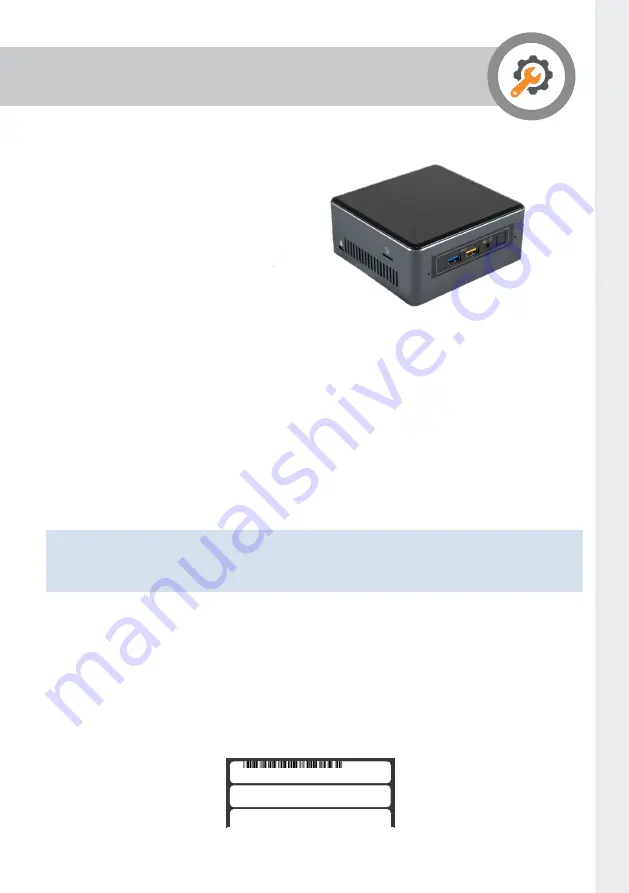
Setting up the Janus C4 Mini PC

If you are using the Janus C4 Mini PC, 

it comes with Janus C4 already installed 

and ready to use. 

Starting up the Janus C4 Mini PC

1. 

Plug in a monitor (minimum screen resolution 1200 x 800) using an HDMI cable.

2. 

Plug in a USB keyboard and mouse.

3. 

Connect a network cable.

4. 

Connect the power supply and press the power button.

5. 

Once the Mini PC has started up, log on to it as follows:

Username: Admin 

Password: janusc4-0 

6. 

When accessing Janus C4 the application username is 

support

 and the password 

is 

Support123!


Note:

 This only applies if you are using the Janus C4 mini-PC. If you install the 

Janus C4 application manually the default username is 

support

 and the password is 

support

.

To access Janus C4 from another workstation

From any other computer on the network, open Internet Explorer and enter:

 http://hostname/c4client 

or

 http://xx.xx.xx.xx.xx/c4client

 Where 

hostname

 is the name of your Janus C4 Mini PC.

The hostname can be found on the label on the underside of the Mini PC or xx.xx.xx.xx 

is the IP address.

EZBX-SAT-00000011

Hostname: SATEON0152

Password: sateon-0

Содержание Janus C4 Series

Страница 1: ...Email info grosvenortechnology com Telephone 44 0 1279 838000 Web www grosvenortechnology com MISC LOCKS LIFT INTERCOM INTRUDER FIRE CCTV Getting Started Guide janusC4...

Страница 2: ...controller is ideal when you only have a small space available The device supports either one Door Blade one I O Blade or one OSDP Blade and it can be powered via PoE or a separate external power supp...

Страница 3: ...herals It enables the connection of up to 8 volt free relay outputs and 8 supervised inputs The Blade can be used in either Single Blade or Multi Blade controllers See page 16 Janus C4 Configurator Ap...

Страница 4: ...RS 485 Line Header 6 controllers maximum supported by an RS 485 Line Header RS485 RS485 ONLY NETWORK HYBRID IP AND RS485 NETWORK RS 485 Line Header 6 controllers maximum supported by an RS 485 Line H...

Страница 5: ...ected I O devices Readers locks and other connected I O devices Single Blade Controller with Lithium Polymer Battery PoE switch injector Mains Power Mains Power Battery PSU Multi Blade Controller with...

Страница 6: ...red Disable PoE on the switch if not required In addition an optional 4 2V lithium polymer battery can provide backup for all connected equipment during power outages When selecting the most suitable...

Страница 7: ...to follow this step Connect the IP and or RS485 cable as required please note for all controller configuration IP must be connected first If using PoE IP connection will apply power to the controller...

Страница 8: ...ition an optional 12V sealed lead acid battery can provide backup for all connected equipment during power outages note that all data is retained when power is lost even without a battery fitted When...

Страница 9: ...ions see page 12 For I O Blade connections see page 16 For OSDP Blade connections see page 14 Run cabling to the enclosure from all the doors readers locks inputs and outputs that are to be connected...

Страница 10: ...powering up for example if PoE and external mains the PoE will be seen first and the external mains ignored Disable PoE on the switch if not required In addition an optional 4 2V lithium polymer batt...

Страница 11: ...se is closed 1 1 Install the lithium polymer back up battery if required The battery ensures operation of equipment during power outage Note that data is retained even without a battery fitted 2 2 Con...

Страница 12: ...S485 A RS485 B Clock D1 Data D0 Valid Beeper Tamper 12 V 5 V GND RS485 A RS485 B Clock D1 Data D0 Valid Beeper Tamper HID Reader connections Advance Reader connections ADVANCE 2 Door Blade Door Reader...

Страница 13: ...se the lock The door would remain locked in the case of a power failure A Fail Safe lock requires power to lock the door The door would be unlocked in the case of a power failure External Lock Power S...

Страница 14: ...V GND RS485 A RS485 B OSDP Reader connections _ Exit switch Door sensor 12 V Sounder GND REX GND Sensor Contact Only no fault detection Reader Connections Door Connections The Door Sensor circuit may...

Страница 15: ...o lock the door The door would be unlocked in the case of a power failure By default locks use the internal power supply If required the door Blade external power supply can be used External Lock Powe...

Страница 16: ...ler or the Multi Blade controller to support extra peripherals Input switch 1K 1K GND In 1 Out NO Com Out NC 1 Normally Closed Contact Common Normally Open External power Supervised may optionally be...

Страница 17: ...4 0 6 When accessing Janus C4 the application username is support and the password is Support123 Note This only applies if you are using the Janus C4 mini PC If you install the Janus C4 application ma...

Страница 18: ...he Janus C4 Mini PC 1 On the Janus C4 mini PC navigate to the Control Panel Network and Internet Network Connections and alter the IPv4 address of the mini PC ensuring IP Subnet and Gateway is all rel...

Страница 19: ...he services app and restart the service Janus C4 Application Server note that restarting the mini PC is also acceptable 4 Once completed log into Janus C4 and the Advance configurator and bring online...

Страница 20: ...are the Janus C4 system Note Full details of the installation process can be found in the Janus C4 Technical Guide 1 Install Janus C4 Server ServerSetup exe The default account is user name support pa...

Страница 21: ...dress format is http xxx xxx xxx xxx c4client where xxx xxx xxx xxx is the IP address of the Janus C4 server 3 Click on the Install button This will download the Janus C4 client installer and install...

Страница 22: ...Licenses to open the panel with the current license information If you own a trial version of the Janus C4 system and you do not have a license the attributes in this panel are empty 2 Click the Activ...

Страница 23: ...rmed in the Configurator The installation of the Configurator program will add a shortcut to the utility on the desktop of the Janus C4 server Double click on the desktop icon to access the Configurat...

Страница 24: ...nstall This is used to add the controllers and line headers to the system it is also used to configure RS 485 only controllers all controllers must be initially configured via IP Replace This is used...

Страница 25: ...xxx xxx xxx 8080 janusc4 where xxx xxx xxx xxx is the IP address of the Janus C4 server 4 Under the application role select either IP Controller or 485 Controller note that to configure an RS 485 con...

Страница 26: ...to 10 mins please do not remove the controller from the network until the controller LED is for a Line Header flashing Green connected on the network and for an RS 485 controller flashing steady Ambe...

Страница 27: ...or DePoll if the reader is OSDP Isolate This is for OSDP readers only and declines all card reads whilst monitoring if the OSDP reader is online Address The address of the reader on the controller Th...

Страница 28: ...ders inputs outputs doors etc and is always 1 for OSDP readers So a door in position 2 on a door blade in controller slot 4 would be addressed as 402 Sensor Type Select if you have a door contact also...

Страница 29: ...variety of security devices from camera systems to intrusion detection into one view Drivers for many security devices can be installed in Janus C4 Operators of the Janus C4 system can be assigned ro...

Страница 30: ...lation guides documents on integrations as well as a range of quick guides to help you get the most from Janus C4 Once the controllers doors and readers are configured the set up of the system can be...

Страница 31: ...nor Technology Ltd Endeavour House Coopers End Road Stansted Essex CM24 1SJ United Kingdom Tel 44 0 1279 838000 Email ac support grosvenortechnology com Web www grosvenortechnology com JC4 GSG v1 3 Ma...

Отзывы: