7
Safety notes
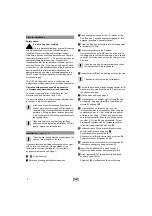
Protection against scalding
It is recommended that near points of discharge
with particular sensitivity to the outlet temperature
(hospitals, schools, nursing and retirement homes)
thermostatic devices should be installed which can limit
the water temperature to 43 °C. The product includes an
appropriate temperature end stop. It is generally
recommended that the temperature of shower-systems
should not exceed 38 °C in nurseries and specific areas
of care centres. Use Grohtherm Special thermostats with
special handle to facilitate thermal disinfection and
appropriate safety end stop. Applicable standards (e. g.
EN 806-2) and technical regulations for drinking water
must be observed.
This GROHE fitting can be used in conjunction with
a pressurised storage heater or an instantaneous heater.
Operation with unpressurised storage heaters
( = displacement water heaters) is not possible.
To ensure correct operation of the fitting, the flow
pressure should be between 1 and 5 bar.
It is recommendable to install a pressure-reducing valve
in the case of higher flow pressures.
In the case of new installations, flush the cold
and hot water lines thoroughly until the water is
completely free of contamination before and after
installation. Otherwise these residues remaining
in the lines may block the fitting and contaminate
the drinking water.
Make sure that you do not damage the fitting
surfaces with the tool during installation. For this
reason, always use toothed pliers.
The cold water supply must be connected on the
right, hot water supply on the left.
If you have reversed the fitting connections (hot on right –
cold on left), you can correct this by means of the
thermostatic compact cartridge (47 175) available
as a special accessory, see Page 1.
1
-
i
= Figure number
1
Note the necessary installation dimensions.
2
Apply sealing compound to the 1/2" threads of the
S-unions. Use a suitable sealing compound for this
purpose (available in specialist shops).
3
Screw the S-unions horizontally into the supply pipes
at intervals of 150mm.
4
Fit escutcheons
A
onto the S-unions.
Remove protective covers
B
from the union nuts on
the fitting and check that dirt strainers
C
are inserted
correctly. Screw the union nuts on the fitting onto the
S-unions.
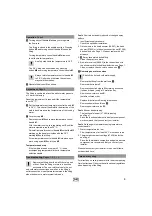
Open the cold and hot water supply and check
the connections for watertightness.
5
Push shower rail
D
into the housing as far as the stop.
The shower rail must not be cut to length.
6
To mark the drill holes, start by aligning shower rail
D
.
Next, mark the holes for backplate
E
. Finally remove
the shower rail again.
7
Drill the holes and insert plugs
F
.
8
For installation on a straight wall, fit O-ring
E1
onto
backplate
E
. Screw backplate
E
to the wall using
screws
F1
and seal
E2
.
9
For installation on a recessed wall, you can
increase the distance to the wall by 8mm using the
compensation disc (27 180) available as a special
accessory, see Page 1. When using other screws,
several compensation discs can be fitted one over
the other. Fit O-ring
E1
onto backplate
E
. Screw
backplate
E
together with the compensation disc
to the wall using screws
F1
and seal
E2
.
0
Push escutcheon
G
onto bracket
H
and reinsert
shower rail
D
in the housing, see
5
.
Push bracket
H
onto backplate
E
.
Align shower rail
D
and secure using set screw
H1
.
Screw escutcheon
G
against the wall.
a
Push shower arm
I
onto shower rail connection
D
from above and secure using set screw
I1
.
b
Insert filter
J1
and seal
J2
in head shower
J
.
Next, screw head shower
J
onto shower arm
I
.
c
Screw taper nut
K1
of shower hose
K
onto hand
shower
L
using filter
L1
.
Screw nut
K2
of shower hose
K
onto the fitting.
Prior to installation
Installation
, Pages 2 + 3
GB
Содержание VITALIO 24785477
Страница 2: ...2 1 5 D 28 3 150 36 42 max 70 C 22mm 2 7 6 F 6 D E 1 127 X 4 B C A 30mm 19 377 22mm...
Страница 52: ...Grohe AG 27 685 27 860 X X S X X X X X X X X 8 4 8 6...
Страница 53: ...54...

