Service and Cleaning (cont.)
Weekly Cleaning Instructions for the LCD Coffee Dispensers: (cont.)
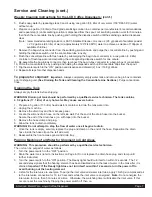
5. Flush soapy water by repeating steps 3 and 4 using one gallon (3.8 litre) of very warm (150°F/65.56°C) water
without soap.
6. Prepare one gallon (3.8 liter) of food grade sanitizing solution in a container per manufacturer’s recommendations
and repeat step (4) until sanitizing solution is dispensed from the spout. Let sanitizing solution work for 5 minutes,
then flush the concentrate line by pushing and holding the dispense switch until the sanitizing solution dispenses
clear.
(Note: recommended sanitizing solution is KAY-5 Sanitizer/Cleaner; mix one oz. (28 g) packet of sanitizer powder
+ 2 1/2 gallons (9.5 litre) of warm (approximately 120°F/48.89°C) water to achieve a solution of 100ppm of
available chlorine).
7. Remove the bag-in-box connector from the sanitizing solution basin and purge the concentrate line by pushing and
holding the dispense switch until the concentrate tube runs dry.
8. Flush the concentrate line with fresh water by submerging the bag-in-box connector in a one gallon (3.8 litre)
container of fresh tap water and activating the corresponding dispense switch for one minute.
9. Re-assemble the bag-in-box connector, then reconnect the bag-in-box connector to a bag-in-box of concentrate.
10. Prime the concentrate line by pushing and holding the dispense switch until concentrate drips from the spout.
11. Flip the water switch to the “ON” position and dispense and discard (2) 6 oz. (168 g) drinks.
12. Repeat all steps for other dispense heads.
To prepare for shipment:
Important - Always completely empty water tank and remove bag in box containers
prior to shipping unit. (See Draining the Tank and Cleaning the Concentrate Line Sections). Purge concentrate
lines.
Draining the Tank
Always empty the tank before shipping.
WARNING: Draining of tank should be performed by a qualified service technician. The tank contains
4 1/2 gallons (17.1 litre) of very hot water. May cause severe burns.
1. Prepare a 5 gallon (17.5 litre) heat resistant container to drain the tank water into.
2. Unplug the machine.
3. Remove the drain tray and front access panel.
4. Locate the silicone drain hose on the left side wall. Put the end of the drain hose into the bucket.
Secure the end of the drain hose (i.e. with tape) into the bucket.
5. Remove the hose clamp and plug.
6. Allow the tank to drain completely.
WARNING: Do not attempt to stop the flow of water once it begins to drain.
7. Once the tank is empty, securely replace the plug and clamp on the end of the hose. Reposition the drain
hose inside the hose clip on the left side wall.
8. Reassemble the front access panel and drain tray.
Purging Machine of all Water for Shipment in Cold Areas
WARNING: This procedure should be performed by a qualified service technician.
The unit can be purged of water as follows:
1. Turn the power switch to the "OFF" position.
2. Drain the water tank (refer to instructions on Page 6.) Do not replace the drain hose plug and clamp until
further instructed.
3. Turn the power switch to the "ON" position. The Ready light should turn itself on within 12 seconds. The 12
second delay signals that the heating element has been disabled due to the lack of water in the tank after it is
drained. Important: If the Ready light does not turn itself on within 12 seconds, turn the power off to
avoid burning out the heating element.
4. Listen for the inlet valve to energize. To purge the inlet valve and water inlet tube, apply 10-20 psi compressed air
to the inlet valve connection for 10 to 20 seconds while the inlet valve is energized. Note: Do not energize the
inlet valve for more than 5 minutes at a time. Otherwise, the watchdog timer will disable the inlet valve. If this
occurs, reset the machine by flipping the power switch off then on.
American Metal Ware Liquid Coffee Dispenser
Page 7
Содержание American Metal Ware LCD2-1
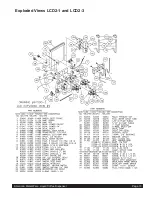
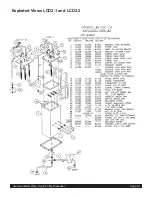
Страница 12: ...Exploded Views LCD2 1 and LCD2 3 American Metal Ware Liquid Coffee Dispenser Page 12 ...
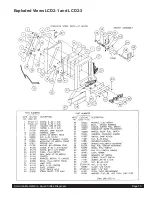
Страница 13: ...American Metal Ware Liquid Coffee Dispenser Page 13 Exploded Views LCD2 1 and LCD2 3 ...
Страница 14: ...American Metal Ware Liquid Coffee Dispenser Page 14 Exploded Views LCD2 1 and LCD2 3 ...
Страница 15: ...American Metal Ware Liquid Coffee Dispenser Page 15 Exploded Views LCD2 1 and LCD2 3 ...
Страница 18: ...American Metal Ware Liquid Coffee Dispenser Page 18 Wiring Diagram 120 240V ...
Страница 19: ...American Metal Ware Liquid Coffee Dispenser Page 19 Wiring Diagram 120 240V ...
Страница 20: ...American Metal Ware Liquid Coffee Dispenser Page 20 Wiring Diagram Rev Release ...
Страница 21: ...American Metal Ware Liquid Coffee Dispenser Page 21 Wiring Diagram ...
Страница 22: ...American Metal Ware Liquid Coffee Dispenser Page 22 Wiring Diagram for High Volume Remote BIB Applications ...
Страница 23: ...American Metal Ware Liquid Coffee Dispenser Page 23 Wiring Diagram for High Volume Remote BIB Applications ...


