– 17 –
C R O S S C O U N T R Y F I V E - W A L L S E R I E S S T R A I G H T L E A N T O • G R E E N H O U S E I N S T R U C T I O N S
Aluminum Frame Assembly
& Installation
(contd.)
E
G
F
4.
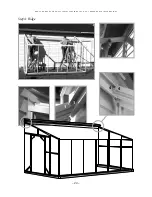
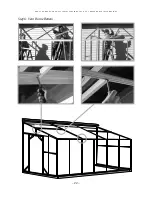
RIDGE
(See Page 20)
NOTE:
Refer to drawings for ridge height.
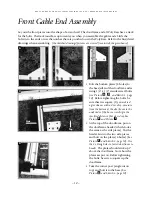
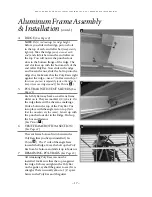
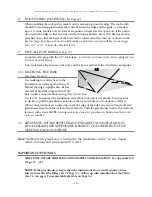
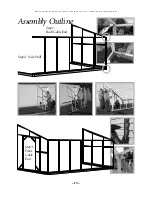
Before you slide in the ridge, put one bolt
in the top of each end rafter bar
(temporarily
tighten)
. Take the ridge
(one person at each
end)
and slide it between the end rafter on
the top. You will notice the punched-out
slots in the bottom flange of the ridge. The
end slot lines up with the bottom side of the
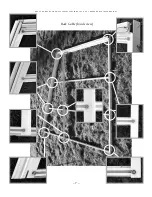
end rafter Poly Bar. Now slide in the ridge
and loosen the nut, slide the bolt up into the
ridge slot. Make sure that the Poly Bar is tight
against the ridge – use a 7/16 flat wrench
(at
this time you can temporarily fasten the ridge to
keep it rom moving around) (See Picture
E
)
.
5.
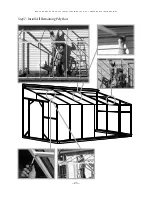
POLY BAR WITH VENT SLIDERS
(See
Page 21)
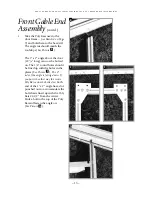
Each Poly Bar may have a small vent frame
slider on it. They are marked 1/2/3/4 etc. On
the ridge there will be the same markings.
Slide a bolt in the top of the Poly Bar. Put
into place with the angle cut on top
(Note
that the numbers are the same).
Line it up with
the punched out slot in the Ridge. Slide up
the bot and fasten it.
(See Picture
F
).
6.
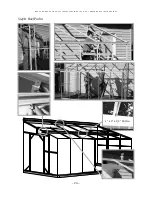
VENT FRAME BOTTOM SECTION
(See Page 22)
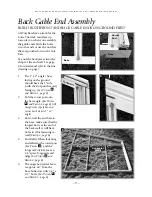
The vent frame bottom fits in between the
Poly Bars that you hve just installed
(See
Picture
G
).
The 2” side of the angle faces
towards the Ridge. Move the bolt up the Poly
Bar from he bottom and slide it up to fasten it.
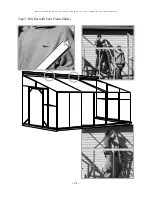
7.
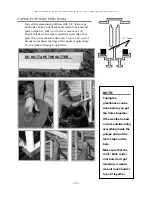
REMAINING POLY BARS
(See Page 23)
All remaining Poly Bars can now be
installed. Make sure that the top is against
the ridge. Before you tighten the Poly Bar
on the gutter, eyeball the gutter to see if it is
straight. There is usually about a 1/8” space
between the Poly Bar and the gutter.

