background image


CIP 1500 – User and Maintenance Manual


25


Chapter 

11 


ROUTINE MAINTENANCE


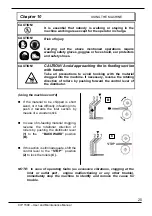
CAUTION! 


Risk of injury 

Before starting any servicing or setting operation, switch 
off the engine and take off the key from the control panel. 

Carrying out the above mentioned operations require 
wearing safety gloves, goggles or face shield, ear
protectors and safety shoes. 


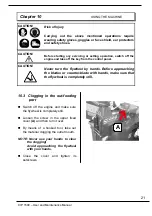
CAUTION! 


Never turn the flywheel with hands. Before approaching 
the blades or counter-blade with hands, make sure the 
flywheel is completely still


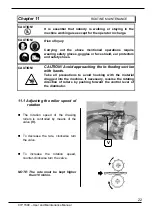
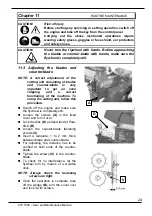
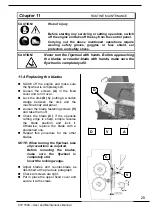
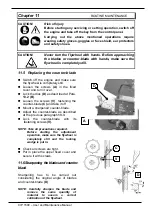
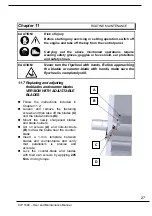
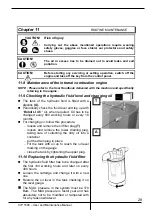
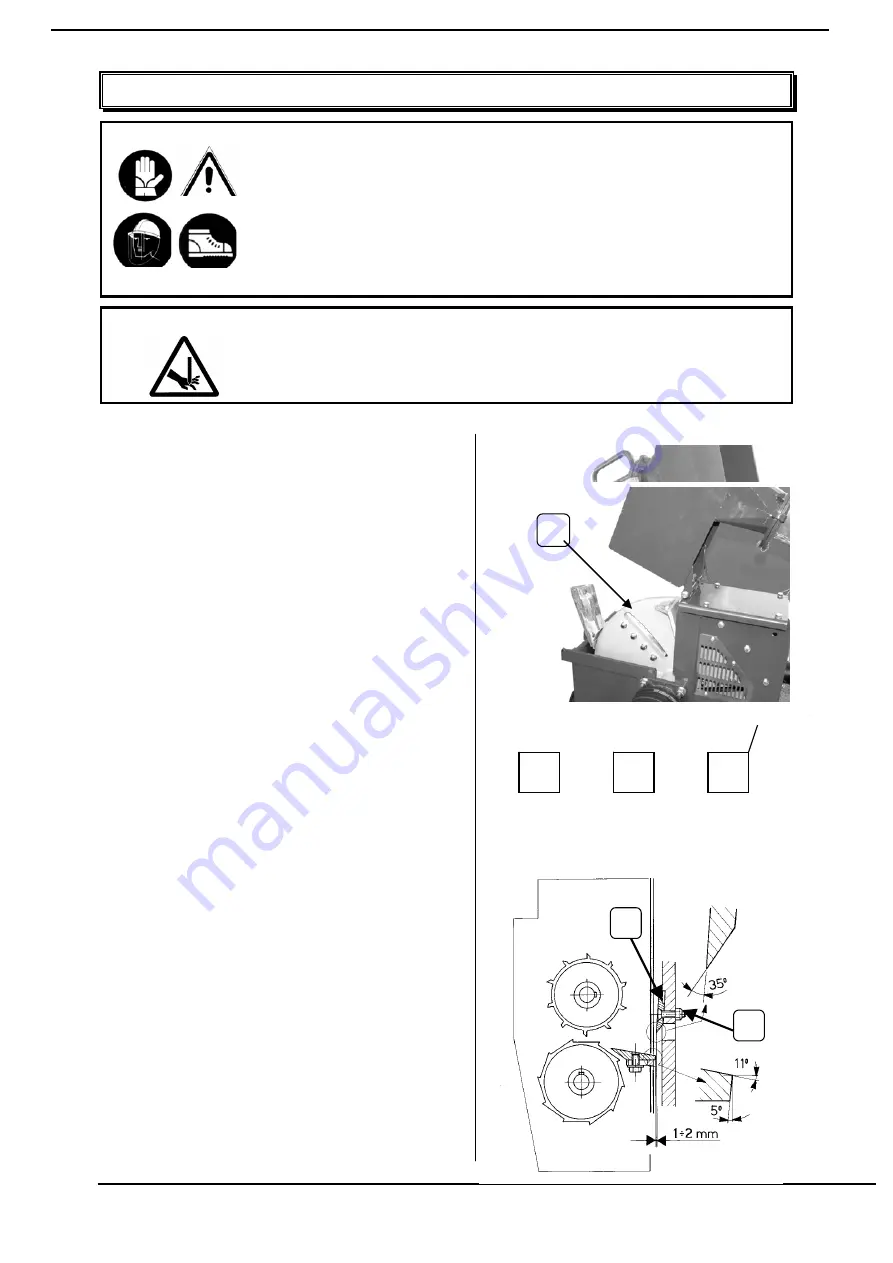
11.4 Replacing the blades 


„

  Switch off the engine and make sure 

the flywheel is completely still. 

„

  Loosen the screws 

(A)

 in the fixed 

cover and turn it over. 

„

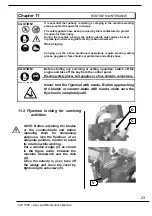
  Lock the disk 

(D) 

by putting a wooden 

wedge between the disk and the 
machine body wall panel 

„

  Loosen the blade fastening screws 

(V) 

and take them off.


„

  Check the blade 

(C)

: if the opposite 

cutting edge is sharp, simple reverse 
the blade position and lock it. 
Otherwise, replace the blade with a 
sharpened one

„

  Repeat this procedure for the other 

blades. 


NOTE: When turning the flywheel, take 

all precautions as required. 
Before removing the blades, 
make sure the flywheel is 
completely still. 
Insert the locking wedge. 


„

 Adjust blades and counter-blade as 

described at the previous paragraph. 

„

  Check all screws are tight. 

„

  Put in place the upper fixed cover and 

secure it with screws. 

V

C

D

D

Содержание CIP 1500

Страница 1: ...ww green technik com Info green green technik com info green produzione it By GREEN PRODUZIONE s r l Via Mons Vigolungo 2 12040 VEZZA D ALBA CAUTION Befor using the machine carefully read this Handboo...

Страница 2: ...nce with Law 7 2 6 Preservation of this Manual 7 2 7 Information to the User 8 03 Technical description of the machine 9 04 Main components of the machine and their position 10 05 Protections and safe...

Страница 3: ...29 11 12 Lubricating the movable roller slideways 29 11 13 Lubricating the retaining collar of the unloading conveyor 29 11 14 Checking oil level and changing oil in the overdrive PTO version 29 11 15...

Страница 4: ...sely affect the machine serviceability They are written with italic characters WARNINGS This term identifies the events that might jeopardize the operator s safety They are written with italic charact...

Страница 5: ...ll the maintenance adjustment control and replacement operations described in this Manual have to be carried out only after the machine has been stopped During the removal adjustment or replacement of...

Страница 6: ...in conformity with the law in force in order to warn the operator for the residual risks actual during the machine operation During the machine transportation there may be a risk for overturning For...

Страница 7: ...al in any way whatever printing photocopy microfilm or any other means is prohibited the same is also for its working out reproduction or distribution through systems legal entities or natural persons...

Страница 8: ...ular it must be always available for advice about the following Working conditions of the machine Working place of the operator Instructions concerning start up use transportation installation assembl...

Страница 9: ...ng the electric equipment installed on the machine is an exclusive responsibility of the Customer who shall apply them properly and suitably to their intended use 5 The Manufacturer is relieved from a...

Страница 10: ...ucing them into chips The chips are ejected by the centrifugal action of the chipper disk into an outlet conveyor Such conveyor may be oriented according to the outlet direction Technical Specificatio...

Страница 11: ...CIP 1500 User and Maintenance Manual 10 Chapter 4 MAIN COMPONENTS OF THE MACHINE AND THEIR POSITION EJECTION TUBE INLET MONTH CONTROL BAR TRUCK MOTOR OUTLET DEFLECTOR DRAWBAR...

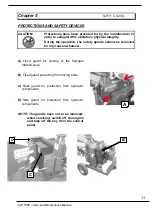
Страница 12: ...uring the operation the safety guards cannot be removed for any reason whatever A Fixed guard for closing of the flywheel rotation zone B Fixed guard protecting from driving belts C Rear guard for pro...

Страница 13: ...uring the working process the safety guards have not to be removed for any reason whatever CHAPTER 5 Protections and safety devices In particular the fixed guards guarding from either driving or machi...

Страница 14: ...or carry out servicing activities CHAPTER 12 Using the machine Before any setting up or servicing intervention switch off the engine and take off the key from the control panel CHAPTER 14 Routing and...

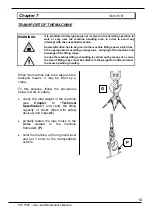
Страница 15: ...case the machine lifting or handling is carried out by means of a crane the size of lifting ropes must be suitable to the weight to he lifted in order to assure operating in safety When the machine ha...

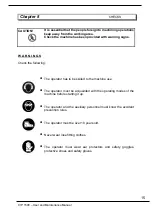
Страница 16: ...R N I N G S Check the following The operator has to be skilled to the machine use The operator must be acquainted with the operating modes of the machine before starting it up The operator and the aux...

Страница 17: ...the cardan shaft to be 30 as a maximum Connect the machine to the 3 point linkage of the tractor Plug into safety sockets B C D Connect the cardan shaft to both power take off of the tractor and input...

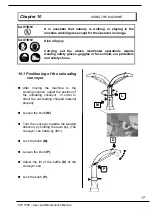
Страница 18: ...s goggles or face shield ear protectors and safety shoes 10 1 Positioning of the unloading conveyor After moving the machine to the working location adjust the position of the unloading conveyor in or...

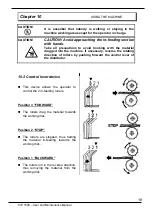
Страница 19: ...ragged into the machine If necessary reverse the rotating direction of rollers by pushing forward the control lever of the distributor 10 2 Control lever device This device allows the operator to cont...

Страница 20: ...direction of rollers by pushing forward the control lever of the distributor Start the engine by following the procedure indicated in the specific handbook and let it warm a few minutes at low speed...

Страница 21: ...tating direction of rollers by pushing forward the control lever of the distributor Using the machine cont d If the material to be chipped is short sized or it has difficulty in feeding into push it t...

Страница 22: ...panel CAUTION Never turn the flywheel by hands Before approaching the blades or counter blade with hands make sure that the flywheel is completely still 10 3 Clogging in the out feeding port Switch o...

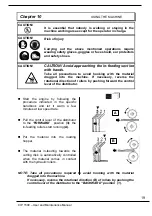
Страница 23: ...CAUTION CAUTION Avoid approaching the in feeding section with hands Take all precautions to avoid hooking with the material dragged into the machine If necessary reverse the rotating direction of roll...

Страница 24: ...ore starting any servicing or setting operation switch off the engine and take off the key from the control panel Wearing safety gloves and goggles or a face shield is compulsory CAUTION Never turn th...

Страница 25: ...blades and counter blade is very important to get an even chipping and a correct functioning of the machine To set up the cutting unit follow this procedure Switch off the engine and make sure the fl...

Страница 26: ...ywheel is completely still Loosen the screws A in the fixed cover and turn it over Lock the disk D by putting a wooden wedge between the disk and the machine body wall panel Loosen the blade fastening...

Страница 27: ...A in the fixed cover and turn it over Lock the disk D as described at Para 13 2 B Loosen the screws V fastening the counter blade C and take it off Mount a sharpened counter blade Adjust the counter...

Страница 28: ...ade with hands make sure the flywheel is completely still 11 7 Replacing and adjusting the blades and counter blades VERSION WITH ADJUSTABLE BLADES Follow the instructions included in Chapter 11 2 Loo...

Страница 29: ...ck A Periodically check the fluid level and top up with Roloil LI 46 oil when required Oil has to be changed every 800 working hours or every 18 months For changing oil follow this procedure loosen an...

Страница 30: ...flywheel supports V 11 12 Lubricating the movable roller slideways Using a manual grease lubrication pump enter grease to the greasing nipple of the slideway on the movable roller support G 11 13 Lub...

Страница 31: ...rol panel 11 15 Checking the tension replacing the driving belts TRACTOR PTO version To carry out the following operations the safety guard should be removed A Check the belt tension by pressing the b...

Страница 32: ...off the engine and make sure the flywheel is completely still Loosen the screws in the safety guard C and take off the guard Check the belt tensioning T by pressing down with a hand If the belt bows d...

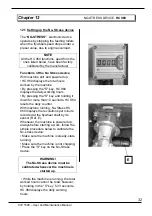
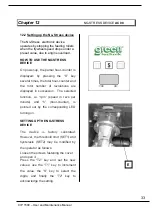
Страница 33: ...ily working hours By pressing the S key and holding it down for more than 10 seconds HC 960 resets the daily counter With machine running No Stress HC 960 displays the revolutions per minute recorded...

Страница 34: ...total hour counter and the rotor number of revolutions are displayed in succession The selected function i e rpm speed in revs per minute and h hour counter is pointed out by the corresponding LED tur...

Страница 35: ...ked undercarriage To handle the chipper Version with aboard control Set the diverter A in the track position Shift the levers B Forward to move forward Backward to move backwards To steer to the right...

Страница 36: ...the same time by shifting them backwards To steer to the right Shift the lever B2 to the centre Shift the lever B1 forward To steer to the left Shift the lever B2 forward Shift the lever B1 to the ce...

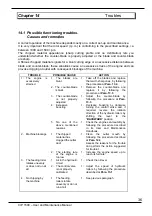
Страница 37: ...eplace it by following the procedure at Para 13 5 3 The counter blade is not properly adjusted 1 Adjust the counter blade by following the procedure at Para 13 3 4 Excessive boosting 1 Decrease boosti...

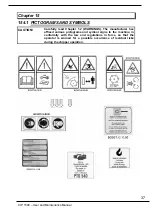
Страница 38: ...CAUTION Carefully read Chapter 1 2 WARNINGS The manufacturer has affixed various pictograms and symbol signs to the machine in conformity with the law and regulations in force so that the operator is...

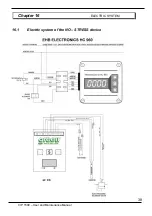
Страница 39: ...CIP 1500 User and Maintenance Manual 38 Chapter 16 ELECTRIC SYSTEM 16 1 Electric system of the NO STRESS device AC 08...

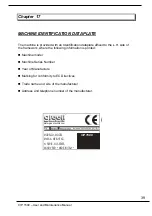
Страница 40: ...framework where the following information is printed Machine model Machine Series Number Year of Manufacture Marking for conformity to EC Directives Trade name and site of the manufacturer Address and...

Страница 41: ...nment where we live Sheaths flexible pipes and hoses plastic parts or non metallic components have to be disassembled and separately disposed of The casing and all the metal parts of the machine have...

Страница 42: ...the fiscal document issued upon delivery of the machine by the vendor Our company undertakes to free of cost repair or replace the components that within the guarantee time reveal any defect in manufa...

Страница 43: ...e in the manufacturer s own judgement Any claims for damage in consequence of harms caused by defects breakage or faults of the machine shall not be taken into consideration This guarantee does not co...

Отзывы: