21
FINISH THE MODEL
❏
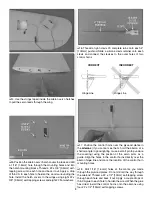
1. Make a strap from the included hook and loop material
to fi t your receiver. Cut a piece of foam rubber (not included)
to fi t your receiver and strap the receiver to the tray in front
of the tail servos as shown. Connect the rudder and elevator
servos to the receiver (and ESC if applicable).
❏
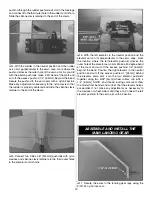
2. Mount the receiver battery pack next to the receiver in
the same manner.
❏
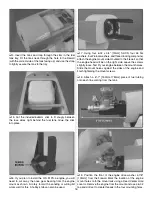
3. Mount your switch harness to the fuselage side in the
location that you prefer. We mounted ours below the wing
near the leading edge. If your muffl er outlet is on the side of
the plane, be sure to mount the switch on the opposite side.
Connect the switch to the battery and receiver, being sure
to secure the connection between switch and battery. You
can also install a charge jack receptacle. However, we chose
to leave this out since the Shoestring has a magnetically
attached canopy hatch. Just be sure to keep the charge jack
lead in an accessible location in the fuse.
❏
4. With everything connected, we suggest bundling the
excess wires and use a tie strap to keep them out of the way
of the hatch opening and tail servos.
❏
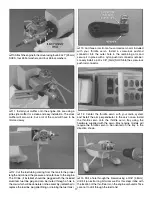
5. We used some scrap pieces of fuel tubing to support
the dual receiver antennas in the correct orientation against
the inside of the fuse (see your radio manual for details).
If you have installed an FM or PCM receiver, route your
receiver antenna through the antenna tube and out the
aft end of the fuse. Be sure to install a strain relief on the
antenna (if applicable).


