16
❏
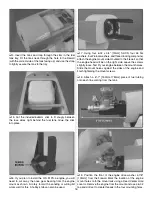
4. Insert the hook and loop through the slots in the fuel
tank tray. Fit the tank neck through the hole in the fi rewall
(with the correct side of the tank facing up) and use the strap
to tightly secure the tank to the tray.
❏
5. Cut the included 6x6mm stick to fi t snugly between
the fuse sides right behind the fuel tank. Glue the stick
into place.
❏
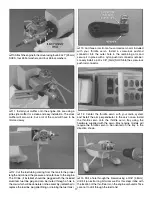
6. If you plan to install the O.S. 81FS-a engine, you will
need to cut away the nose gear bearing from the engine
mount as shown. A rotary tool with a sanding or cutting bit
works well for this. A hobby knife can also be used.
❏
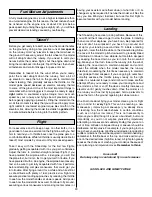
7. Using four 6-32 x 3/4" [19mm] SHCS, four #6 fl at
washers, four #6 lock washers, and thread locking compound,
attach the engine mount side-mounted to the fi rewall so that
the engine head will be on the right side. Leave the screws
slightly loose. Test fi t your engine between the mount halves.
Slide the mount halves against the sides of the engine and
fi nish tightening the mount screws.
❏
8. Attach a 6"-7" [152mm-178mm] piece of fuel tubing
onto each line coming from the tank.
❏
9. Position the front of the engine drive washer 4-7/8"
[124mm] from the fi rewall. Mark the location of the engine
mount holes onto the mount rails using a Dead Center Hole
Locator. Remove the engine from the mount and use a 6-32
tap and drill set to create threads in the four mounting holes.


