❏
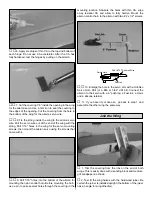
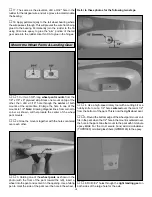
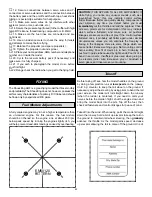
2. Hold a ruler to the fuse centered on one of the cowl
mounting blocks. Use a felt-tip pen to draw a line directly
onto the fuse along the straightedge.
❏
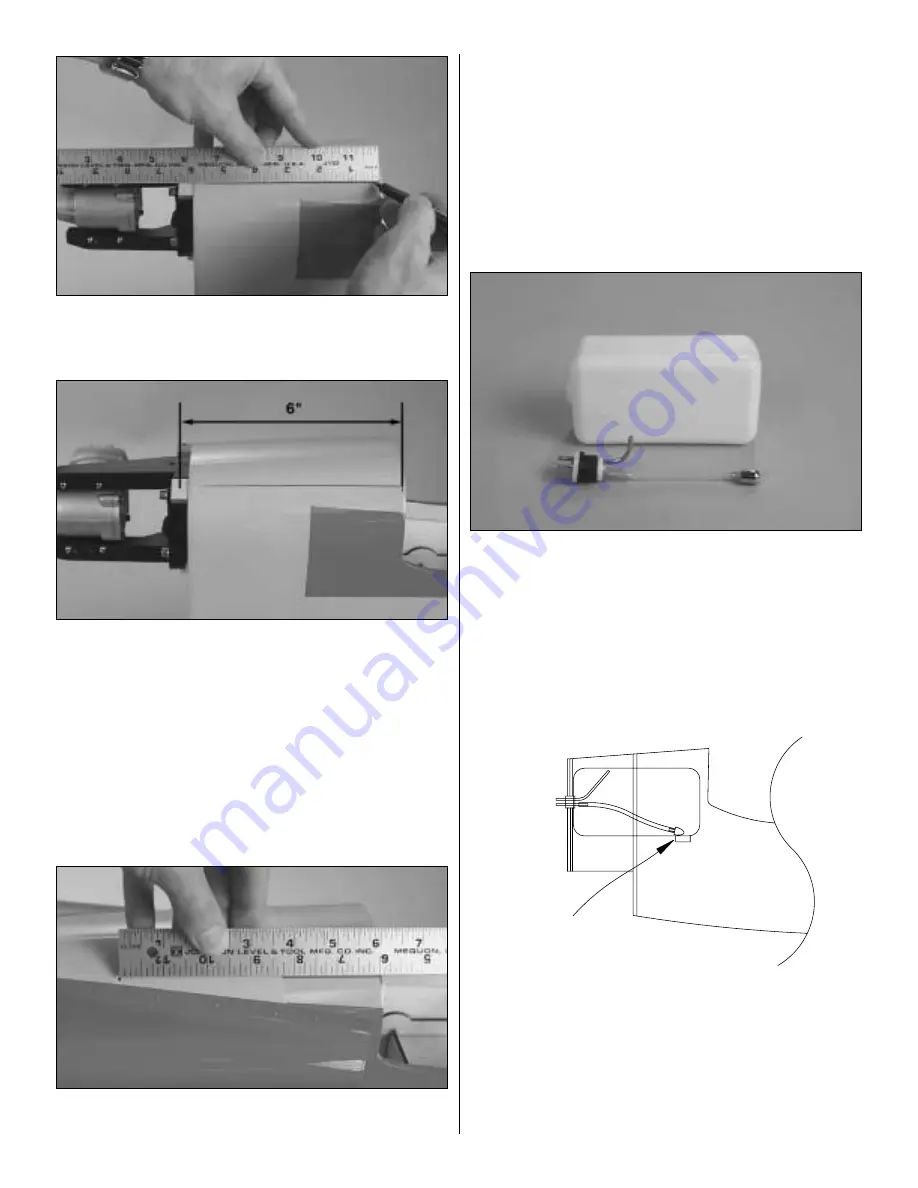
3. Mark a reference point on the end of the line exactly
6" from the center of the cowl mounting block.
❏
4. Mark the location of the remaining three cowl mounting
blocks the same way.
❏
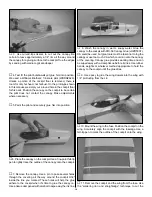
5. Place the cowl on the fuse. Mount the spinner and prop
to the engine. Position the cowl on the fuse so it is in
alignment with the spinner. Be certain there is at least a
3/32" gap between the front of the cowl and the back plate
of the spinner. It may be helpful to have an assistant hold the
cowl for you.
❏
6. Align the ruler with the line on the fuselage. Mark the
center of the cowl mounting block on the cowl 6" from the
reference point. Drill a 3/32" hole through cowl and the
mounting block at the mark. Enlarge the hole in the cowl only
with a 1/8" drill. Mount the cowl to the block with a #4 x 3/8"
screw and #4 washer.
❏
7. With your assistant holding the cowl in position, mark,
drill and mount the cowl to the remaining three cowl
mounting blocks the same way.
Before finishing the cowl, now is a good time to install the
fuel tank...
❏
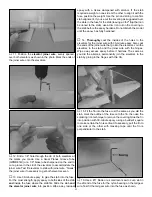
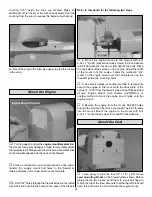
8. Arrange the stopper and tubes as shown in the photo,
then insert them into in the tank. Tighten the screw to
expand the stopper, thus sealing the tank. Be certain the fuel
line weight (clunk) at the end of the fuel line inside the tank
does not contact the rear of the tank. Otherwise, the line
may become stuck above the fuel level and discontinue fuel
flow. Remember (or use a felt-tip pen to mark) which tube is
the fuel pick-up tube and which tube is the vent (that will be
connected to the pressure fitting on the engine muffler).
❏
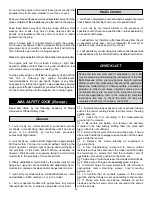
9. Install the tank in the fuse. Fit the neck through the
hole in the firewall. Be certain the vent tube inside the tank
is pointing upward. Cut the 1/4" x 3/4" x 5" balsa stick to the
correct length to fit between the fuselage sides under the aft
end of the tank (the approximate length will be 4-11/16").
Position the “fuel tank support” in the fuse, then glue it into
position. If necessary, the support may be broken free to
remove the tank when maintenance is required.
BALSA FUEL
TANK SUPPORT
16


