13
❏
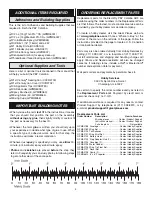
4. Plug the battery lead from your two speed controls
into the “Y”connector (your “Y” connector may look different
than the one pictured) and plug the two receiver leads into a
servo “Y” connector. Secure the servo lead to the extension
with tape, a piece of shrink tube or some other method to
keep them from coming unplugged.
❏
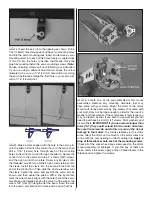
5. From the adhesive hook and loop material provided
with the kit, cut a piece large enough to fi t the back of your
speed controls. Adhere one side of the hook and loop to the
speed controls and the other sides to the side of the plywood
structure inside of the fuselage. Attach the speed controls to
the hook and loop material as shown.
❏
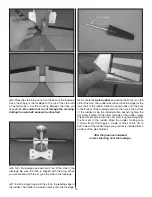
6. Pull the wires from the speed control through the forward
hole in the top of the fuselage.
❏
7. Install a “Y” harness into the aileron port of the receiver.
Then feed the wire through the forward hole with the speed
control wires.
IMPORTANT: Before experimenting with different battery
combinations and connecting multiple battery packs with
adapter plugs, refer to the Battery Precautions on page 15.
❏
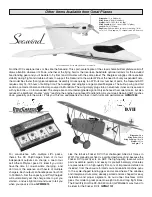
8. Temporarily place your motor/ receiver battery onto the
plywood tray inside of the fuselage.
If you have propellers
or prop adapters installed on the motors, remove them!
❏
9. Without attaching the wing to the fuselage, plug the
wires from the motor into the wires from the speed control,
following the instructions that came with your speed control.
❏
10. Read the instructions that came with your speed control
to become familiar with the connections and the motor arming
sequence. Once you are familiar with the operation of the
speed control turn on your transmitter. Plug the motor/receiver
battery into the “Y” connector from the speed control. Follow
the sequence for arming the motors from the speed control
instructions. Slowly advance the throttle and be sure that both
motor shafts are turning counter clockwise when viewed from
the front of the airplane. If either of the motors is not turning
the correct direction, shut the motors down using the throttle
control on the transmitter. Unplug any two of the three wires
from the speed control and reverse the connection. This will
allow the motor to turn the proper direction. When you are sure
both motors are turning the correct direction, unplug the battery
from the speed controls and then turn off the transmitter.
❏
11. Use a small piece of masking tape to identify each
of the speed control wires so that you can unplug them and
later identify the proper sequence for plugging them in. Once
this is complete unplug the motors from the speed controls
and set the wing aside.
❏
12. From the adhesive hook and loop material provided
with the kit, cut a piece large enough to secure your battery
pack to the battery tray. Adhere one side of the hook and loop
to the battery and the other side to the plywood battery tray.
When you install the battery it will be held in place by both
the hook and loop attached to the battery tray as well as the
hook and loop strap pre-installed around the battery tray.


