2019-06-12
401-705M
YP3025A
Appendix R - Row-Pro™
184
Monitor Only
:
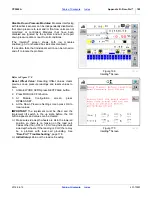
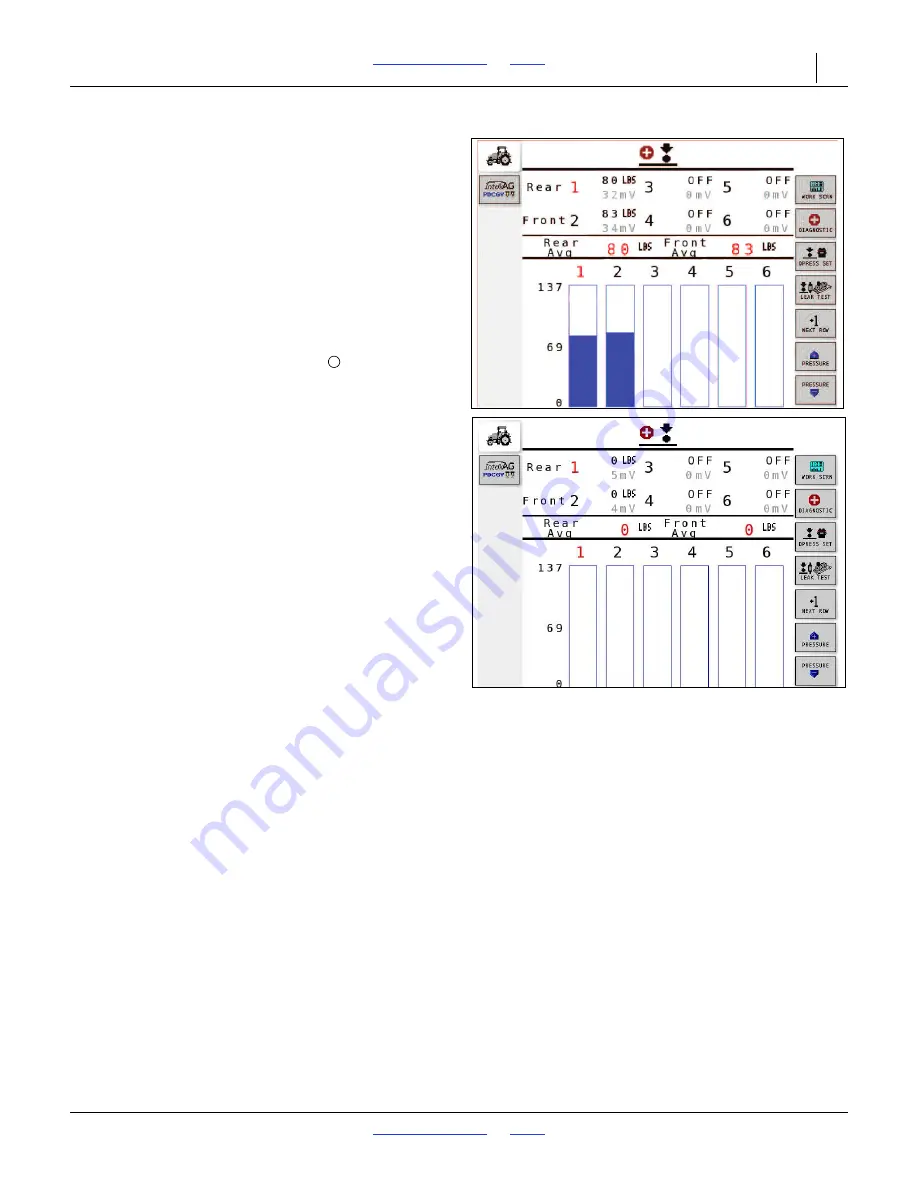
This screen disables control, but still
reports sensor feedback. From there, press the
Down
Pressure Diagnostic
key and then press the
Float
Mode ON
button to release all of the air from the system.
Next, press the
Float Mode OFF
button. Stay on the
Diagnostic
screen and make a planting pass. Note the
pressure displayed on the
Diagnostic
screen and then
evaluate the seed trench. If the seed trench results are
acceptable, use the displayed pressure as your target
rate.
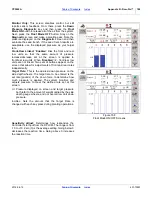
Front-Rear Linked:
“
Enabled
” links the front and rear
row units so that the same amount of pressure
increase/decrease set at the screen is applied to
front/rear row units. When “
Disabled
” - front/rear row
units are not linked. Two sets of buttons appear on the
screen that allow for adjustments of front and rear rates
independently.
Target Rate:
This is the desired down pressure on the
side depth wheels. The target rate to be entered is the
set rate (pounds) of the down force to determine how
much pressure is applied. The system monitors and
adjusts pressure to meet the defined rate set at this
screen.
Pressure displayed on screen and target pressure
both refer to the amount of weight carried by the side
depth gauge wheels, and not overall row unit down
pressure.
Inc/Dec: Sets the amount that the Target Rate is
changed with each key press during planting operations.
Sensitivity Adjust:
Determines how responsive the
Controller is to input from the DPLCM. The range is from
-10 to +10. Zero (0) is the average setting. Going below 0
decreases the reaction time. Going above 0 increases
the reaction time.
Figure 168
Float Mode ON/OFF Screens

