Section 1: Assembly & Set-up
NTS2507, NTS2509, & NTS2511 s/n+ 2019+ NTS Seeder 313-900M
7/1/19
11
Section 1: Assembly & Set-up
Tractor Requirements
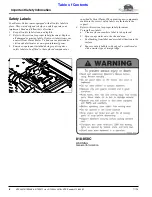
WARNING
!
To avoid serious injury or death:
•
•
Make certain tractor’s 3-point lifting capacity and weight
is capable of lifting and controlling the seeder under all
operating conditions. Refer to “
Specifications &
Capacities”
on page 66 for seeder weight.
Tractor horsepower and hitch category should be within
the range noted below. Tractors outside the horsepower
range must not be used.
Pull-Type Hitch Minimum Horse Power
NTS2507 . . . . . . . . . . . . . . . . . . . . . . . . . . . .60 hp
NTS2509 . . . . . . . . . . . . . . . . . . . . . . . . . . . .80 hp
NTS25011 . . . . . . . . . . . . . . . . . . . . . . . . . . . 100 hp
3-Point Hitch Minimum Horse Power
NTS2507 . . . . . . . . . . . . . . . . . . . . . . . . . . . .70 hp
NTS2509 . . . . . . . . . . . . . . . . . . . . . . . . . . . .90 hp
NTS25011 . . . . . . . . . . . . . . . . . . . . . . . . . . . 110 hp
3-Point Hitch Category
NTS2507 without Native Seedbox . . . . . . . . . Cat. I
NTS2507, NTS2509, & NTS2511 . . . . . . . . . Cat. II
Hydraulic Hook-up
Pull-Type Hitch . . . . Duplex outlet with factory float
3-Point Hitch . . . . . . . . . . . . . . . . . . . . . . . . . None
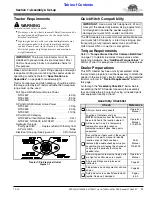
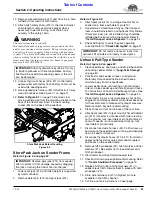
Electrical Hook-up (See Figure 1-1) . . . . . 7-Pin Outlet
Tractor 7-Pin Electrical Outlet
Figure 1-1
IMPORTANT:
The lower 3-point arms must be
stabilized to prevent side-to-side movement. Most
tractors have sway blocks or adjustable chains for
this purpose.
11640
Quick Hitch Compatibility
The NTS Seeders are quick hitch compatible. Make sure
your quick hitch lift capacity is rated for picking up and
transporting a fully loaded seeder. Use Land Pride’s
QH20 Quick Hitch or one that is compatible.
Torque Requirements
Refer to
“Torque Values Chart for Common Bolt Sizes”
on page 70 to determine correct torque values when
tightening hardware. See
bottom of chart for exceptions to common torque values.
Dealer Preparations
This NTS Seeder has been mostly assembled at the
factory. Some preparation will be necessary to attach the
seeder to the customer’s tractor. Make sure the intended
tractor conforms to
listed on
this page.
Go through the
below before
assembling the NTS Seeder. Speed up the assembly
task and make the job safer by having all needed parts
and equipment readily at hand.
Assembly Checklist
Check
Reference
All major frame components
Operator’s
Manual
Location of fasteners and pins.
NOTE:
All hardware from the factory has
been installed in the location where it
will be used. If a part is temporarily
removed for assembly reasons,
remember where it goes. Keep parts
separated.
Operator’s
Manual
313-629M
Be sure the part gets used in the correct
location. Use parts manual to identify
location of parts that have been
removed. By double checking while you
assemble, you will lessen the chance of
using a part incorrectly that may be
needed later.
Parts
Manual
313-629P
All working parts are moving freely, bolts
are tight and cotter pins are spread.
Operator’s
Manual
All grease fittings are in place and
lubricated.
Proper take-up and alignment of all drive
chains.
Safety decals are correctly located and
legible. Replace if damaged.
Pages
IMPORTANT:
Use a quick hitch designed to lift and
transport the seeder fully loaded. Using a quick hitch
not designed to handle the seeder weight can
damage your quick hitch, seeder, and tractor.


