6
3 About the Initial Setup screen
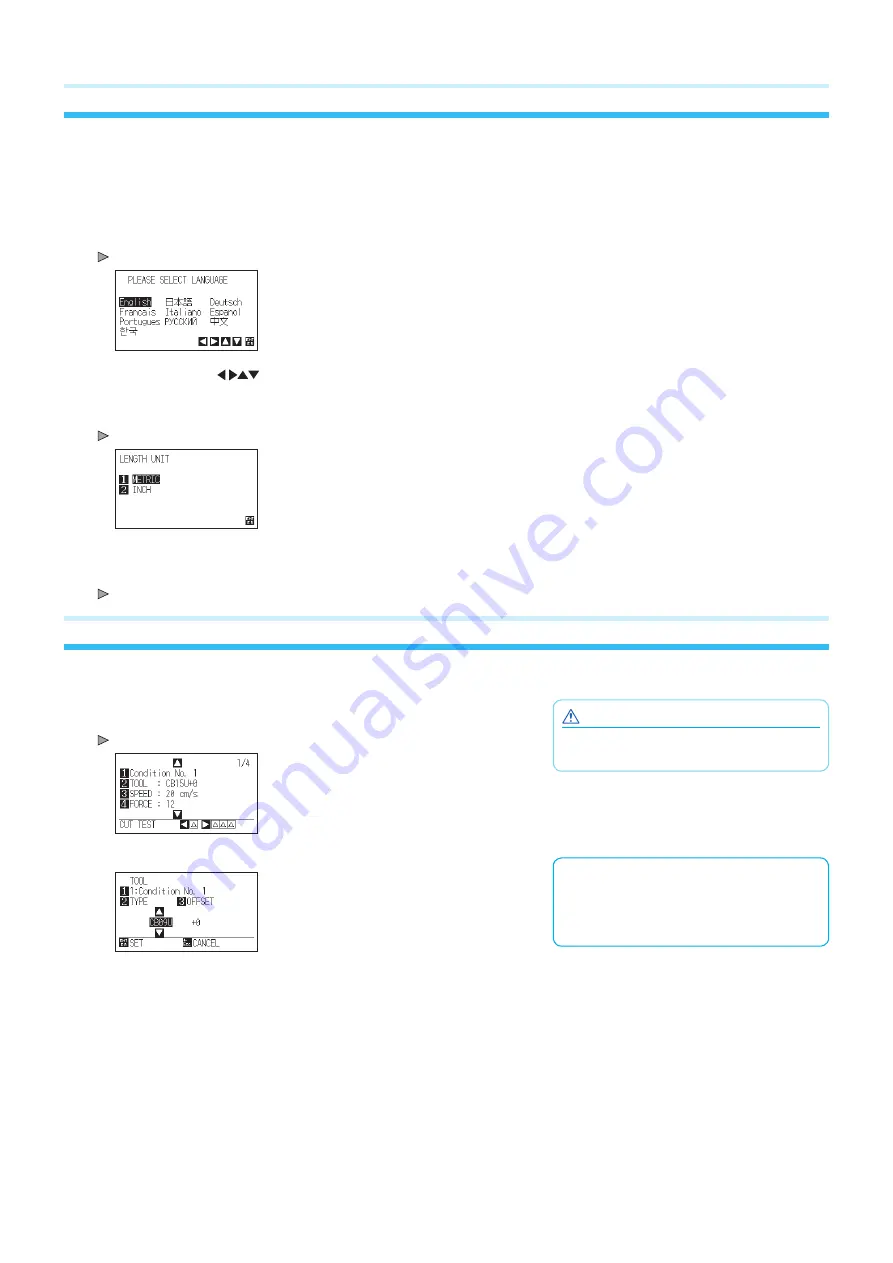
The Initial Setup Screen appears only when powering up the machine for the first time after purchase. Here, you can set the
display language and length unit.
You can also change the settings from the menu after a setup.
(See “Display Language Settings (Language)” and “Display Length Unit Settings (Length Unit)” in the User’s Manual (PDF).)
See “Connecting to the Power Supply” in the User’s Manual (PDF) for turning on the power.
1
Once the machine is powered on (" | " side) a message will be displayed after the version will be displayed.
Here, DISPLAY LANGUAGE setting screen is displayed.
2
Use the POSITION (
) keys to select the language.
(You can also change the settings from the menu after a setup.)
3
Press the [ENTER] key.
After the DISPLAY LANGUAGE is selected, the LENGTH UNIT screen will appear.
4
Press the [1] key (METRIC) or the [2] key (INCH) to select the length unit setting.
5
Confirm the setting and press the [ENTER] key.
Setting will be set, and it will return to default screen.
4 Tool adjustment and test cutting
After setting the Tool/Speed/Force/Acceleration, make test cutting, and repeat until optimal condition is achieved.
CAUTION
Do not touch the Tool tip when power is turned
on or during operation.
1
Load the media for test cutting in the plotter.
2
Press the [COND/TEST] key in the default screen.
CONDITION setting screen (1/4) is displayed.
Setting the Tool conditions
See “Selecting Tool Condition” in the User’s
Manual (PDF) for more information on how to
set the various cutting conditions.
3
Set the Tool conditions (Tool, Speed, Force, Acceleration).
Содержание FCX4000 SERIES
Страница 8: ...622659111...
Страница 10: ...2 2 3 1 USB 1 1 PHP33 CB15N HS 1 CB15U 1 1 PHP31 FIBER 1 KF700 BK 1P 1 PM CT 001 1 1...
Страница 12: ...4 1 1 2...
Страница 13: ...5 3 2 4 PDF 1 CHART HOLD OFF 2 3 CHART HOLD 4 CHART HOLD CHART HOLD CHART HOLD...
Страница 14: ...6 3 PDF PDF 1 2 POSITION 3 ENTER 4 1 2 5 ENTER 4 1 2 COND TEST 1 4 PDF 3...
Страница 16: ...622659111...


