


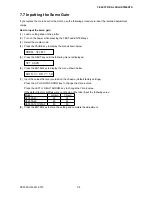

CE5000-UM-251-9370
6-29
6. DISASSEMBLY AND REASSEMBLY
How to reinstall the Y-flexible cable
(1) Clean the surface of the Y-rail with alcohol to remove any glue from the double-sided adhesive tape that
was attached the Y-flexible cable.
(2) Affix two pieces of double-sided adhesive tape to the flexible cable guide of the Y-rail. The first piece of
tape should start at the right end of the Y-rail. The position of the second piece of tape depends on the
model.
Size of the double-sided adhesive tape:
10 mm wide, 15 mm long for the first piece of tape (Nitto #500)
10 mm wide, 50 mm long for the second piece of tape (Nitto #500)
Position of the second piece of tape:
CE5000-40:
about 260 mm from the right end of the Y-rail
CE5000-60:
about 360 mm from the right end of the Y-rail
CE5000-120/120AP:
about 660 mm from the right end of the Y-rail
The first piece of double-sided adhesive tape.
Affix the tape onto the right edge of the Y-rail.
The second piece of double-sided adhesive tape.
Affix the tape at the specified position on the Y-rail.
(3) Insert the Y-flexible cable into the core and connect the Y-flexible cable to connector J501.
(4) Attach the core to the Y-relay board using double-sided adhesive tape.
(5) Move the pen block to the left end.
Содержание CE5000-120
Страница 1: ...CE5000 UM 251 09 9370 CE5000 Series SERVICE MANUAL MANUAL NO CE5000 UM 251 CUTTING PLOTTER...
Страница 24: ......
Страница 28: ...CE5000 UM 251 9370 3 4 3 OPERATIONS CE5000 120AP ENTER key ENTER key...
Страница 34: ......
Страница 36: ......
Страница 72: ......
Страница 90: ......
Страница 96: ......
Страница 100: ......
Страница 102: ...CE5000 UM 251 9370 10 2 10 PARTS LIST Outer Casing 1 2 3 4 5 8 6 7 9 10 13 11 12 14 15 16 18 17 19 20 21...
Страница 116: ......


