5
6
LAN
UP
DOWN
STOP
Trigger
( Figure 15 )
. Switch Manual/Remote Control Button to position "0" ( remote control stalls ) ( Figure 16 ).
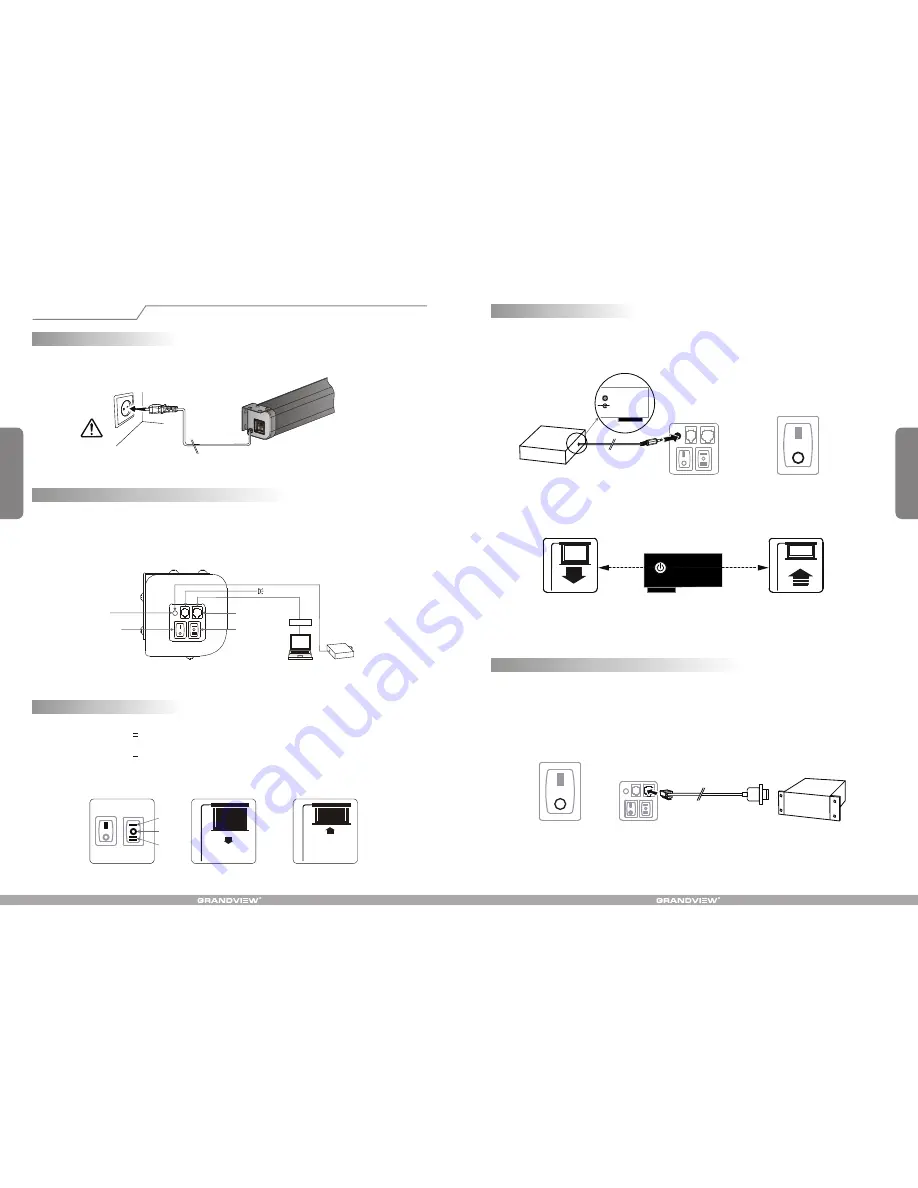
1. Insert one end of the signal cable into the
jack of the handle controller, and the other end into the + 5V-12V DC
output hole of the projector
.
2
+ 5V-12V DC
TRIGGER
3. When running the projector, the screen will spread the fabric automatic by synchronous; when closing the projector,
screen will be back automatic by synchronous too
.
( Figure 17 )
On
Off
4. If you don't need to use the t
, please draw off the burst line directly, then control it by your hand.
rigger control
RJ12
DB-9
Operation Instruction
Power supply connection
1. Take off the sticker on the lower tube.
2. Connect power supply ( Figure 10 ).
Figure 10
The screen has four kinds of optional control methods: Manual Control, Trigger Control, External Control (Central Control
or RS232/USB), IR Remote Control. When switching the Manual/Remote Control Switch Button to position "1", you can
use Manual Control to control up/pause/down of the screen. When switching to position "0", you can use Trigger, External
Control (Central Controller or RS232/USB) or IR Remote Control to control up/pause/down of the screen.
How to use Manual/Remote Control Switch Button: ( Figure 11 )
Manual/Remote
Control Switch Button
Trigger Jack
Central Controller
Manual Control
Connecting External IR
Projector
Computer Output Jack
Figure 11
1. Switch Manual/Remote Control Button to position "1" ( manual stalls ) ( Figure 12 ).
2.
" "
; it will come down slowly. When it is all the way down, it will
stop automatically ( Figure 13 )
.
3. Turn the switch to
" " to
the screen; it will go up into the metal casing. When it is all the way up, it
will stop automatically ( Figure 14 ).
4. To stop any time while the screen is in motion, turn the switch to 0.
Turn the switch to position
to lower the screen
position lower
How to use manual switch control:
Figure 12
Figure 13
Figure 14
How to use Trigger
Control:
Figure 15
Figure 16
Figure 17
1. Turn the manual/IR remote control switch to position "0" ( remote control stalls )
2. Plug one side of the signal cord into the computer output jack at left side of the screen's end cap, the other side of the
singal cord to plug into the jack of Central Controller or computer RS232/USB ( Note: in order to use RS232 Control,
an Adapter is necessary to be connected with, the Adapter is not in the accessory package ) ( Figure 19 ), and then
you can control up/pause/down of the screen via Central Controller or computer.
( Figure 18 ).
How to use External Control ( Central Controller or RS232 / USB ):
Figure 18
Figure 19
control system


