Control Interface Setup and Maintenance
3.
Press the Power button
to turn off the system.
Note
If power is cycled while a token is
present, the system tries to load the
software that is currently loaded on the
token. If you insert a token that contains
older software, do not cycle power and
inadvertently load the old software.
Depending on the age of the software,
it may not be possible to reprogram a
token.
4.
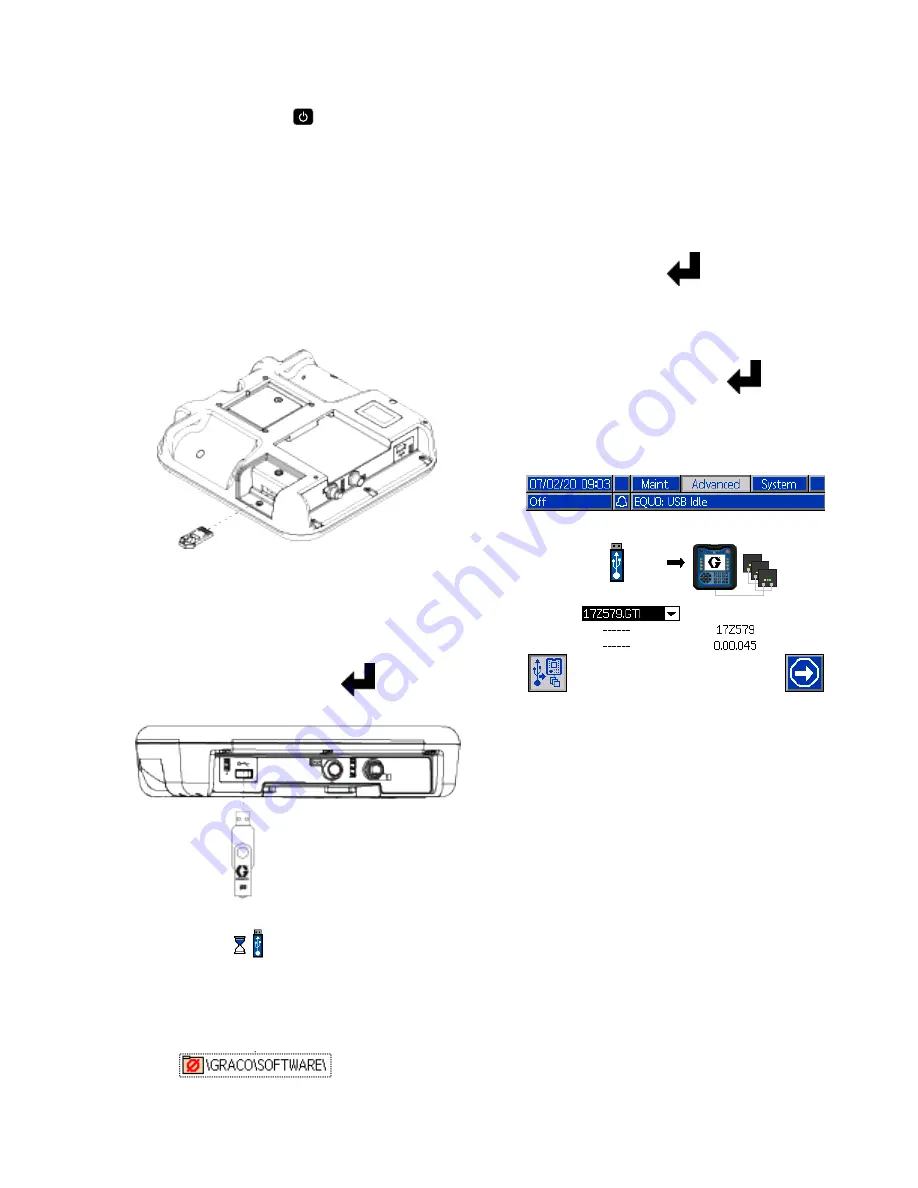
Insert a black update token into the slot where
the cover was removed.
Figure 25 Insert Token
5.
Insert the USB drive that contains the updated
software into the USB interface slot.
A warning may flash on the screen signaling
that a USB download is occurring. Wait for the
warning to indicate that the USB download is
complete. Press the Enter key
to return to
the Software Update Start screen.
Figure 26 Insert USB Drive
An hour glass
displays while the USB drive
prepares for the software transfer process. If this
process takes more than a couple of minutes,
remove the USB drive and try again.
The following message is displayed if no
compatible software files are found on the USB
drive:
6.
When the process is ready to begin, the screen
automatically transitions to the USB Software
Update screen.
• On the left side of the screen, use the
drop-down box to select the software update
file from the USB drive. The software part
number and version for each update is listed
beneath the file.
Press the Enter key
to change the
selection on the USB drive. A drop-down menu
displays the available software update files (up
to 14 files).
Use the keypad arrows to highlight the desired
update, and then press Enter
to select
the update.
• On the right side of the screen, the current
software part number and version on the token
is listed.
Figure 27 USB Software Update Screen
3A7370C
47


