SuperKing
TM
Extension Assembly
<
The parts and assembly configuration pictures for the SuperKing
TM
Extension Pole are located on page
Seven. The Brace parts and assembly configuration pictures for the SuperKing
TM
Extension set-up are
located on page Eleven. Follow those pictures and directions as you set up the frame into the
SuperKing
TM
length.
Extra-Long SuperKing
TM
Extension Assembly
<
The parts and assembly configuration pictures for the set-up of the Extra-Long Pole are included on the
pole and brace pages. Follow the directions for setting up the frame into the Extra-Long Pole length on
both the Brace and pole instructions and pictures.
Application and Use of EdgeMaster
TM
<
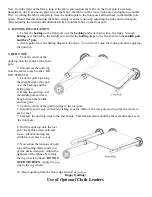
The Edgemaster
TM
keeps the side tension of the
quilting fabric even. Slide the hooks around the back side of the front and middle poles. The bar with
the cloth sleeve should rest on top of the two poles, with the sleeve facing toward the work area.
<
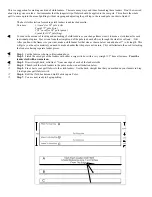
There are four tightness settings available. The best one will depend on the angle of your poles as they
rotate around. (Example: If you are clamping down on the corner of the front pole, you will need to
clamp down in a less tight setting).
<
To test the appropriate tightness setting, lift the handle
up to the unlocked position and move it to a different notch and
gently pull down to the locking position.
If it strongly resists locking down, DO NOT FORCE.
The setting
may be too tight. (typically the cloth sleeve bar will bend under the pressure of a setting that is too tight).
<
Pin the quilt edge to the muslin strip.
Next, as you lock
in the appropriate tightness setting, pull gently away
from the work area
to achieve desired side tension.
Do
not distort fabric by pulling it too tautly.
HOW TO USE
YOUR
GraceFrame
TM


