page 16
down buttons results in continuous volume changes.
The longer a button is held the quicker the volume
level changes. If the setup menu has been entered by
pushing and holding the OUTPUT / setup button, the
volume up and down buttons are used to navigate
through the available setup menu items.
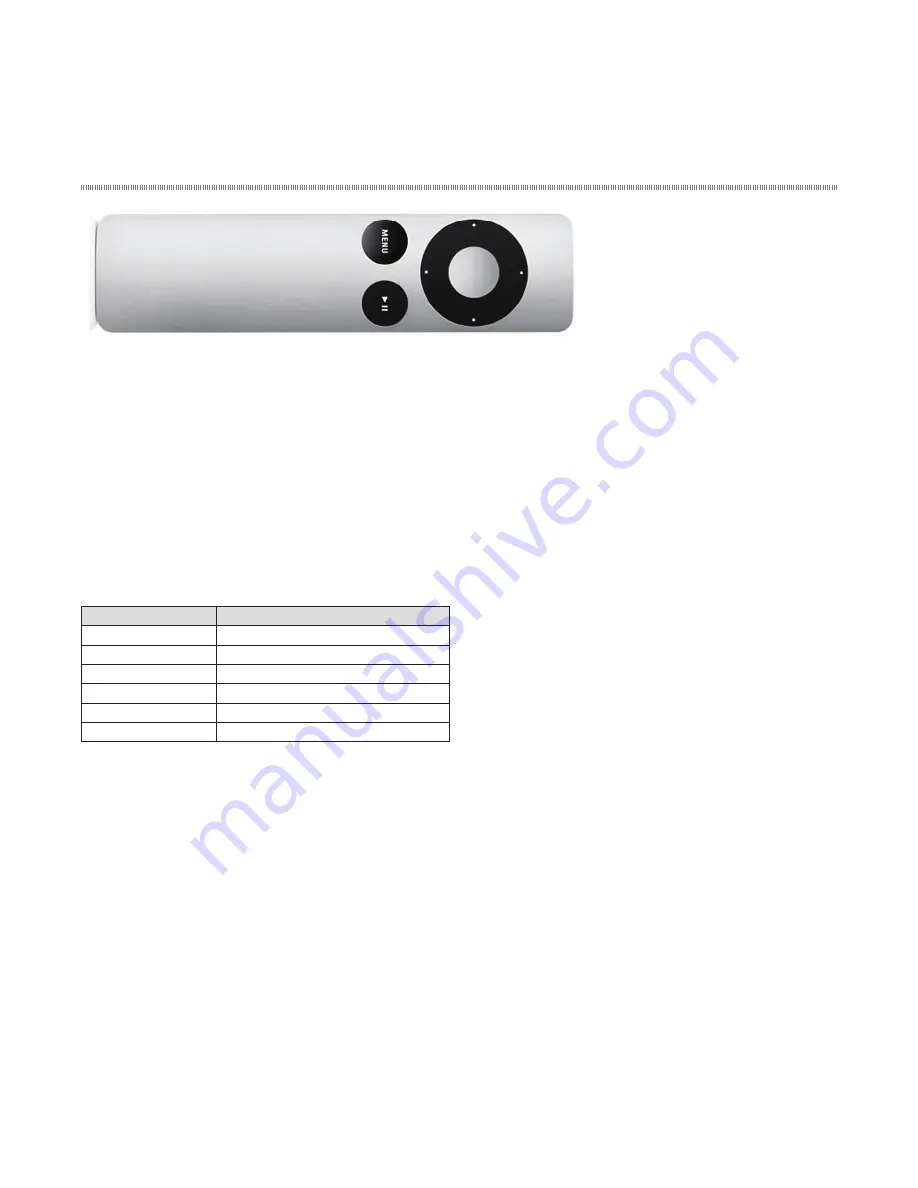
Apple IR Remote Control Operation
In addition to the Grace Design wireless remote
control, the m920 can also be controlled by an Apple
IR Remote Control. The following section details all
of the features available from the Apple IR Remote
Control. Several of the buttons on the remote have
multiple functions based on operating mode and are
described below. To activate an m920 for use with a
remote control please refer to the ‘infrared remote
control enable’ procedure in the ‘accessing and using
the setup menu’ chapter of this manual. The factory
default setting is active. Please refer to the section
‘Apple Remote Pairing’ for instructions on assigning a
specific apple remote to the m920.
Apple remote button
m920 function ( ) push-hold
MENU
Enter Setup Menu
PLAY/PAUSE
Mute
LEFT <<
Crossfeed ON/OFF
CENTER
Output Select / Enter
RIGHT >>
Balance / (Mono)
UP/DOWN
Volume UP/DOWN and Menu Navigate
MENU
Pressing this button enters and exits the
m920 setup menu (like pressing and holding the
encoder for 3 seconds on the m920). When exiting
the setup menu, all changes to the setup menu are
saved.
PLAY/PAUSE (MUTE)
Pressing this button toggles
the mute setting for the currently selected output on
the m920. Once engaged, active mute status will be
reflected by the 7-segment display flashing on and
off in regular intervals. *NOTE: the small white plastic
Apple Remote Control has the center button labeled
as PLAY/PAUSE, however it functions as the CENTER
button only with the m920.
To disable muting simply press the PLAY/PAUSE
button again. The output will return to the current
level setting and the display will return to solid.
In addition to pushing the mute button, mute can
be turned off by making any volume change (on
remote control or on the m920 itself).
LEFT (CROSSFEED)
Pressing this button toggles the
x-feed status on the m920. The current x-feed status
will be displayed momentarily on the m920 7-seg-
ment display, as well as by the dedicated x-feed LED
to the right of the volume control. Also, pressing the
x-feed button while in the setup menu will return the
m920 to normal operation.
CENTER (OUTPUT TOGGLE / ENTER)
Pressing this
button during normal operation toggles between
the 3 available outputs (phones, line 1 and line 2).
The newly selected output indicator LED will illumi-
nate and its corresponding level will be displayed on
the 7-segment display.
Pressing this button while in the m920 setup menu
functions the same as pressing and releasing the
encoder, serving as the ‘enter switch’.
RIGHT (BALANCE MODE / MONO)
Pushing this but-
ton will directly enter balance mode option. From
here, pushing the up button will adjust the left (vol
down) and right (vol up) balance. Conversely, push-
ing the down button will adjust the right (vol down)
and left (vol up) balance. These changes are indicated
by the right or left facing speaker symbol changing
to the corresponding balance offset value. Please
refer back to the previous chapter ‘accessing and us-
ing the setup menu’ for a more detailed description
of adjusting the balance setting.
Pushing and holding the RIGHT button during nor-
mal operation will toggle the MONO mode feature of
the m920. This setting simply sums the left and right
channels of all outputs together. When MONO mode
is active, the 7-segment display no longer displays
the current output level numbers and shows two
large facing brackets. Pushing and holding again


