


Page 11
Page 12
©2017 GPS Insight. All rights reserved.
©2017 GPS Insight. All rights reserved.
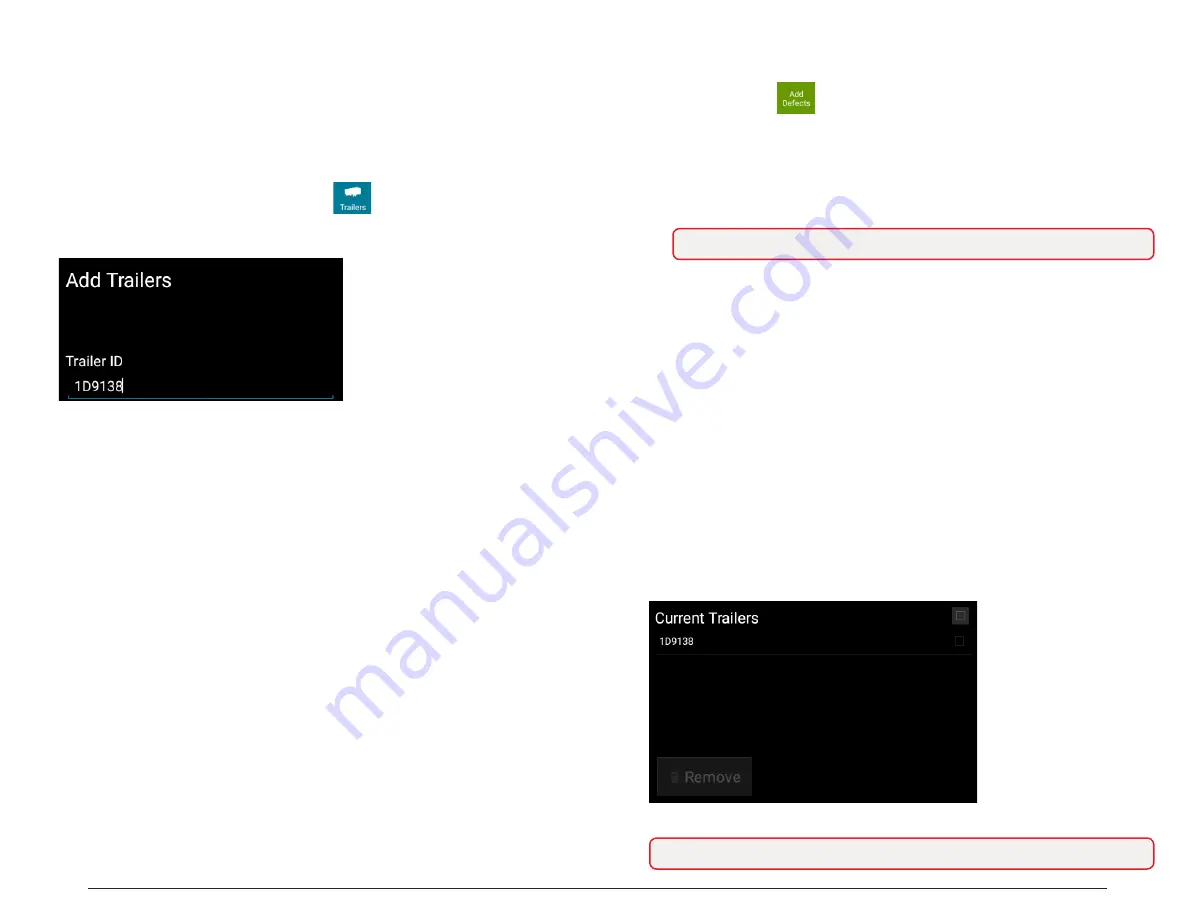
Step 5: Add/Remove Trailers
We recommend that you add/remove any trailer(s) (if applicable) to your resources
before you begin driving to ensure that your records are as current and up-to-date as
possible.
Adding Trailers
If adding a trailer, you are prompted to review or complete a DVIR.
1. From the Driver Overview screen, tap Trailers .
2. From the Manage Trailers screen, enter the Trailer ID in the Trailer ID field under the
Add Trailers section and tap Return/Enter on your keyboard.
3. When the inspection information appears for your trailer, enter the location (if
prompted), and tap Request DVIR.
4. If a previous DVIR was submitted for the trailer, review the DVIR using the
instructions from Step 4: Review Previous DVIR. If a DVIR was not submitted
previously, follow the steps below after tapping OK.
If there are no existing defects:
A. Tap No Defects.
The Certify and Submit screen appears.
B. Deem the trailer safe to operate or not safe to operate:
I.
If the trailer is safe to operate, tap Yes, and enter notes (if applicable) or if
the trailer is not safe to operate, tap No and enter notes.
The Trailer ID appears in the Current Trailers section.
Step 5: Add/Remove Trailers cont.
If there are existing defects:
A. Tap Add Defects .
The inspection screen appears, displaying a list of parts specific to the selected
trailer on the left-hand side of the screen.
B. Add defect(s) by tapping on parts from the available list.
A sub-defect menu appears, displaying a list of potential defects applicable to
the part you selected.
C. Tap on the defect you would like to record. If none of the defects listed apply,
use the Other field to add a description of the defect.
D. Tap Next.
E. Review your DVIR details. If you need to make changes, tap
Back
and make
your changes. Otherwise, tap Next.
The Certify and Submit screen appears.
F. Deem the trailer as safe to operate or not safe to operate:
I.
If the trailer is safe to operate, tap Yes and enter notes (if applicable).
II. For Repair Status, tap Complete (if repairs were done) or tap Not Needed (if
repairs are not necessary to safely operate the trailer).
III. If the trailer is not safe to operate, tap No and enter notes.
5. Tap Done.
Once you have completed your review, the Trailer ID appears under Current Trailers
on the left side of the screen.
6. Tap Home when finished.
Note: You may need to scroll up to view the entire list of available defects.
Note: If the trailer is not safe to operate, sign out and contact your administrator.


