


©2017 GPS Insight. All rights reserved.
Page 9
©2017 GPS Insight. All rights reserved.
Page 10
Step 4: Review Previous DVIR
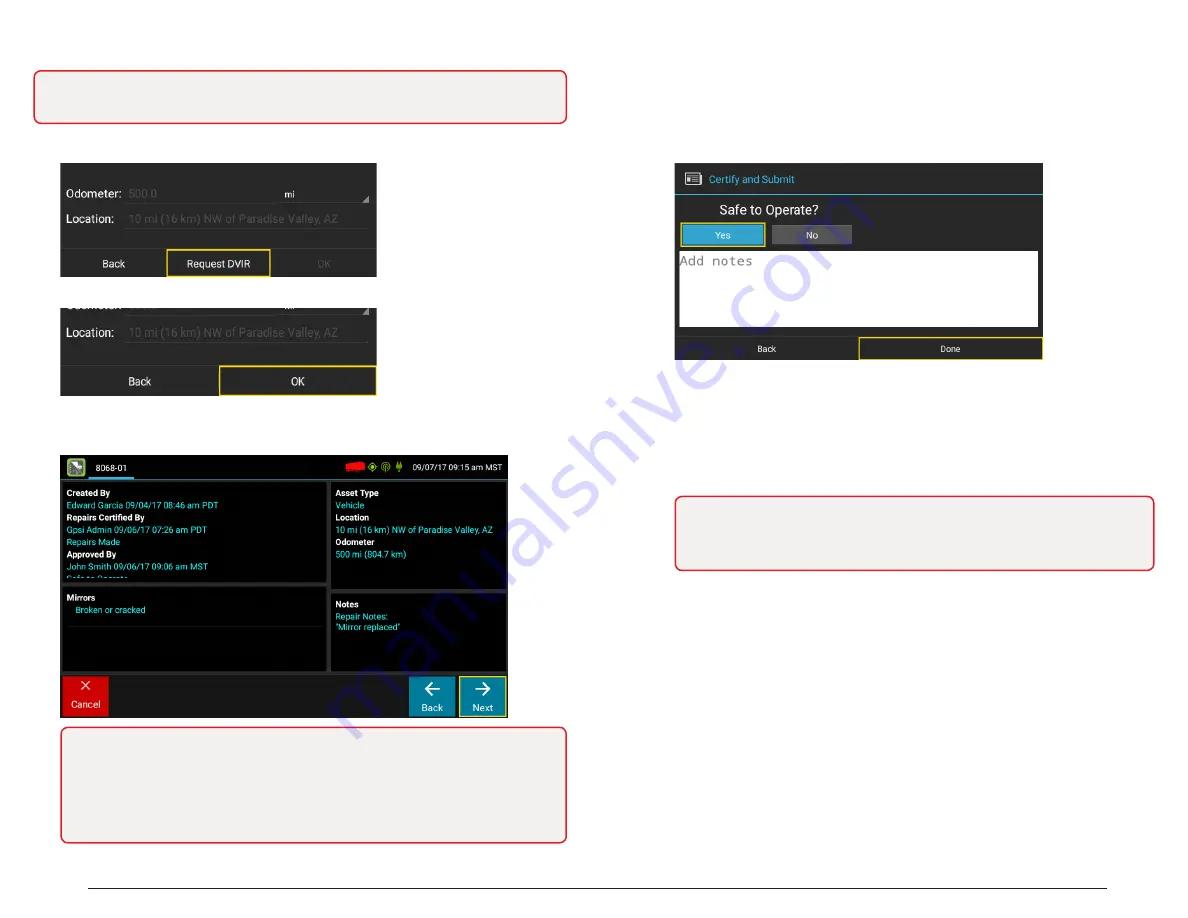
1. When the inspection information appears for your resource, tap Request DVIR.
2. Once the DVIR is received, tap OK.
3. Review the DVIR, and tap Next.
Note: Always review the previous DVIR with care before operating the vehicle to
ensure that all information is true and correct. You are responsible for ensuring that
all records required to be in your possession are correct and up-to-date.
Note:
Carry Over Defects
: In some cases, the previous DVIR for a resource may
include a defect that was certified as
Repairs Not Necessary
. This denotes that
the defect or deficiency may still exist, but that repair was not required in order
for the vehicle to be operated safely. The ELD will “carry over” such defects to
the next DVIR. You will be notified when beginning a new inspection report if the
previous report has such defects. You may add or edit these defects as needed.
Step 4: Review Previous DVIR cont.
The Certify and Submit screen appears.
4. Deem the vehicle as Safe to Operate or Unsafe to Operate.
A. If the vehicle is safe to operate, tap Yes. Enter notes (if applicable), and then tap
Done.
B. If your vehicle is unsafe to operate, tap No.
I.
Enter applicable notes regarding the status, and then tap Done.
II. Once the Driver Overview screen appears, tap Status.
III. Tap OFF Sign Out, and follow the prompts for completing a post-trip driver
vehicle inspection to document the defects.
Note: Part names and defect descriptions are specific to the type of
resource (vehicle or trailer) selected at the time of the inspection. All defects
lists provide an Other option, where you can enter your own description. Part
names and defect descriptions can be customized by your motor carrier.


