background image


In the far right row, you will find the text PRS. Please hit this, after making sure, that the sequencer 
is stopped. 


Содержание Anamono Xmini

Страница 1: ...Gotharman s aNamoNo Xmini Modular Synthesizer User Manual V 2 27...

Страница 2: ...th Audio Bus Sources 28 Accessing the Synth Pages 29 Editing the parameters of the Modules 32 Connecting Modules 33 The Synth Modules 36 Zones 37 Trigger Setup 38 Oscillator 1 to 4 42 Sampler 1 to 4 4...

Страница 3: ...Delay Time Steps Edit 146 Note Track Mod Page 148 Clear Note Track 150 Mute Unmute Tracks 151 Controller Tracks 153 Controller Steps Edit 153 Slide Steps Edit 156 Controller Track CC page 159 Clear C...

Страница 4: ...e 220 Edit A Sampling 227 Adjusting start and end points 228 Sample Chops 229 Generating Sample Chop Points 232 Deleting a Sample 234 USB 235 Importing Files 237 Importing Multiple Files 239 Reload Mu...

Страница 5: ...or the audio input connectors any audio output from any other module can be connected The analog filter also appears as a module It also has a new very sensitive capacitive touch screen that is used f...

Страница 6: ...ulien Huet Florian Bielmann Nick Nimick Weinglas Christopher Rayce Richie Prado For supporting this project from the beginning I really appreciate your trust Without you Anamono Xmini might not have b...

Страница 7: ...lt in speakers it just needs to be connected to something that can transfer its amazing sound to you Connect any line audio source to the audio input for sampling and or processing through Xmini s ana...

Страница 8: ...v file from another device it must be Mono or stereo 44 1 KHz sample rate Xmini will import other sample rates but they will play back in a wrong speed 16 bit native PCM It is not compatible with broa...

Страница 9: ...you would like the sequencer of Xmini to sync to your setup On MIDI out MIDI clock MIDI CC s form the Xmini edit knobs and notes and CC s from its sequencer are transmitted Connect any MIDI gear to th...

Страница 10: ...type with a 2 1 mm DC plug with positive middle Some Xmini s might have been shipped out with a power adaptor that has multiple tips If you have received one of these you should use the tip with the b...

Страница 11: ......

Страница 12: ...Turn it on Push the I on the power switch Your Xmini should now turn on...

Страница 13: ......

Страница 14: ...an be used as bus converters Since they take their inputs from the modulation bus and outputs to both the modulation and the audio bus at the same time it is possible to route any modulation signal to...

Страница 15: ...e a trigger button send a note value to another trigger button The setup of these will be described later in this manual in the synth section When a trigger is trigged the LED near it will light up Th...

Страница 16: ...mits MIDI CC s Any Edit Knob that has not been assigned as a modulator to any parameter acts as a Quick Edit Knob The Quick Edit Knobs controls Edit Knob 1 Analog filter peaks Edit Knob 2 Analog filte...

Страница 17: ...yboard also possible to apply modulation to the sound by placing your finger on different positions between the top and the bottom of the keyboard This is referred to as Keyboard Y modulation On any o...

Страница 18: ...The number of octaves for the touch keyboard is settable for each preset to any number between 1 and 8 It is also possible to set which note the first key should play...

Страница 19: ...back is shown Below this it says Preset if Xmini is currently in preset mode or Song if Anamono X currently are in song mode Below this the number and name of the currently selected preset song is sho...

Страница 20: ...LED will now start to flash and the text NEXT will show right above the new presets name awaiting track 1 to reach its end As soon as this happens Xmini will switch to the newly selected preset the St...

Страница 21: ...ansmit MIDI CC s to Xmini s MIDI out on the Xmini MIDI channel Edit Knob 1 to 4 will transmit MIDI CC 1 to 4 The Morph knob will transmit and receive MIDI CC 11 The Cut knob will transmit and receive...

Страница 22: ...ible to trigger 4 internal events like envelopes and samplings and or external MIDI devices and to make oscillators play a specific note using the trigger buttons To play the triggers simply hit the c...

Страница 23: ...an be connected to each other in absolutely any way you like Just like you can do with cables on a modular system The big ups are though Xmini can memorize anything and you won t get a huge bunch of c...

Страница 24: ...the Synth Section 4 Oscillators Samplers 1 Noise Generator Up to 1 Analog Filter 4 Ring VCA s 4 VCA s 8 Envelopes 4 LFO s 4 Random Generators 4 Effects Processors Please find each module described la...

Страница 25: ...The low frequency output of Oscillator 4 Slo4 Inverted Slow Oscillator 4 The Inverted low frequency output of Oscillator 4 Aen1 The output of VCA Envelope 1 Aen1 The output of VCA Envelope 1 Inverted...

Страница 26: ...v3 The output of Envelope 3 Env3 The output of Envelope 3 Inverted Env4 The output of Envelope 4 Env4 The output of Envelope 4 Inverted LFO1 The output of LFO1 LFO1 The output of LFO1 Inverted LFO2 Th...

Страница 27: ...it knob 1 value and the last MIDI CC 1 value received on MIDI in on the Anamono X MIDI channel Inverted Knb2 Edit knob 2 value and the last MIDI CC 2 value received on MIDI in on the Anamono X MIDI ch...

Страница 28: ...tor Sampler 4 Noise Noise Generator Ring1 Ring VCA 1 Ring2 Ring VCA 2 VCF Analog Filter Slot VCA1 VCA1 VCA2 VCA2 VCA3 VCA3 VCA4 VCA4 EFX1 Effects Processor 1 EFX2 Effects Processor 2 EFX3 Effects Proc...

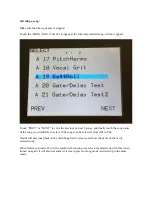
Страница 29: ...Accessing The Synth Pages From the Preset Song Select screen Touch the EDIT field...

Страница 30: ...Now Xmini will show a list of the available edit groups In the upper left corner of this page the serial number of your Xmini will show To enter the Synth edit pages touch SYNTH...

Страница 31: ...ist of the available Synth modules will now show To enter any of the Synth modules simply touch the text showing the name of the module you would like to enter To exit to the edit groups page touch EX...

Страница 32: ...ected row of parameters will have their value written inside a blue square When turning any of the 4 Edit Knobs the corresponding selected parameter will be adjusted and you will hear a change in the...

Страница 33: ...are connecting external analog devices via the CV inputs and outputs of course You just need to select a module touch the screen and turn a knob and the module is connected I will now explain how Nea...

Страница 34: ...Edit Knob 1 to 4 select the sources that should be connected to the modulation inputs of the module The parameter names shows what parameter is being modulated by the selected source By touching the l...

Страница 35: ...turning Edit Knob 1 to 4 select the sources that should be connected to the audio inputs of the module Each module that has audio inputs usually has 4 of these By touching the lower row of parameters...

Страница 36: ...The Synth Modules In this section all the modules of the Synth synthesizer section are explained The modules of the sequencer is not explained here but in the Sequencer section later in this manual...

Страница 37: ...te track 1 will always drive Trigger 1 in the full note range note track 2 will always drive Trigger 2 in the full note range and so on LO1 LO2 LO3 LO4 Sets the lowest note of trigger 1 to 4 MIDI note...

Страница 38: ...r that each trigger button should send to the internal oscillators when pushed This setting only affects when the trigger buttons theselves are pushed not when a trigger is controlled via MIDI or the...

Страница 39: ...Sub page 2 Osc1 Osc2 Osc3 Osc4 1 to 4 Selects what trigger that should trigger each of the 4 samplers and send note numbers to the oscillators samplers...

Страница 40: ...Sub page 3 VCA1 VCA 2 VCA 3 VCA 4 ENV1 ENV 2 ENV 3 ENV 4 1 to 4 Selects what trigger that should trigger each of the 4 VCA envelopes and the 4 modulation envelopes...

Страница 41: ...I channel Midi1 Midi2 Midi3 Midi4 Off C 1 to G9 The MIDI note number that will be transmitted when pushing trigger button 1 to 4 When this is set to any other position than Off the sequencer note trac...

Страница 42: ...e and suboscillator level can be modulated The oscillators can act as both audio and modulation sources The pitch range of the oscillators are chromatically over the entire 10 octave MIDI keyboard ran...

Страница 43: ...uency version of itself so samples can be used as low frequency modulation too Sampler modules can load and playback Little deFormer samples and use the chop points It is also possible to create chop...

Страница 44: ...en sine triange saw pulse and feedback waves PW Adjusts the pulse width of the waveform Unlike many other oscillator designs the pulse width can be adjusted on all of Xmini s waveforms not just the pu...

Страница 45: ...Porta Portamento The more this is turned up the slower the oscillator pitch will slide from one note to another Range 0 to 511...

Страница 46: ...ssible to select a modulation source and to adjust the modulation amount For a complete list of modulation sources see the list in the start of this section The upper row of parameters selects the mod...

Страница 47: ...Sub Modulates the level of the sub oscillator square wave...

Страница 48: ...e below the waveform will show the current playback point Tune Adjust the basic pitch in semitones Range 64 to 63 Fine Fine tuning of the pitch Range 256 to 255 Start The sample start point Selects at...

Страница 49: ...play back the sample over and over again Free The sample will constantly be looping between the adjusted or chop selected start and endpoints regardless of if it is triggered or not Chop If chop poin...

Страница 50: ...modulation amount For a complete list of modulation sources see the list in the start of this section The upper row of parameters selects the modulation sources The lower row of parameters Labelled A...

Страница 51: ...samples for sampler 1 to 4 On any oscillator page touch the Sel button to enter this page Mode Select whether the oscillator should be in oscillator or sampler mode In oscillator mode the rest of the...

Страница 52: ...select the sample slot to play back manually by the Slot parameter or set it to any modulation source to make a modulation source select the sample slot for play back For a complete list of modulatio...

Страница 53: ...puts a slow version of itself The rate of the slow wave can be adjusted In the bottom right of the noise generator page the current waveform is shown Shp Noise Shape The Noise Generator can make a lot...

Страница 54: ...modulation amount For a complete list of modulation sources see the list in the start of this section The upper row of parameters selects the modulation sources The lower row of parameters Labelled Am...

Страница 55: ...tween 2 cutoff frequencies and resonance can be adjusted and modulated If the mounted filter has analog feedback this can also be adjusted and modulated LPF BPF and HPF filter modes can be switched on...

Страница 56: ...he filter cutoff frequency Range 0 to 511 Peaks On single filters If the filter has more than one filter block this will adjust the cutoff frequency offset of block 2 or block 3 4 If the filter has on...

Страница 57: ...n and off the low pass band pass and high pass outputs on the filter At least one of these must be on to get a sound out of the filter On dual filters Switches on and off the low pass band pass and hi...

Страница 58: ...off The phase of this is inverted compared to the phase of the 12 and 24 dB outputs on output 1 so when mixing with these different filter modes can be obtained 6dB Switches the 6dB lowpass block on...

Страница 59: ...ilter installed Cut Adjust the filter cutoff frequency Range 0 to 511 Reso Adjusts the resonance of the filter Rate Sample Rate 0 to 60 KHz Bits Bit depth 12 or 6 bit Out1 2 Adds an analog Fuzz effect...

Страница 60: ...ed Cut Adjust the filter cutoff frequency Range 0 to 511 Reso Adjusts the resonance of the filter Cut3 Feed Negative feedback Out1 BPF or LPF select Out2 Always HPF Out1 2 Mix between filter output 1...

Страница 61: ...he parameters in this section to have any effect G Ray Adjusts the amount of g RAY intermodulation 0 no g RAY 3 max g RAY Range 0 to 3 Mode G Ray mode Norm Normal 1 1 feedback Neg 1 1 feedback with th...

Страница 62: ...function of the Feed Cut3 parameter Feed The value of the Feed Cut3 parameter are a totally separate value and are not affected by the Cutoff value This setting is the recommended one when a single o...

Страница 63: ...at can be modulated it is possible to select a modulation source and to adjust the modulation amount For a complete list of modulation sources see the list in the start of this section The upper row o...

Страница 64: ...is possible to select a modulation source and to adjust the modulation amount For a complete list of modulation sources see the list in the start of this section The upper row of parameters selects t...

Страница 65: ...Gfeed Modulates the G Ray feedback...

Страница 66: ...ity of the selected audio sources Each analog filter has 4 audio inputs For each of these an audio source can be selected and the input level can be adjusted For a complete list of audio bus sources s...

Страница 67: ...audio or a modulation source to input 1 and a modulation source to input 2 and the modulator on input 2 will adjust the level of the source on input 1 Modulation to audio convertor If you would like f...

Страница 68: ...Connects any modulation source to the modulation input of the ring VCA The first source that can be selected are special to this module Max This just adds a maximum value to the modulation input Sele...

Страница 69: ...lable for opening the VCA without the envelope needing to be trigged VCA output level are modulated by the attached ADSR envelope Attack decay and release can be modulated by any modulation source The...

Страница 70: ...he amp envelope has reached its maximum value in the time set by the attack parameter it will decay until it reaches the sustain level and stay there as long as the note that trigged it is held Range...

Страница 71: ...attack Drone VCA envelope drone offset level When this is turned up the amp envelope will never reach an output value lower than what this is adjusted to It will release to this adjusted value instead...

Страница 72: ...is possible to select a modulation source and to adjust the modulation amount For a complete list of modulation sources see the list in the start of this section The upper row of parameters selects t...

Страница 73: ...Outp Modulates the output level of the VCA...

Страница 74: ...ivity of the selected audio sources Each VCA has 4 audio inputs For each of these an audio source can be selected and the input level can be adjusted For a complete list of audio bus sources see the l...

Страница 75: ...thmic charateristics and an offset control In order to trigger any envelope you will have to set up a trigger to do this See the Triggers section earlier in this manual for information on how to do th...

Страница 76: ...e 0 to 511 D Envelope decay time When the envelope has reached its maximum value in the time set by the attack parameter it will decay until it reaches the sustain level and stay there as long as the...

Страница 77: ...arameters affected by it On Positive only offset added The envelope will only work above the zero point and will only add to the values of the parameters affected by it Mode Selects if the envelope cu...

Страница 78: ...d it is possible to select a modulation source and to adjust the modulation amount For a complete list of modulation sources see the list in the start of this section The upper row of parameters selec...

Страница 79: ...1 to 4 Here you will find 4 effects processors All effects has a bypass Freeze switch and a mix parameter All effects outputs to both the audio and the modulation bus and many parameters can be modula...

Страница 80: ...page Touch Sel to enter this page On this first effects page you can select the effect type for the effects processor by turning Edit Knob 1 The 2 VU meters at the right of the screen shows the Effec...

Страница 81: ...ade controls Deep adds space to the delay Size makes the playback range more narrow than the input recording range and beam beams the delay to previously unknown places The Xfade control on this delay...

Страница 82: ...pecial Pitch Shaper that forces an audio signal to play back at a specific pitch determined by an adjustable frequency Pitch Shaper 2 2 input version of Gotharman s special Pitch Shaper that forces an...

Страница 83: ...s a mixer When the effect are in Freeze mode the input signal is no longer sampled The sound that the effect holds will just keep playing back on and on again NOT ALL EFFECTS ARE AFFECTED BY FREEZE Mi...

Страница 84: ...Steep band pass filter 2 with a slightly different response than the first variant HPF2 High pass filter 2 with a slightly different response than the first variant ADD2 Reverse filter 2 with a sligh...

Страница 85: ...ct a modulation source and to adjust the modulation amount For a complete list of modulation sources see the list in the start of this section The upper row of parameters selects the modulation source...

Страница 86: ...r sampled The sound that the effect holds will just keep playing back on and on again NOT ALL EFFECTS ARE AFFECTED BY FREEZE Mix The mix between the un effected signal on the effect input and the effe...

Страница 87: ...e to select a modulation source and to adjust the modulation amount For a complete list of modulation sources see the list in the start of this section The upper row of parameters selects the modulati...

Страница 88: ...RE AFFECTED BY FREEZE Mix The mix between the un effected signal on the effect input and the effected signal on the effect output that is sent to the audio bus Drive The higher the value the more the...

Страница 89: ...Xdis Complete destruction of the sound...

Страница 90: ...ated it is possible to select a modulation source and to adjust the modulation amount For a complete list of modulation sources see the list in the start of this section The upper row of parameters se...

Страница 91: ...on again NOT ALL EFFECTS ARE AFFECTED BY FREEZE Mix The mix between the un effected signal on the effect input and the effected signal on the effect output that is sent to the audio bus Rate Sample Ra...

Страница 92: ...ect a modulation source and to adjust the modulation amount For a complete list of modulation sources see the list in the start of this section The upper row of parameters selects the modulation sourc...

Страница 93: ...ect input and the effected signal on the effect output that is sent to the audio bus Pitc Smoothly pitches the sound from up to 4 octaves below the original pitch to 4 octaves above Sense Pitch detect...

Страница 94: ...Feed Pitch shifter feedback Adjusts the portion of the output signal that is fed back to the input...

Страница 95: ...e to select a modulation source and to adjust the modulation amount For a complete list of modulation sources see the list in the start of this section The upper row of parameters selects the modulati...

Страница 96: ...no longer sampled The sound that the effect holds will just keep playing back on and on again NOT ALL EFFECTS ARE AFFECTED BY FREEZE Mix The mix between the un effected signal on the effect input and...

Страница 97: ...lated it is possible to select a modulation source and to adjust the modulation amount For a complete list of modulation sources see the list in the start of this section The upper row of parameters s...

Страница 98: ...nd on again NOT ALL EFFECTS ARE AFFECTED BY FREEZE Mix The mix between the un effected signal on the effect input and the effected signal on the effect output that is sent to the audio bus Strc The de...

Страница 99: ...e to select a modulation source and to adjust the modulation amount For a complete list of modulation sources see the list in the start of this section The upper row of parameters selects the modulati...

Страница 100: ...ignal on the effect input and the effected signal on the effect output that is sent to the audio bus Strch The degree of self FM from 0 to up to 4 octaves Sense FM pitch detection sense On a pure wave...

Страница 101: ...Feed FM feedback Adjusts the portion of the output signal that is fed back to the input...

Страница 102: ...le to select a modulation source and to adjust the modulation amount For a complete list of modulation sources see the list in the start of this section The upper row of parameters selects the modulat...

Страница 103: ...will just keep playing back on and on again NOT ALL EFFECTS ARE AFFECTED BY FREEZE Mix The mix between the un effected signal on the effect input and the effected signal on the effect output that is...

Страница 104: ...delay effect sound smoother by crossfading the feedback repeats into each other Feed Delay feedback amount At values over middle the feedback signal will be gained and create infinite feedback This mi...

Страница 105: ...dulated it is possible to select a modulation source and to adjust the modulation amount For a complete list of modulation sources see the list in the start of this section The upper row of parameters...

Страница 106: ...ix The mix between the un effected signal on the effect input and the effected signal on the effect output that is sent to the audio bus Step Sets how many steps the granulator sequencers should go th...

Страница 107: ...tep is used causing the granulator to stutter Seq Selects which of the 16 sequencer controller tracks the granulator should get it step values from Each value selects a different portion of the granul...

Страница 108: ...e to select a modulation source and to adjust the modulation amount For a complete list of modulation sources see the list in the start of this section The upper row of parameters selects the modulati...

Страница 109: ...holds will just keep playing back on and on again NOT ALL EFFECTS ARE AFFECTED BY FREEZE Mix The mix between the un effected signal on the effect input and the effected signal on the effect output tha...

Страница 110: ...a modulation source and to adjust the modulation amount For a complete list of modulation sources see the list in the start of this section The upper row of parameters selects the modulation sources...

Страница 111: ...ARE AFFECTED BY FREEZE Mix The mix between the un effected signal on the effect input and the effected signal on the effect output that is sent to the audio bus Feed Reverb feedback Feed X Adjusts how...

Страница 112: ...Time X Adjusts how much the following reverb taps will decrease in time Lower settings is good for a short reverb and higher settings for a long reverb...

Страница 113: ...select a modulation source and to adjust the modulation amount For a complete list of modulation sources see the list in the start of this section The upper row of parameters selects the modulation s...

Страница 114: ...n the effect input and the effected signal on the effect output that is sent to the audio bus Pitc Glitchy pitches the sound from up to 4 octaves below the original pitch to 4 octaves above Sense Pitc...

Страница 115: ...Feed Glitch shifter feedback Adjusts the portion of the output signal that is fed back to the input...

Страница 116: ...s possible to select a modulation source and to adjust the modulation amount For a complete list of modulation sources see the list in the start of this section The upper row of parameters selects the...

Страница 117: ...ted signal on the effect output that is sent to the audio bus Pitc Sets the frequency that the input signal should be re pitched to Sense Pitch detection sense On a pure waveform turn this fully down...

Страница 118: ...Oct Octave transpose From 0 to 3 octaves Feed Pitch shaper feedback Adjusts the portion of the output signal that is fed back to the input...

Страница 119: ...ible to select a modulation source and to adjust the modulation amount For a complete list of modulation sources see the list in the start of this section The upper row of parameters selects the modul...

Страница 120: ...a pure waveform turn this fully down to make sure that it detects all the waves of it and pitch shifts correctly On more complex sounds turn this up until the desired effect are obtained At higher se...

Страница 121: ...hened Vari Pitch variation The more this is turned up the more the pitch variations on the input signal affects the pitch shaper frequency Oct Octave transpose From 0 to 3 octaves Feed Pitch shaper fe...

Страница 122: ...ted it is possible to select a modulation source and to adjust the modulation amount For a complete list of modulation sources see the list in the start of this section The upper row of parameters sel...

Страница 123: ...mixer When the effect are in Freeze mode the input signal is no longer sampled The sound that the effect holds will just keep playing back on and on again NOT ALL EFFECTS ARE AFFECTED BY FREEZE Mix Th...

Страница 124: ...an be modulated it is possible to select a modulation source and to adjust the modulation amount For a complete list of modulation sources see the list in the start of this section The upper row of pa...

Страница 125: ...selected audio sources Each EFX has 4 audio inputs For each of these an audio source can be selected and the input level can be adjusted For a complete list of audio bus sources see the list in the st...

Страница 126: ...LFO1 to 4 The 4 LFO s has continuosly variable waveform and rate parameters Both of these parameters can be modulated The 4 LFO s outputs to the modulation bus...

Страница 127: ...Adjusts the speed of the LFO Wave1 Wave2 LFO output waveform Morphs between triangle sawtooth square pulse and FM waveforms The FM waveforms are high frequency waves that can be used for FM synthesis...

Страница 128: ...Adjusts the speed of the LFO Wave3 Wave4 LFO output waveform Morphs between triangle sawtooth square pulse and FM waveforms The FM waveforms are high frequency waves that can be used for FM synthesis...

Страница 129: ...can be modulated it is possible to select a modulation source and to adjust the modulation amount For a complete list of modulation sources see the list in the start of this section The upper row of...

Страница 130: ...can be modulated it is possible to select a modulation source and to adjust the modulation amount For a complete list of modulation sources see the list in the start of this section The upper row of...

Страница 131: ...Rndm1 to 4 The 4 Random Generators changes to a new random value every time they are trigged Trigger sources can be trigger 1 4 and LFO 1 4 Outputs to the modulation bus...

Страница 132: ...ld trigger the random generator to shift to a new random value Choices are Trigger 1 to 8 LFO 1 to 4 Tout1 Tout2 Tout3 Tout4 Sets up the Random Generator to trig trigger 1 to 4 unless you set it to Of...

Страница 133: ...MIDI out Each controller track has a controller value subtrack and a slide subtrack that makes it possible to make the steps slide from one value to the next instead of just shift All tracks has separ...

Страница 134: ...tton lights up it is indicating that the sequencer is playing back When the green LED above the Start Stop button does not light up the sequencer playback is stopped If you hit the play button to star...

Страница 135: ...Enter the sequencer From the Preset Select Screen touch the EDIT field...

Страница 136: ...Touch SEQUENCER...

Страница 137: ...will bring you to the Sequencer modules page To enter any of the Sequencer modules simply touch the text showing the name of the module you would like to enter To exit to the edit groups page touch E...

Страница 138: ...tronome is on and when the sequencer is playing it will put out a click to audio output 1 every time note track 1 passes a 4 4 beat Every time note track 1 starts over it will make a click that is sli...

Страница 139: ...notes in realtime To realtime record notes Set the metronome up as desired Touch the Rec button on this page so it turns red Make sure that the sequencer is playing Play back notes on a connected MIDI...

Страница 140: ...is button will make Xmini jump to this page If you touch the Yes button here you will clear all tracks of the current preset on the Morph Layer selected by the Morph Settings button If you do not wish...

Страница 141: ...highest note number is shown below and above the mini keyboard at the left Edit Knob 2 Selects the bar to be viewed 4 bars can be viewed showing each 16 steps for a total of 64 steps The bar number is...

Страница 142: ...Edit Knob 4 Sets the track resolution Values 1 32 1 24 1 16 1 12 1 8 1 6 Value is shown as Res Touching EXIT will exit you to the Sequencer Modules page...

Страница 143: ...o switch a step on or off simply touch any of the 16 step buttons in the bottom of this page The black rectangle just above the step buttons shows what step is currently being played back The small VU...

Страница 144: ...just above the note grid marked Bar and the first and the last step number viewed is shown just above the note grid to the right and the left Edit Knob 3 Sets the last step that will be played back on...

Страница 145: ...on or off simply touch any of the 16 step buttons in the bottom of this page The black rectangle just above the step buttons shows what step is currently being played back The small VU meter right to...

Страница 146: ...st above the values field marked Bar and the first and the last step number viewed is shown just above the values field to the right and the left Edit Knob 3 Sets the last step that will be played bac...

Страница 147: ...on or off simply touch any of the 16 step buttons in the bottom of this page The black rectangle just above the step buttons shows what step is currently being played back The small VU meter right to...

Страница 148: ...in this manual Dest Track modulation destination Selects what should be modulated on the track Choices are Note The note numbers of the track will be modulated Gate The gate times of the track will be...

Страница 149: ...grammed note steps of the track will play back The more it is turned down the less notes will play back The notes the will not play back are selected randomly Rtim Track Note Randomizer Time When turn...

Страница 150: ...m the Mod page touch the Clear Track button to enter this page Touching Yes from here will clear all step on s of the currently selected note track If you would not wish to do this touch No to exit to...

Страница 151: ...racks From the Sequencer Modules page touch MUTE to enter this page When touching the squares so they turn white the tracks represented by the square will be muted Touch the square again so it turns g...

Страница 152: ...nd holding the Morph Settings button and push any of the 4 corresponding trigger buttons to mute or unmute a note track The pushbutton LED s will show the state and activity for each track If a LED is...

Страница 153: ...function Edit Knob 2 Selects the bar to be viewed 4 bars can be viewed showing each 16 steps for a total of 64 steps The bar number is shown just above the values field marked Bar and the first and t...

Страница 154: ...Touching EXIT will exit you to the Sequencer Modules page...

Страница 155: ...To switch a step on or off simply touch any of the 16 step buttons in the bottom of this page The black rectangle just above the step buttons shows what step is currently being played back The small...

Страница 156: ...r number is shown just above the values field marked Bar and the first and the last step number viewed is shown just above the values field to the right and the left Edit Knob 3 Sets the last step tha...

Страница 157: ...p is played back the output will shift to the value of this regardsless if the value has been reached by the slide or not The tempo of slide is not controlled by the sequencer tempo Slide is more a ki...

Страница 158: ...To switch a step on or off simply touch any of the 16 step buttons in the bottom of this page The black rectangle just above the step buttons shows what step is currently being played back The small...

Страница 159: ...ill get you to the CC page The parameters of this page CC Setting this to any other value than Off will make the selected controller track output MIDI CC s to MIDI out This parameter sets the MIDI CC...

Страница 160: ...he track CC page touch the Clear Track button to enter this page Touching Yes from here will clear all step on s of the currently selected controller track If you would not wish to do this touch No to...

Страница 161: ...so its yellow LED lights up Now the parameters of layer B will be shown on the screen and you can edit these using Edit Knob 1 to 4 just like the layer A parameters All continously adjustable paramete...

Страница 162: ...More preset parameters From the Preset Select page touch the Edit field...

Страница 163: ...Now touch MORE...

Страница 164: ...p all the basic Xmini things like MIDI channel morphing touch keyboard analog filter type and CV in s out s check and erase the Xmini memory initialize the preset and change to song mode On the follow...

Страница 165: ...s page using edit knob 1 to 5 Contr Adjusts the display contrast This setting is automatically saved and will be remembered after a power off Chan The Xmini global MIDI channel All MIDI data to Xmini...

Страница 166: ...hether or not Xmini will re transmit MIDI clock and start stop events to MIDI out Even if Xmini is syncing to an external MIDI clock source it will re transmit this if this parameter is on This settin...

Страница 167: ...meters on this page Mode Synth Seq both Sets if the Morph knob should affect the synth parameters the sequencer parameters or both at the same time Sw s 0 to 511 Xmini does not morph switches like mod...

Страница 168: ...DI CC 1 value received via MIDI in on the Anamono X MIDI channel Knb2 Edit knob 2 value and the last MIDI CC 2 value received via MIDI in on the Anamono X MIDI channel Knb3 Edit knob 3 value and the l...

Страница 169: ...nsposition of the Touch Screen Keyboard From More page touch KYBD to enter this page The parameters on this page Note C 1 to C6 Sets the first note of the touch screen keyboard which is always a C Oct...

Страница 170: ...Examples of different octave settings...

Страница 171: ......

Страница 172: ...modulated Xmini accepts CV voltages of up to 15 volts The voltage range of each CV input can be set up to a number of different configurations It is also possible to set up each CV input as a trigger...

Страница 173: ...he CV input will work as a trigger input for trigger 1 On the modulation bus it will work in the 12 volts range Trg2 The CV input will work as a trigger input for trigger 2 On the modulation bus it wi...

Страница 174: ...gear with both a static voltage and a modulation source at the same time The setup of these is stored within each Xmini preset so it is possible to give the external analog gear memory Remember to sav...

Страница 175: ...arameters selected by turning Edit Knob 1 to 4 set a static voltage to each CV output This is useful if you for instance are controlling cutoff or resonance of an external filter or tune of an externa...

Страница 176: ...of parameters selected by Edit Knob 1 to 4 select the modulation source for each CV output For a complete list of modulation sources see the list in the start of the synth section in this manual With...

Страница 177: ...will not be overwritten until you save the new preset so even though you have initialized it it can still be recalled if you should regret by selecting another preset and then select this one again Fr...

Страница 178: ...triggers should be placed on layer A If you attempt to morph from an oscillator to a sampler the sampler will stay in oscillator mode and use the oscillator settings If you morph from a sampler to an...

Страница 179: ...From More page touch COPY to enter this page Touch the preset you would like to copy a layer from Touch PREV and NEXT to select the previous or the next 5 presets...

Страница 180: ...n for the copy will always be the currently selected preset and the layer that is currently selected by the Morph Settings button The copy is only performed to the preset edit buffer In order to keep...

Страница 181: ...from Gotharman s this will be set up correctly so you should only need to go here when you swap the filter board From More page touch COPY to enter this page Turn Edit Knob 1 to select your analog fi...

Страница 182: ...touch FLASH to enter this page This page should look exactly like on the picture except for the touch screen keybaord If it doesn t the FLASH memory on your Xmini might be defective and should be repl...

Страница 183: ...e possible to recover your samplings again From More page touch DEL SmpA Xmini will now ask If you are really sure that you absolutely have to do this touch Yes to start the erase The sample bank will...

Страница 184: ...e possible to recover your samplings again From More page touch DEL SmpB Xmini will now ask If you are really sure that you absolutely have to do this touch Yes to start the erase The sample bank will...

Страница 185: ...ual since if you don t have a backup it will not be possible to recover your presets again Xmini will now ask If you are really sure that you absolutely have to do this touch Yes to start the erase Al...

Страница 186: ...C P From More page touch C P to enter this page By turning Edit Knob 1 to 4 you can here make the 2 rectangles produce different colours...

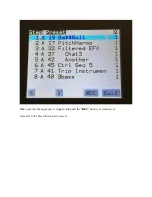
Страница 187: ...PRS Touch this to toggle between preset mode and song mode Song mode is described later in this manual...

Страница 188: ...er as soon as you select another preset or turn off your Xmini A preset that is saved on Xmini contains all the data previously described in this manual All sequencer data All synthesizers settings Al...

Страница 189: ...set in If it is not shown touch PREV and NEXT to reach it Preset number and name is shown for presets that are already saved If you save your new preset on such a location the old preset will be overw...

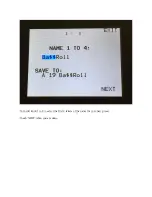
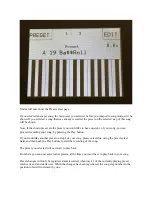
Страница 190: ...Turn edit knob 1 to 4 to select the first 4 letters of the name for your new preset Touch NEXT when you are done...

Страница 191: ...Turn edit knob 1 to 4 to select letters 5 to 8 of the name for your new preset Touch NEXT when you are done...

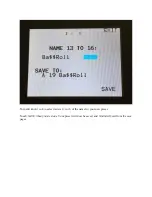
Страница 192: ...Turn edit knob 1 to 4 to select letters 9 to 12 of the name for your new preset Touch NEXT when you are done...

Страница 193: ...Turn edit knob 1 to 4 to select letters 13 to 16 of the name for your new preset Touch SAVE when you are done Your preset will now be saved and Xmini will exit from the save pages...

Страница 194: ...a Song is set to Loop it will jump back to step 1 and continue playback after the last preset has played Songs can be realtime recorded simply by hitting the Rec button on the song main page and then...

Страница 195: ...first song step from the preset select page before you enters song mode This is not something you have to do I have just experienced when testing this that it makes things a bit easier When you select...

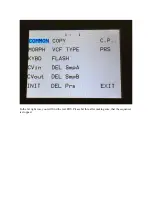
Страница 196: ...Touch MORE...

Страница 197: ...In the far right row you will find the text PRS Please hit this after making sure that the sequencer is stopped...

Страница 198: ...Now PRS turns into SONG and Xmini are in song mode If you would like to go back to preset mode just touch SONG...

Страница 199: ...e Song Edit Page To enter the Song Edit page exit from the More page where you just switched to song mode to enter this screen As you might notice SEQUENCER has now turned into SONG EDIT Touch SONG ED...

Страница 200: ...ep number is shown the preset number and name and the number of times track 1 will play back under the X To edit a song step turn edit knob 1 to select End preset bank A to P or Loop End will make son...

Страница 201: ...Touch EXIT to exit from the Song Edit page and touch REC to start song realtime recording This will be explained very soon...

Страница 202: ...xtra digit The first digit of this now shows the song step number that is currently being played back The 2 other digits is still showing the bar and the beat of the preset that is currently playing b...

Страница 203: ...finally touch the song name of the song you would like to select 1024 songs can be selected from A01 to P64 Xmini will now jump back to the main Song Select screen and show the name of the newly sele...

Страница 204: ...nsmit MIDI CC s to Xmini s MIDI out on the Xmini MIDI channel Edit Knob 1 to 4 will transmit MIDI CC 1 to 4 The Morph knob will transmit and receive MIDI CC 11 The Cut knob will transmit and receive M...

Страница 205: ...Song Realtime Recording On the Song Select page select the song you would like to record 1024 songs are available from A00 to P64 Now go to the song edit page...

Страница 206: ...Make sure that the sequencer is stopped and push the REC button so it turns red Now exit to the Preset Song select screen...

Страница 207: ...y pressing the Play button If you would like another preset on step 1 of your song please select this using the preset select field and then push the Play button to start the recording of the song The...

Страница 208: ...he song edit page and touch the REC button so it turns grey again to exit from song realtime recording To listen to the song you have just created just hit the Play button If there are anything you wo...

Страница 209: ...ave Song Xmini songs are not saved within the presets so they must be saved separately To do so when in song mode from the song select page touch the EDIT field to enter the Edit Groups page Touch SAV...

Страница 210: ...ew song to If it is not shown touch PREV and NEXT to reach it Song number and name is shown for songs that are already saved If you save your new song on such a location the old song will be overwritt...

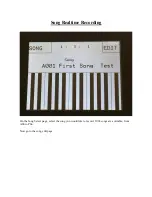
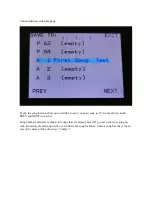
Страница 211: ...Turn edit knob 1 to 4 to select the first 4 letters of the name for your new song Touch NEXT when you are done...

Страница 212: ...Turn edit knob 1 to 4 to select letters 5 to 8 of the name for your new song Touch NEXT when you are done...

Страница 213: ...Turn edit knob 1 to 4 to select letters 9 to 12 of the name for your new song Touch NEXT when you are done...

Страница 214: ...Turn edit knob 1 to 4 to select letters 13 to 16 of the name for your new song Touch SAVE when you are done Your song will now be saved and Xmini will exit from the save pages...

Страница 215: ...Initializing a Song If you would just like to start all over with an empty song it is possible to initialize it To do so in song mode access the More page From here hit INIT...

Страница 216: ...itializing Please notice that when initializing a song this is only done in Xmini s temporary song RAM NOT on the FLASH memory so if you did this by mistake or you regretted doing it you can always re...

Страница 217: ...r storing samples Bank A and Bank B Bank A holds up to 10 minutes of samples maximum 128 and Bank B holds up to 12 minutes of samples maximum 128 A total of 256 samples 22 minutes One sampling can max...

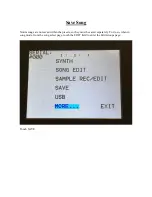
Страница 218: ...From the Preset Select screen touch the EDIT field to enter the Edit Group page Touch SAMPLE REC EDIT...

Страница 219: ...enter the sample rec edit menu From here you can go on to SAMPLE REC for recording a sampling SAMPLE EDIT for editing start end points and chop point or SAMPLE DELETE to delete the last recorded impo...

Страница 220: ...oute it yourself Select VCA1 select VCF as an input and turn the input level fully up Turn the VCA1 Drone parameter fully up Set VCA1 output level to 256 Apply the signal and adjust the analog filter...

Страница 221: ...n Edit Knob 4 to adjust the Auto parameter to any other value than Off Turn Edit Knob 2 to select sample bank A or B as the destination bank for the recording When you are ready to record the sample t...

Страница 222: ...audition the sample you have just recorded touch the Audition button To name and save the sample touch the Save button If you decide not to keep this sample touch EXIT and the new sample will be eras...

Страница 223: ...If you touch the Save button Xmini will jump to this page Here you can turn edit knob 1 to 4 to select the first 4 characters of the new sample s name Touch NEXT to go on...

Страница 224: ...Turn Edit Knob 1 to 4 to select character 5 to 8 of the sample name Touch NEXT to go on...

Страница 225: ...Turn Edit Knob 1 to 4 to select character 9 to 12 of the sample name Touch NEXT to go on...

Страница 226: ...Turn Edit Knob 1 to 4 to select character 13 to 16 of the sample name Touch SAVE to save the new sample and return to the Sample Rec page...

Страница 227: ...ample chops To audition the samples that your Xmini holds touch the Sample name and turn Edit Knob 1 to select the sample bank and Edit Knob 2 to select the sample number To audition the selected samp...

Страница 228: ...uch to select the upper row of parameters Adjust the start point by turning edit knob 1 fine adjust by turning edit knob 2 Adjust the end point by turning edit knob 3 fine adjust by turning edit knob...

Страница 229: ...On Xmini it is also possible to make the chop function find wave chops This function will pick out single wave cycles of the sampling and create chop points for these In the samplers of the synth sec...

Страница 230: ...up a bit If it creates too little or no chop points lower this parameter Dec Chop envelope decay This adjusts the decay time of the chop detection envelope in a reverse manner The lower the value the...

Страница 231: ...meter will make Xmini set the chop points a little bit earlier than it usually would This will remove these clicks xChp Number of chops in each chop point Turning this up before generating chops will...

Страница 232: ...ple Chop Points On the Sample Chops page adjust the Sens Dec Pre and xChp parameters as desired and switch wave mode on if desired Touch the Chop button Xmini will now look for chop points in the sele...

Страница 233: ...k While the sampling is playing back hit the Add button when it is playing back the point where you would like to add a chop point In the bottom of the screen it shows the position of the selected cho...

Страница 234: ...sampling in sample Bank A or B Select the sample bank from which you would like to delete a sampling on the Sample Edit page From the sample rec edit menu touch SAMPLE DELETE to enter this page To de...

Страница 235: ...USB connector You can import and export samples as wav files import and export presets and songs update the Xmini firmware and make new directories USB drives used with Xmini should be Maximum 32 GB...

Страница 236: ...e drive make sure that it is connected properly and that it is has the right specs as described in the start of this section The names you see on the screen are the names of the files and directories...

Страница 237: ...s with the ending hex Files with any other ending will not be shown on Xmini s screen regardless of if they are present on the drive To import a single sampling or preset song select the WAV LDS AXP A...

Страница 238: ...Touch the Import button Xmini will now import the selected file and show the progress on a progress bar...

Страница 239: ...cted directory holds It will though not import files from any sub directories Samples are imported to the sample bank selected on the Sample Edit page Presets are imported to the selected preset and f...

Страница 240: ...XP This will import presets on the same locations as they were originally stored to Reload will also import samples to the exact same location as they were placed when exporting This will make sure th...

Страница 241: ...and B on Xmini delete the sample wav files you want to erase on the USB drive from Xmini itself or on a computer and reload all the samples Samples that are erased will just be left blank If you would...

Страница 242: ...single files or sub directories simply select the directory you would like to open by touching it and then touch the Open button Xmini will now open the directory and show the first 7 files in it The...

Страница 243: ...Turn the 4 edit knobs to select the first 4 characters of the name for the new directory Touch n5 8 so it turns black to select the characters 5 to 8 of the name When you are done with this touch the...

Страница 244: ...file from USB drive It is possible to delete a file from the attached USB drive directly from Xmini To do this select the file you would like to delete and touch the MD Del button Now touch the Del b...

Страница 245: ...nd songs in its own axp axo format so these can at writing moment only be used by Xmini and Anamono X To enter the export page touch the Export button All exports are done to the currently open direct...

Страница 246: ...t the sample bank of the sample to be exported and turn Edit Knob 2 to select the sample number AlSm Export All Samples Touching this button will export all samples of the selected sample bank The Sam...

Страница 247: ...nect the USB drive to your computer 3 Make sure that the USB drive is FAT formatted 4 Create a directory in the root directory of this USB drive that is named UPDATE If the USB drive already contains...

Страница 248: ...11 Touch the UPD button...

Страница 249: ...12 Xmini will now search for the UPDATE folder and a valid update file If it finds both it will ask Update Firmware 13 Touch Yes to proceed with updating or No if you regret...

Страница 250: ...get the update file and program its processor When it starts to program the processor it will look like it halts for a couple of minutes This is because it does halt when erasing the program memory of...

Страница 251: ...Programming processor counter in the bottom counts up...

Страница 252: ...15 When programming is done Xmini will ask you to restart it Please turn Xmini off and then on again...

Страница 253: ...re ready to use While it is finalizing the update and initial text will show on the display If something goes wrong If the power should go off while Xmini is getting the update from the USB drive and...

Страница 254: ...inspiration you might not need to purchase a completely new synth The analog filter of your Xmini can be replaced to enter a new sound universe This section of the manual will describe how to do that...

Страница 255: ...And a filter board...

Страница 256: ...Make sure that your Xmini is turned off and remove the power connector cable from its connector...

Страница 257: ...Remove the 4 screws in the corners of the left endplate using the Phillips screwdriver...

Страница 258: ...Pull the endplate leftwards...

Страница 259: ...ore you touch anything electronic with the Xmini power supply connected to the wall socket touch the metal on the connector This will unload you from any static electricity that might damage the elect...

Страница 260: ...ing the filter in place might be glued Use the screwdriver with flat head or a knife to loosen it from the Xmini box Grab the filterboard with 2 fingers You will need to wristle it out of the filter c...

Страница 261: ...Old filterboard is out...

Страница 262: ...When you now look inside the box you will see the filterboard connector The new filter has to be connected in the middle of that...

Страница 263: ...EXACTLY IN THE MIDDLE OF THE SOCKET UNFORTUNATELY I HAVE NOT BEEN LUCKY TO FIND A SOCKET THAT FITTED 100 SO THERE ARE A LITTLE AIR ON BOTH THE LEFT AND THE RIGHT SIDE If you like you can now remove th...

Страница 264: ...Reso knobs Pitch Bend messages on the Xmini global MIDI channel Controls ocillator Sampler 1 to 4 Mono Aftertouch messages on the Xmini global MIDI channel Modulates parameters that has been set up to...

Страница 265: ...Knob 1 to 4 on the Preset Song Select screen MIDI CC 9 10 and 11 on the Xmini global MIDI channel from the Morph Cut and Reso knobs Note on off s on any MIDI channels from the sequencer trigger system...

Страница 266: ...Written by Flemming Christensen Gotharman 2017 www gotharman dk...

Отзывы: