background image

27

EN

26

EN

5 / EVERYDAY MAINTENANCE OF YOUR APPLIANCE

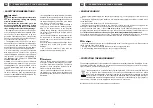
• CLEANING THE DRYING FILTER

• ACCESS TO THE BOTTOM OF THE TANK

Important :

The filter must be cleaned after every

drying cycle.

The purpose of this filter is to catch the lint
that forms during drying, so that it does not
enter the air circulation system.

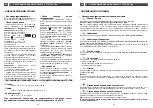
To clean the drying filter, proceed as follows:
— open the machine lid.
— the filter handle is on the right, near to the
drum opening.
— remove the filter from its housing by pulling
it towards you 

(Fig. 24).

— clean it without wetting it by pulling off the
thin layer of lint covering it.
— return the filter to its housing, pushing it
firmly into place.

A

Fig. 23

Fig. 24

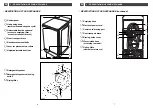
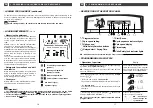
Removing the vane from the drum :

If an item of laundry falls between the drum
and the vane:
— Close the drum after emptying it.
— Turn the drum until the vane attaches.
— Unscrew and remove the 2 screws 
(TORX T20 recesses), the vane falls into the
drum. Take the precaution of placing a towel
to cushion the fall 

(Fig. 23).

— Turn the drum around and open it.
— Pick up the fallen part through the openings
created by removal of the vane.
— To refit, insert the vane, from front to back,
into its housing.
— Close the drum and turn it around.
— Hold the vane while you place the screws.

A

A

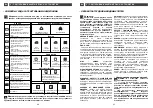
• CLEANING THE PUMP FILTER

• CLEANING THE DETERGENT DISPENSER 

5 / EVERYDAY MAINTENANCE OF YOUR APPLIANCE

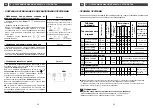
Clean the detergent dispenser regularly. 
To do this:
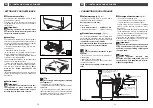
— Push the button forwards and 

pull the dis-

penser upwards

(Fig. 18).

— Hold the dispenser under the hot water tap
to thoroughly clean the inside of the compart-
ments and the water intake areas.
— For easier cleaning of the fabric softener
compartment, it has a 

removable siphon

(coloured part). Make sure you replace it cor-
rectly after cleaning.
— Then replace the entire detergent dispenser
in its housing, making sure it is positioned
correctly.

Fig. 18

Fig. 19

Fig. 20

Fig. 21

Fig. 22

Important :

If you do not clean the pump filter regu-

larly, your machine's performance may be
compromised.

Important :

First program emptying then discon-

nect the power supply.

To clean the pump filter :
— Remove the baseboard  

(Fig. 19).

— Place a flat recipient under the pump
access.
— If your machine has a drain pipe, take it out
by detaching the cap from the base 

(Fig. 20).

— Open the cap at the end of the pipe and let
the water flow into the recipient 

(Fig. 20).

— Close the cap, making sure that it is pushed
down and reattach it in the base.
— Unscrew the cap of the drainage pump filter
(Fig. 21).
— Clean the filter.
— To replace it, insert it and point the small lug
on the cylindrical surface upwards 

(Fig. 22).

— Screw the cap back on as far as it will go
(Fig. 22).
— Replace the baseboard in its original posi-
tion.

Important :

At the next wash, check that there is no

leak during the filling phase.

Содержание WTD 63111

Страница 1: ...EN Instructions for Use RU Washer Dryer...

Страница 2: ...g the pump filter 26 Access to the bottom of the tank 27 Cleaning the drying filter 27 Cleaning your appliance 28 Miscellaneous maintenance 28 6 INCIDENTS THAT MAY OCCUR 30 7 AFTER SALES SERVICE 33 2...

Страница 3: ...nce and keep pets away from it For dryers Before drying remove any powder or liquid detergent recipients that may have been pla ced in the drum with the laundry The plastic material of these recipient...

Страница 4: ...ess to emptying filter access to transport braces Front transport brace Baseboard removal bolts Lever for placement on rollers Height adjustable front feet G G F F E E D D C C B B A A DESCRIPTION OF Y...

Страница 5: ...ded Fig 07 Reattach the baseboard Fig 07 C C B B A A A A 2 INSTALLING YOUR APPLIANCE Fig 04 Fig 05 B B A A Fig 06 B B Fig 07 C C Rear transport brace Remove the 2 screws and the 4 screws D D the 4 scr...

Страница 6: ...ANCE Placement on rollers Your machine has retractable rollers so that you can move it easily To place it on rollers turn the lever at the base of the appliance from the right to the extreme left Fig...

Страница 7: ...n with one part glycerine for one part hot water Let the item soak for an hour then wash normally PAINT do not let paint spots dry Treat them immediately with the solvent indicated on the paint pot wa...

Страница 8: ...ght dry laundry Single sheet ________________400 to 500 g Double sheet______________________800 g Pillowcase ________________________200 g Light night shirt____________________150 g Child s plain weav...

Страница 9: ...s Pre washing compartment powder Washing compartment powder or liquid Bleach compartment Fabric softener compartment Powder detergent Liquid detergent 4 cl 3 2 1 NB All buttons are touch sensitive the...

Страница 10: ...PROGRAMMING A DRYING CYCLE ONLY Important To ensure proper drying the load must not exceed 4 kg If the machine estimates that the load is too large to permit subsequent drying it stops at the end of t...

Страница 11: ...cording to the load of laundry in the drum Information Choosing an option changes the cycle duration for example Prewash option the cycle is extended from 17 to 33 minutes Rinse plus option the cycle...

Страница 12: ...that this change is not allowed and that it will not be taken into account 3 3 A A DETAILS OF PROGRAMS Prewash Sp cially designed for soiled laundry mud blood etc Cold agitation precedes a heating ph...

Страница 13: ...t can limit spinning if it detects that the load is poorly distributed In this case your laundry may be insufficiently spun Spread out your laundry evenly in the drum and program a new spin Remaining...

Страница 14: ...NG THE DETERGENT DISPENSER 5 EVERYDAY MAINTENANCE OF YOUR APPLIANCE Clean the detergent dispenser regularly To do this Push the button forwards and pull the dis penser upwards Fig 18 Hold the dispense...

Страница 15: ...he pre sence of seals as well as tightening of connections NB excess foam may have caused overflow in this case slight leak try to re program a supervised cycle with a smaller amount of detergent If t...

Страница 16: ...not empty you have programed Full tank stop the drainage pump or filter are blocked clean these parts the discharge pipe is bent or flattened The load is not spun or insufficiently spun you have sele...

Страница 17: ...ofessional authorised to work on the brand When you call mention your appliance s complete refe rence model type serial number This infor mation appears on the manufacturer s rating plate Fig 26 ORIGI...

Страница 18: ...6 9 16 9 9 18 9 9 18 7 9 0 19 20 21 22 23 90 9 7 7 23 6 D 24 6 D 25 5 E 6 7 26 6 D 9 26 6 27 6 D 9 27 6 28 6 9 28 6 E F 30 7 E E 33 9 9 9 GORENJE I 9 9 9 7 9 6 7 6 9 6 9 0 9 0 7 9 0 6 7 9 0 GORENJE 9...

Страница 19: ...6 6 6 6 9 6 I 90 I9 I O 9 9 F 6 9 6 9 9 9 7 7 6 9 I 90 0 I 0 6 9 9 9 0 9 I I I9 I 9 7 I9 I 9 8 RU 1 34 3 5 6 3 3 9 9 9 9 3 9 0 6 90 9 0 9 9 6 0 9 9 D 6 9 0 9 9 9 9 9 9 9 9 6 7 9 I 9 0 9 9 90 0 9 0 9...

Страница 20: ...1 34 3 5 6 3 3 5 6 3 K K L L M M N N P P O O Q Q 5 9 5 9 9 9 C Q Q P P O O N N M M L L K K 03 RU 1 34 3 5 6 3 3 5 6 3 H H I I 9 9 D J J I I H H 02 3 8 G G F F E E D D C C B B A A A A B B G G E E D D...

Страница 21: ...08 09 H H 0 2 4 9 6 10 9 9 9 08 0 I9 0 9 9 0 6 9 0 7 0 2 09 H H G G F F E E D D 4 7 9 9 9 3 9 9 C 9 C 9 3 8 E E RU Y 3 Z 0 8 3 9 0 9 9 90 D 0 7 9 9 7 9 0 9 0 04 9 0 9 6 10 9 9 9 05 0 9 06 9 9 07 9 07...

Страница 22: ...6 6 9 6 0 0 9 90 9 9 9 9 9 9 6 9 9 9 7 0 0 80 1 10 0 3 3 3 2006 95 CE 2004 108 CE 13 13 90 9 9 9 9 6 0 9 9 1 10 0 80 m mini 9 D 9 6 9 9 6 9 D RU 2 3 3 5 6 3 6 4 3 3 5 6 3 9 6 9 9 O 9 6 9 10 3 3 3 0 9...

Страница 23: ...9 6 06 6 9 6 6 6 0 7 9 7 9 9 9 9 0 9 6 90 9 9 I 90 9 0 9 9 79 I 9 3Z 6 9 0 9 9 9 6 9 9 90 9 9 7 0 9 90 9 0 6 9 0 90 3e 6 6 9 7 9 9 6 3 3 9 9 3 3 40 4e 0 4 Y RU 3 6 3 3 5 6 8 4eY 3 Z 9 9 C 50 60 60 40...

Страница 24: ...0 6 9 0 9 0 0 9 90 9 7 0 90 9 9 9 0 9 0 6 9 0 9 6 9 0 9 9 9 9 9 6 9 0 6 06 9 9 9 0 9 6 9 9 0 9 9 9 6 Q9 0 D 9 9 150 7 9 ______________ 100 __________________________ 250 9 9 __________________ 50 9 0...

Страница 25: ...9 9 I 90 3 9 F F E E D D C C B B A A 9 5 5 4 4 3 3 2 2 1 1 NB 3 RU 3 6 3 3 5 6 8 4eY 3 6 8 4eY 6 3 16 cl 9 6 9 0 9 0 9 0 9 6 90 0 0 90 9 9 9 6 9 0 90 9 7 6 7 IDD 9 6 9 9 7 9 9 7 9 7 0 9 9 I 7 99 9 90...

Страница 26: ...E 2 2 E E 9 0 NB 6 6 6 6 9 9 6 1000 6 9 9 E E 90 9 9 9 6 9 6 0 9 0 F NB 9 6 9 9 6 0 9 0 RU 4 6 3 3 5 6 3 6 3 4 3 9 9 30 4 NB 6 6 9 9 9 0 9 9 A A 0 NB 9 9 0 6 79 9 9 7 90 9 9 9 0 9 0 3 0 6 9 6 9 30 4 9...

Страница 27: ...3 5 6 3 3 0 3 30 4 Y 6 0 0 9 9 6 9 7 0 O 0 9 F 6 9 9 9 0 0 7 90 9 0 907 I 0 9 9 9 9 9 40 C 6 9 9 E E E E 6 9 0 7 0 9 0 0 6 6 0 0 9 7 7 90 I 2 4 9 6 0 9 6 9 9 7 6 9 9 9 6 90 I 2 NB 9 6 9 9 6 9 0 9 6 9...

Страница 28: ...6 9 00 9 9 9 9 0 9 9 0 9 9 9 9 9 0 9 0 6 0 9 9 6 90 9 9 0 0 0 9 9 6 I 0 6 3 3 A A 6 4Y 3 4e 0 3 0 3 Q9 60 C 6 Q9 4 230 50 10 A 2200 9 96 60 CE 8 90 9 6 Q 9 9 9 0 60 C NB 6 7 I 9 0 6 9 0 9 9 9 9 907 7...

Страница 29: ...9 9 6 0 7 3 3 D D RU 4 6 3 3 5 6 3 8 9 90 0 9 0 0 30 C 7 9 7 9 9 6 0 3 9 9 D 0 9 6 IDD 6 6 0 0 9 0 9 90 6 9 99 90 9 9 9 9 6 7 9 0 0 9 9 9 7 0 I 6 9 9 0 90 9 9 9 9 0 F 6 9 0 6 6 9 I 9 9 9 9 9 0 9 9 79...

Страница 30: ...18 19 20 21 22 3 C CC 9 3 90 6 D 9 9 19 9 9 9 9 9 6 0 20 9 6 9 6 20 9 6 6 9 9 6 D 9 9 21 6 D 9 90 9 9 6 7 7 9 6 22 9 6 9 9 3 C RU 4 6 3 3 5 6 3 3 Z D 8 9 0 90 6 0 I 9 6 9 0 9 0 9 90 0 0 900 9 9 9 0 0...

Страница 31: ...90 9 9 9 9 0 9 6 7 0 6 7 7 0 9 9 9 3 C C 9 6 0 9 6 9 0 0 9 9 9 9 Z 3 5 6 3 3 9 9 6 9 25 7 99 6 7 9 9 7 9 Z D 4e 5 Z 8 RU 5 3 3 8 4 3 3 5 6 3 3 D 9 6 I D 9 0 90 0 9 0 0 6 9 90 7 90 6 D 9 9 6 D 9 7 0 9...

Страница 32: ...9 0 9 6 D 0 9 7 0 7 9 6 9 0 9 9 9 0 9 9 9 9 0 9 9 9 0 9 9 9 6 9 9 9 6 9 6 0 9 9 3 9 9 3 62 RU 6 3 0 3 3 9 3 9 9 6 6 I9 0 9 9 6 9 6 9 7 9 6 d01 9 d07 9 6 D 0 D 0 9 6 9 9 9 6 9 6 9 6 9 7 0 9 9 6 0 6 1 6...

Страница 33: ...9 9 0 9 D D 9 0 9 9 0 D 0 0 9 6 7 6 7 7 90 26 6 4e 0 4 9 0 9 D 7 9 7 7 6 0 8 0 64 RU 6 3 0 3 3 0 30 e Y 4e 90 D 9 7 9 0 9 I 0 9 6 6 6 9 6 D 9 9 E 6 D 9 6 9 6 6 9 3 9 d01 d02 9 9 9 0 9 6 0 9 9 6 9 6 9...

Страница 34: ...67 Z Y RU 66 Z Y RU...

Страница 35: ...WTD 63111 WTD 63131 TW2G00259_01 1 3 01 12...

Отзывы: