background image

7

HANDLING COMPACT DISCS

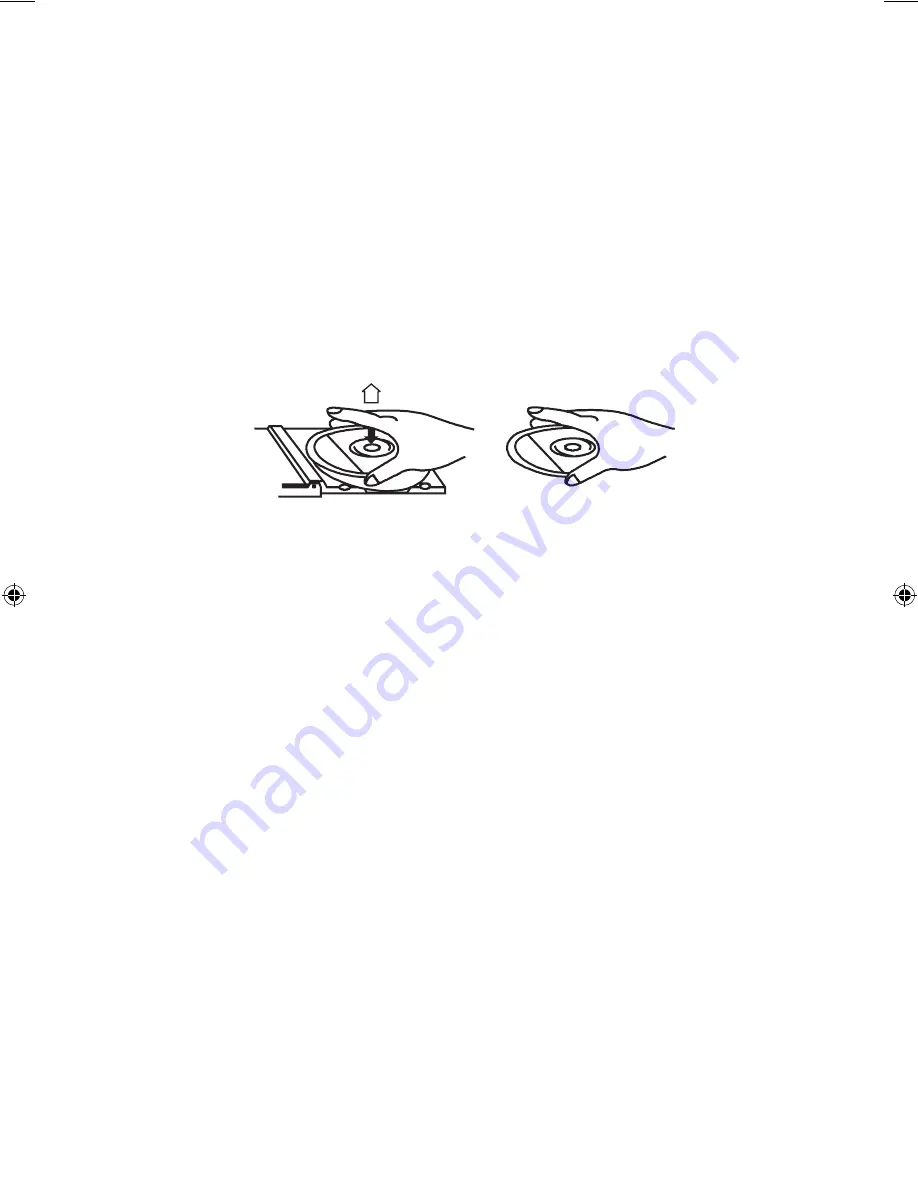
To remove a disc from its storage case, press down on the centre of the case and lift the 

disc out, holding it carefully by the edges. 

Fingerprints and dust should be carefully wiped off the disc’s recorded surface with soft 

cloth. Unlike conventional records, compact discs have no grooves to collect dust and 

microscopic debris so gently wiping with a soft cloth should remove most particles. Wipe 

in a straight line from the inside to the outside of the disc. Small dust particles and light 

stains will have absolutely no effect on reproduction quality.

Never use chemicals such as record sprays, antistatic sprays, benzine, or thinners to 

clean) compact discs. These chemicals can irreparably damage the disc’s surface. Discs 

should be returned to their cases after use. This avoids serious scratches that could 

cause the Laser pickup to skip. 

Do not expose discs to direct sunlight, high humidity, or high temperatures for extended 

periods. Long exposure to high temperatures can warp the disc. 

LOADING DISCS

LOADING AND UNLOADING CD OR CD+G

1.  Push the CD door to open the disc compartment. 

2.  Once the CD door has opened, remove a disc from its case and locate the disc  

  silver side down on to the centre turntable. Push the disc down until it clicks firmly 

      in place. 
3.  Push the CD door to close the disc compartment. 

CAUTION 

1.  Do not put anything except a compact disc into the compartment. Foreign objects  

  can damage the mechanism.

2.  Keep the disc compartment closed when not in use to prevent dirt and dust from  

  entering the mechanism. 

IB for 6300027.indd   6

5/17/2006   2:50:37 PM

SINGING TO MUSIC 

The microphone can operate together with the CD functions. 

1. Insert the supplied microphone into either MIC input socket. 

2. Move the ON / OFF switch on the microphone to the ON position and operate the

microphone.

3. Adjust MIC 1 or MIC 2 volume level and master Volume control as required. 

4. To add ambience to your voice adjust the Echo control as required. 

5. Use the AVC switch to cut and control the vocals from the music being played.

6. Putting Karaoke disc, switch MUSIC / VOCAL Control to Music side to adjust music

volume and to Vocal side to adjust vocal volume.

Содержание XB5CDG

Страница 1: ...V GRAPHICS SYSTEM VIDEO READY CONTENTS This product includes the following accessories 1 X Microphone 1 X Scart Lead 1 X CD G Disc 1 X Colour Camera Before operating this unit please read this Owners Manual carefully ...

Страница 2: ...tral wires be connected to the earth termi nal in a 3 pin mains plug This symbol means that this unit is double insulated An earth connection is not required CAUTION CLASS 1 LASER PRODUCT Use of contents or adjustments of performance of procedures other than those specified Herein may result in hazardous radiation exposure LASER SAFETY This unit employs a laser only qualified service personnel shoul...

Страница 3: ... this may expose dangerous voltages DON T leave equipment switched on when it is unattended unless it is specifically stated that it is designed for unattended operation or has a standby mode Switch off using the switch on the equipment and make sure that your family knows how to do this Special arrangements may need to be made for infirm or handicapped people DON T obstruct the ventilation of the e...

Страница 4: ...3 LOCATION OF CONTROLS ...

Страница 5: ...P button 7 STANDBY button 8 REPEAT button 9 R P button 10 Pb button 11 MASTER VOLUME control 12 OPEN CLOSE button 13 MUSIC VOCAL button 14 ECHO control 15 DISPLAY 16 AVC control 17 SCART output 18 CD G or V CAMERA video switch 19 DC 12V output Only connect camera DC cable to this socket 20 CAMERA video in ...

Страница 6: ... you ever have to trans port the unit VIDEO AUDIO OUT SCART SOCKET AND CABLE This unit is supplied with a scart cable Connect this scart cable to your XB5 and TV to see the lyrics and AUDIO L R of the CDG disc on your TV USING THE MICROPHONE The microphone may be used in conjunction with all other sections of the XB5 PUBLIC ADDRESS 1 Insert microphone into either of the microphone input sockets 2 ...

Страница 7: ...e does not show on TV then check that AV or scart function has been selected on the TV remote You can now insert a CD disc press play and sing along with the music Note that the wording will not show at the same time as the camera is ON To see the wording on the TV you will need to switch the function switch on the back panel from CAMERA to CD The Camera will now no longer be operating Note The ca...

Страница 8: ...exposure to high temperatures can warp the disc LOADING DISCS LOADING AND UNLOADING CD OR CD G 1 Push the CD door to open the disc compartment 2 Once the CD door has opened remove a disc from its case and locate the disc silver side down on to the centre turntable Push the disc down until it clicks firmly in place 3 Push the CD door to close the disc compartment CAUTION 1 Do not put anything excep...

Страница 9: ...AV on your TV Connect one end of the supplied scart cable to your TV and the other end to the scart socket on the rear of the XB5 Make sure you select AV channel on your TV Note When a CD Graphic disc is loaded the words of the song will appear on TV screen when it is being played IMPORTANT INFORMATION This compact disc player has built in error compensation circuits to correct for minor de fects ...

Страница 10: ...track each time the Pb button is pressed If this button is pressed once in the middle of a track the CD player will skip back to the beginning of that track To make it skip back to the previous track press the Pb button twice Repeatedly pressing the Pb button make the CD player skip back through the disc track by track Once the beginning of the first track is reached the CD player will not go back ...

Страница 11: ...Remember listening for prolonged period of time at high volume levers will harm your hearing Once you have established a comfortable listening level DO NOT INCREASETHE SOUNDLEVEL FURTHER The following list of typical sound levels may assist you in recognising just how loud you have set the volume level DECIBEL Lever dB Example 30dB Quiet library soft whisper 40 Living room fridge freezer bedroom a...

Страница 12: ...ve 2002 96 EC WEEE The mark indicates the requirement NOT to dispose the equipment as unsorted municipal waste but to use the return and collection systems available Notes 1 Only compact disc s marked with the disc logo are guaranteed to work on this player Home recorded discs CDR recorded on home PC s may not play or operate correctly This player cannot play CD RW DVD s includ ing PHOTO CDs data ...

Отзывы: