background image

Mini Docking Station User’s Manual 

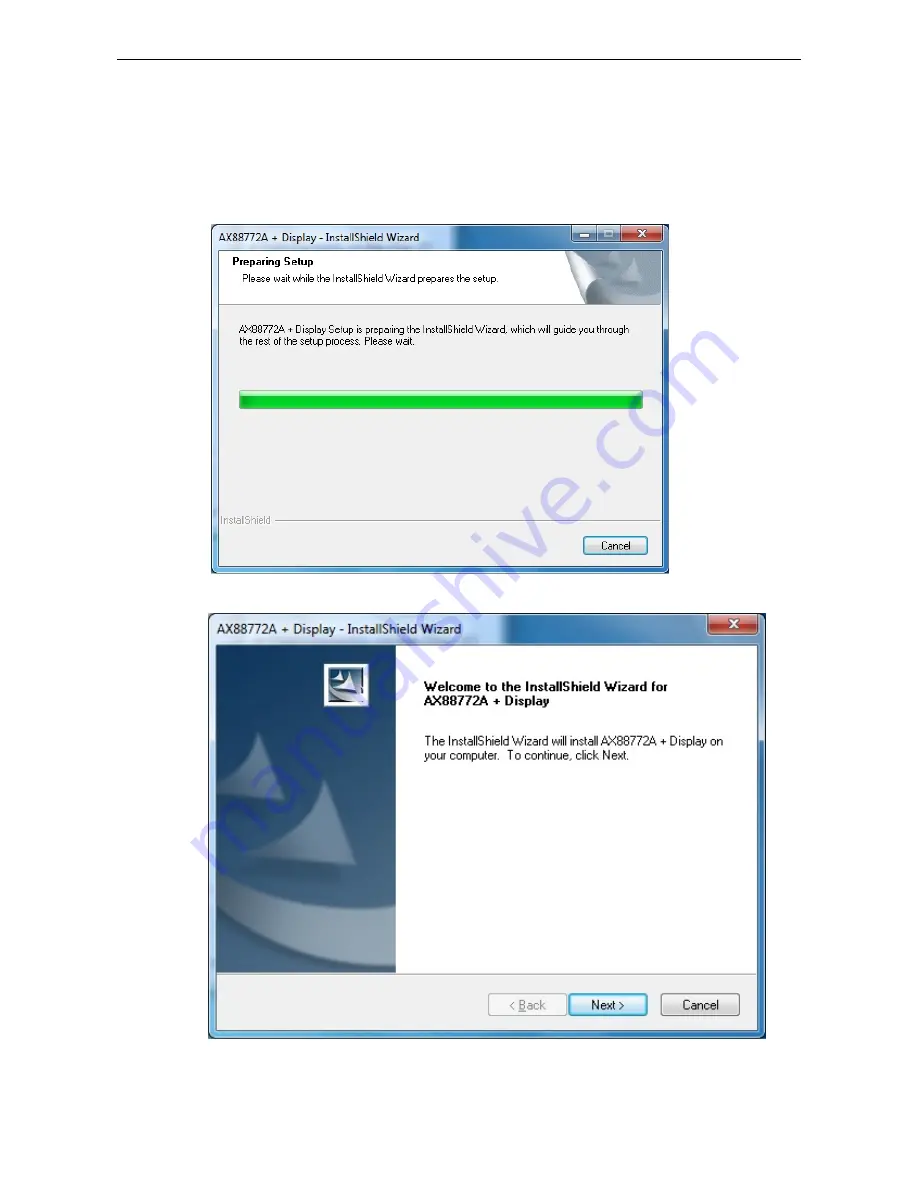
B. On Windows 7 

To install the Driver:   

1.  Insert the provided CD into your disc drive, locate and double-click the 

Setup.exe 

file under 

E:\Driver

 where E is your disc drive letter. 


2.  Please click Next to install the driver. 


8


Содержание DU2800

Страница 1: ...Mini Docking Station User s Manual ...

Страница 2: ...r other damage SAFETY INSTRUCTIONS Always read the safety instructions carefully Keep this User s Manual for future reference Keep this equipment away from humidity If any of the following situation arises get the equipment checked by a service technician The equipment has been dropped and damaged The equipment has obvious sign of breakage The equipment has not been working well or you cannot get ...

Страница 3: ...ecting DVI Monitor 11 Connecting USB Devices 12 3 Using the Docking Station with Video 13 USB 2 0 Ports 13 Ethernet Port 13 Video Port 14 Display Modes 14 Adjusting Resolution Color Depth and Refresh Rate 17 Disconnecting the Docking Station 19 How Standby or Hibernate Mode Affects Devices Attached to the Docking Station 20 External Monitors 20 Other Devices 20 4 Uninstalling the Drivers 21 Uninst...

Страница 4: ...rals Ethernet network speaker and microphone but also an additional connect or disconnect the peripherals from the rear of a computer With the video port your computer can be connected to one more monitor LCD or projector The connected monitor can be configured to either mirror your primary screen or extend the Window desktop allowing visibility of more applications at the same time No more stacki...

Страница 5: ...nitor mouse and all peripherals with one USB plug Mini tower design reduces desktop footprint Plug n play and hot pluggable so you can connect to the dock and swap devices without shutting down Front USB port makes connections quick and easy Supports Windows 2000 SP4 XP SP2 Vista Windows 7 Package Contents Mini Docking Station x1 USB 2 0 Cable x1 Power Adapter x1 DVI to VGA adapter x1 CD Driver an...

Страница 6: ...Mini Docking Station User s Manual Mini Docking Station User s Manual Front Panel USB 2 0 downstream ports For connection to USB peripherals 3 ...

Страница 7: ...not provided DVI video output port For connection to a VGA or DVI monitor For DVI model if you want to connect to a VGA monitor use the provided DVI to VGA adapter for connection USB upstream port For connection to the USB port of the host computer Power jack For connection to the provided power adapter The Docking Station always needs external power supply for operation as it does not take power ...

Страница 8: ...tion procedure please follow the steps described in this manual to install the drivers first and then make the connection A On Windows 2000 XP Vista To install the Driver 1 Insert the provided CD into your disc drive locate and double click the Setup exe file under E Driver where E is your disc drive letter 2 Please click Next to install the driver 5 ...

Страница 9: ...n installation 5 Please click I Accept after reading the statement of Software End User License Agreement Do not connect the docking station to your computer at this stage Please proceed to next section to continue with the video component installation 6 ...

Страница 10: ...anager Icon in System Tray that looks like a monitor as below Click on the icon to bring up the menu Extend Mode The screen is part of the extended desktop Mirror Mode The screen copies the contents of the primary screen Off Mode The screen is black Set as Main Monitor The screen is the primary screen Notebook monitor off The Notebook screen is black and the DisplayLink screen is the primary scree...

Страница 11: ...s Manual B On Windows 7 To install the Driver 1 Insert the provided CD into your disc drive locate and double click the Setup exe file under E Driver where E is your disc drive letter 2 Please click Next to install the driver 8 ...

Страница 12: ... User License Agreement Do not connect the docking station to your computer at this stage Please proceed to next section to continue with the video component installation 4 Please wait while Windows configures DisplayLink Core Software Your screens may temporarily go black or flash during this process 9 ...

Страница 13: ...Windows 7 Orientation Portrait landscape rotated portrait rotated landscape 6 To control the behavior of an attached DisplayLink device or screen it is possible to use Windows Key P to display a menu and cycle through it to allow Disconnect Projector Duplicate Extend Projector Only Actual strings depend on your operation system These screen shots are from Windows 7 and might vary slightly for each...

Страница 14: ...cating the driver software installation is successful Then the docking station is ready for use D Connecting Devices to the Docking Station Now the installation is complete You can connect the peripherals monitor to appropriate ports on the docking station as required If required you can connect and disconnect the peripherals monitor any time without disconnecting the docking station from the USB ...

Страница 15: ... for a while please reboot your system again To change the display mode see next chapter for instructions Connecting USB Devices Connect your USB devices to the USB ports on the docking station As long as one USB device is connected to the port and the connection works properly the USB LED glows green on When no USB device is connected to the port the LED light is off If your USB device such as a ...

Страница 16: ...ort supports hot plug feature You may plug and unplug an USB device from the docking station at any time when required Some USB devices e g printers and optical drives require higher power to operate To use these devices the power adapter shipped with the device should be plugged into the device and the mains Ethernet Port The Ethernet port supports Ethernet 10 100 Mbps function To connect your co...

Страница 17: ...dows Extended mode is the default setting To set up the video component to use or restore extended mode follow these steps 1 Position the mouse anywhere on your computer desktop right click and select Screen Resolution on Win 7 Personalize Display Settings on Vista or Properties Settings on XP 2000 2 In the Display drop down menu select the option with the string DisplayLink Graphics Adapter 3 Che...

Страница 18: ...over to your second monitor However note that some applications may not support display on the extended desktop Cursor disappeared If you re in extneded mode but the add on monitor is not connected the desktop still pans to the add on monitor and it s possible that your cursor has moved to the extended desktop so that you cannot find it on the primary display To solve the problem in such a case co...

Страница 19: ...on monitor are limited by that of the primary monitor For example even though your add on monitor supports a resolution of up to 1680x1050 you can only configure it to use 1280x1024 due to the primary monitor only supports a resolution of up to 1280x1024 If you change the video output to extended mode and then want to switch back to mirror mode follow these steps 1 Position the mouse anywhere on y...

Страница 20: ...Click OK to close the settings screen The add on monitor stays primary if the PC enters hibernate or suspend mode or is rebooted If the add on monitor is unplugged the main display becomes primary again Adjusting Resolution Color Depth and Refresh Rate There are three components that make up the screen mode Resolution In common usage this refers to the number of pixels displayed on screen horizont...

Страница 21: ... the user through Windows are a comprise of the support from the following elements The video component of the docking station The primary monitor and the add on monitor The primary video card on your computer and installed drivers Therefore for example if your monitor doesn t support a resolution of 1600x1200 then 1600x1200 is not possible though your dokcing station s video component supports 16...

Страница 22: ...pported resolutions and color quality numbers in the table above For an add on monitor you can also select any resolution or color quality supported by that monitor 4 To change the refresh rate click Advanced and then click Monitor 5 Select a refresh rate from the Screen refresh rate drop down list and then click Apply 6 Click OK to close the settings screen Disconnecting the Docking Station If th...

Страница 23: ...t were previously on the external monitor will not move back to that secondary monitor Also if the add on monitor is in extended mode and the computer requires a login after standby or hibernate mode the login screen appears on the primary computer monitor not the external monitor If the computer is shut down restarted and logged in again the add on monitor returns to the same mode as it was befor...

Страница 24: ...ive 1 Open the Control Panel and double click Uninstall a Program on Win 7 Programs and Features on Vista or Add or Remove Programs on 2000 XP 2 Select DisplayLink Graphics and click Uninstall or Remote 3 Click Yes to confirm the removal 4 Click Yes to restart your computer You can also disconnect the video connection now 21 ...

Страница 25: ... Type A Female Black Video Output Port 1 x DVI Female White LAN 1 x RJ 45 Female Power 1 x DC Jack Black LEDs Power LED On Power is supplied to the docking station Off No power is supplied to the docking station USB Hub LED On Any of the four USB downstream ports is connected to a USB device Off No USB device is connected 10 100 1 x LED Green LAN LEDs Link 1 x LED Green Specification is subject to...

Страница 26: ...in compliance with the requirements of the following regulations EN 55 022 CLASS B WEEE Information For EU European Union member users According to the WEEE Waste electrical and electronic equipment Directive do not dispose of this product as household waste or commercial waste Waste electrical and electronic equipment should be appropriately collected and recycled as required by practices establi...

Отзывы: