


25
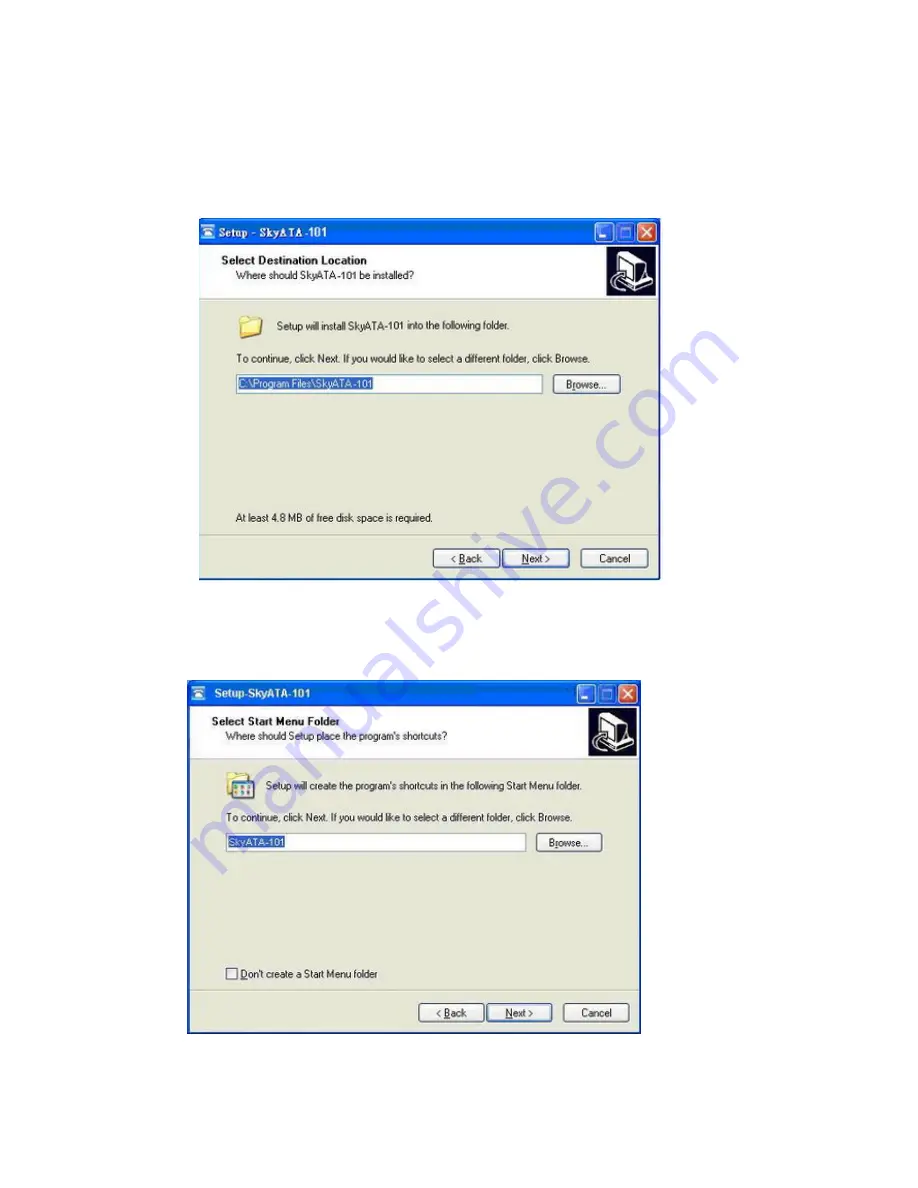
8. In the next window, designate a folder for the installation. A default folder will
appear. If this is not a preferred folder for user, click Browse and choose a
folder from the list. After deciding folder for the installation, click Next.
9. In the next window, choose a preferred folder for SkyATA-101 program’s
shortcuts in Start Menu folder. A default folder will appear. If this is not a
preferred folder, click Browse and choose a folder from the list. User can
choose not to create a Start Menu folder. If this is the case, check the box of
“Don’t create a Start Menu folder”. Click Next when the setting is done.
Содержание SkyATA-101
Страница 9: ...9 6 After installation Skype will ask for Create Account Then click Next ...
Страница 10: ...10 7 User can provide e mail address and country information and then click Sign In ...
Страница 11: ...11 8 A Getting Started window comes up Press Start button to get a simple guide for setting up Skype ...
Страница 12: ...12 9 The next window will help user to check your sound settings by making a Skype test call Click Next ...
Страница 13: ...13 10 The next window will guide user to add friends to user s Skype contact list Click Next ...
Страница 14: ...14 11 Then user can try to call friends Click Next ...
Страница 16: ...16 ...
Страница 28: ...28 ...
Страница 63: ...63 ...
Страница 64: ...64 ...
Страница 65: ...65 ...
Страница 68: ...68 ...
Страница 69: ...69 Q8 Why does SkyATA 101 fail to initialize ...
Страница 75: ...75 ...


