background image

36

R6530 DVD Recor

der

:: Special Disc Features

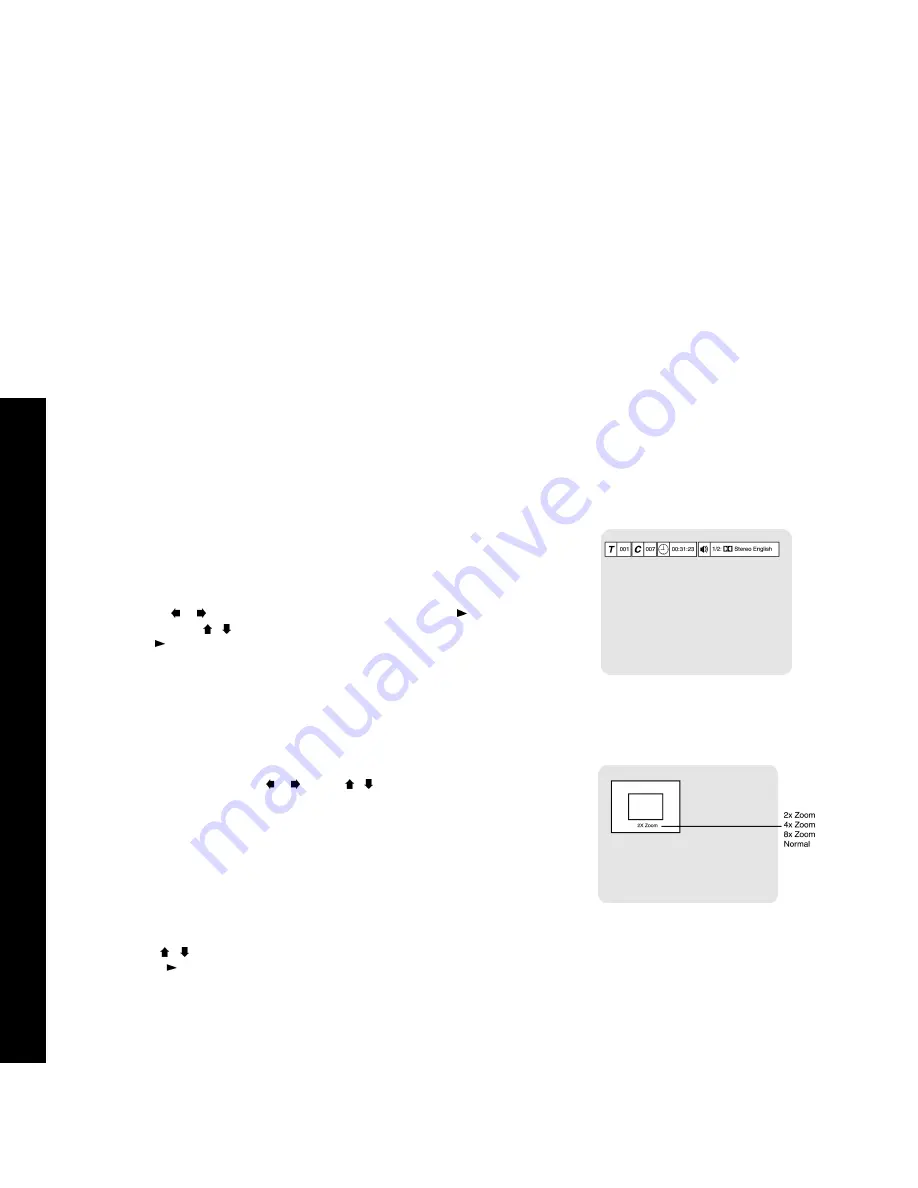
Display/Go To

1

Press Display or Go To during playback to view and/or change the current disc status:

DVD

 - Shows the current Title number, Chapter number, elapsed time, and audio sta-

tus.

CD

 - Shows the current Track number, elapsed time, Play mode (Normal or Random), 

and Repeat mode (Off, Track, or Disc).

2

To go to a specific Title, Chapter or Track or to change the status of any item:

• Use  the 

 / 

 buttons to select the desired item and press Play  /Enter.

• Use the 0-9 or   /   buttons to change the selected item to the desired setting and press 

Play /Enter.

3

Press Display or Go To again to turn off the display.

Zoom

1

Press Zoom repeatedly during DVD playback to progressively increase/decrease the scale 

of the on-screen image.

2

While in Zoom mode, use the 

 / 

 and the   /   buttons to move around the zoomed 

image.

Title

When you play a DVD or DVD+R/+RW with multiple Titles, you can select the Title you 

want using the Title button.

1

Press Title to display the disc’s Title menu.

• If there is no Title menu, the button is invalid.

2

Press the   /   buttons or the 0-9 buttons to select a Title for playback.

3

Press Play  /Enter to start playback of the selected Title.

Display/Go To Screen

Zoom Screen

Содержание R6530

Страница 1: ......

Страница 2: ...odak Company and is used with permission All other brand and product names are trademarks or registered trademarks of their respective companies This product incorporates copyright protection technology that is protected by method claims of certain US patents other intellectual property rights owned by Macrovision Corporation and other rights owners Use of this copyright protection technology must...

Страница 3: ...21 Recording from an External Device 23 Editing during DVD Playback 25 Inserting a Chapter 25 Removing a Chapter 25 Hiding a Chapter 25 Showing a Chapter 26 Creating a New Thumbnail 26 Editing from the Disc Menu 27 Playing a Full Title 27 Finalizing a Disc DVD R only 27 Erasing a Title DVD RW only 27 Making a Disc Compatible DVD RW only 27 Timer Recording 28 4 DVD Playback Basic Disc Playback 31 A...

Страница 4: ...utput Format 42 Modulator Output 42 Clock System Settings 42 Set Clock 42 Ratings 42 Password 43 Screen Saver 43 Angle Mark 43 Factory Reset 43 Disc Media Settings 43 Finalize DVD R 43 Erase DVD RW 43 Recording Settings 44 Recording Quality 44 Auto Chapter 44 6 Help Customer Service Information 45 Troubleshooting 45 Warranty 48 Safety 49 Important Safety Instructions 49 Safety Regulatory Informati...

Страница 5: ...e from 1 hour to 6 hours on one DVD R RW disc Automatic Menu Creation Automatically creates a DVD disc menu as you record Editing Hide or Re arrange material after it has been recorded Thumbnail Images Uses images from your recordings as menu selections on the disc Progressive Scan Output Delivers sharp crisp video for highest quality on your progressive scan TV Connection Flexibility Composite S ...

Страница 6: ... pur poses How do I know how much space is left on my disc for recording Load the disc and press Disc Menu to see the percentage of recording time remaining on your disc Where do I purchase discs Are they expensive Blank DVD R and DVD RW discs are available at most elec tronics and office supply stores Prices vary but DVD Rs can gen erally be purchased in bulk for less than 1 each What format is t...

Страница 7: ...Chapter Chapters are similar to bookmarks When you hide a Chapter the bookmark is still there but you don t see the Chapter during play back When you remove a Chapter it is like removing the book mark The contents of the disc are still there but the bookmark has been removed What are thumbnails How do I create new thumb nails Thumbnails are single frames from your recordings used to iden tify each...

Страница 8: ... right analog audio outputs of your camcorder or other playback device 5 Front Panel Display Displays feedback on player operation see page 9 for details 6 Disc Tray Use to load a DVD CD or other compatible disc 7 Power LED Lights when the Power button is pressed 8 Record LED Lights when a DVD recording is in progress 9 Open Close button Press to open and close the disc tray 10 Play Pause button P...

Страница 9: ... an alternative angle is available during DVD play back 8 Random Indicator Lights when a disc is playing in random order 9 Program Indicator Lights when a custom program order has been programmed CD MP3 playback only 10 DVD Indicator Lights when a DVD disc is loaded 11 Progressive Scan Indicator Lights when Component Video with Progressive Scan is enabled 12 Play Indicator Lights when a disc is pl...

Страница 10: ...es Line 1 Line 1 S Line 2 Line 2 S Ch 7 Play Enter Press to start playback Also press to con firm menu settings Also use as a shortcut to jump to Disc mode while in Live mode 8 Arrow buttons Press to navigate on screen menus 9 Return Press to return to the previous menu 10 Next Press to skip to the next Chapter or Track 11 Prev Press to skip to the previous Chapter or Track 12 Zoom Press to zoom i...

Страница 11: ...use Step Press to pause playback and recording Press repeatedly for frame by frame play back 28 Slow Press repeatedly for slow motion play back at variable speeds 29 Title Press to display DVD Title menus for discs with multiple Titles If a disc has a single Title functions like the Disc Menu button 30 Mute Press to mute audio playback 31 Volume Press to adjust the volume level disc playback only ...

Страница 12: ...o cable 5 Composite Video Out Connect to the composite video input of your TV with an RCA cable 6 S Video Out Connect to the S Video input of your TV with an S Video cable 7 Prog Scan Y Pb Pr Connect to the Progressive Scan Component video inputs of your TV with a Component Video cable 8 Stereo Audio Output Connect to the left right analog audio inputs of your TV stereo or 2 channel amplifier with...

Страница 13: ...V jack on the back panel of the DVD Recorder to the antenna in jack on your television b Line Out Use for better sound and picture quality if your television has audio video inputs Connect the supplied audio video cable from the AUDIO VIDEO OUT jacks on the back panel of the DVD Recorder to the line in jacks on your television and or stereo receiver 3 Power on DVD Recorder TV Plug the DVD Recorder...

Страница 14: ... accu rate timer recording Use the buttons to select each item hours minutes month day and year Use the buttons to set each item to the correct time and date Press Play Enter to continue 3 Select Antenna or Cable Use the buttons to select Antenna default or Cable Press Play Enter to continue 4 Run Auto Channel Search Auto Channel Search runs automatically after you select Antenna or Cable This may...

Страница 15: ... Connect S Video to TV Connect an S Video cable from the S VIDEO OUT jack on the back panel of the DVD Recorder to the S Video input on your television 2 Connect Stereo or Digital Audio to TV Connect stereo audio cables from the AUDIO OUT jacks on the back panel of the DVD Recorder to the line in jacks on your television or stereo receiver OR Connect the coaxial or optical digital audio output to ...

Страница 16: ...e corresponding jacks on the DVD Recorder and TV 2 Connect Stereo or Digital Audio to TV Connect stereo audio cables from the AUDIO OUT jacks on the back panel of the DVD Recorder to the line in jacks on your television or stereo receiver OR Connect the coaxial or optical digital audio output to your audio video receiver see page 17 3 Enable the Component Video Output Set Video Output to Component...

Страница 17: ...igital audio video receiver 1 Connect DVD Recorder to Digital Audio Receiver Connect a coaxial OR optical digital audio cable from the DIGITAL AUDIO OUT jacks on the back panel of the DVD Recorder to the matching digital audio inputs on your audio video receiver Use whichever connection is available on your audio video receiver Use EITHER coaxial OR optical NOT both ...

Страница 18: ...nel of the DVD Recorder to the antenna in jack on your television b Line Out Use for better sound and picture quality if your television has audio video inputs Connect the supplied audio video cable from the AUDIO VIDEO OUT jacks on the back panel of the DVD Recorder to the line in jacks on your televi sion and or stereo receiver 4 Power on DVD Recorder TV Cable Box Plug the DVD Recorder power cor...

Страница 19: ... input jack on your cable box 3 Connect Cable Box to TV Connect an additional coaxial cable from the output jack on the cable box to the antenna in jack on your television 4 Power on DVD Recorder TV Cable Box Plug the DVD Recorder into a standard electrical outlet and turn on your televi sion DVD Recorder and cable box 5 Select Channel 3 on TV Cable Box Tune your television and cable box to channe...

Страница 20: ...om the following options To View Device Press Disc Live on the remote control to switch to Live mode Press Input until Line 1 Line 1 S Line 2 or Line 2 S appears on your television screen To Record from Device Press Disc Live on the remote control to switch to Live mode Press Input until Line 1 Line 1 S Line 2 or Line 2 S appears on your television screen then press Record See Basic Recording on p...

Страница 21: ... an external amplifier audio system and set it to the input connected to the DVD Recorder 1 Press Open Close on the remote control or front panel to open the disc tray 2 Insert a DVD R or DVD RW into the disc tray with the label side facing up If you are using a DVD R it must be not be finalized Once a DVD R is full or finalized it cannot be recorded on again 3 Press Open Close again to close the ...

Страница 22: ...uper Long Play mode 6 hrs max per disc comparable to stan dard VHS quality 8 Press Record to start recording REC appears on the screen and the R6530 will start recording a new Title onto your DVD R RW 9 Options during recording To pause recording press Pause Step To resume recording press Record To view elapsed and remaining recording time press Display You cannot change the Input source or Qualit...

Страница 23: ...r finalized it cannot be recorded on again 3 Press Open Close again to close the disc tray The unit will take a few moments to read the disc and then switch to Disc mode automatically The disc menu for the DVD R or DVD RW will appear The disc menu displays the percentage of free space available on the disc Check to make sure you have enough space on the disc to record the desired show and adjust t...

Страница 24: ...it will not record copy protected material If your source material is copy protected you will receive an error message and the event will not be recorded 8 Options during recording To pause recording press Pause Step To resume recording press Record To view elapsed and remaining recording time press Display You cannot change the Input source or Quality settings once recording has begun 9 When reco...

Страница 25: ... recording where you want to insert a new Chapter Use the buttons to select Insert Chapter and press Play Enter EDIT appears briefly on screen and the new Chapter is added Press Edit to exit the Edit menu Removing a Chapter If you insert a Chapter accidentally or at an incorrect position you can easily remove it Cue to the Chapter in the recording you want to remove Use the buttons to select Remov...

Страница 26: ...e the buttons to select Show Chapter and press Play Enter The selected Chapter is restored and will now be visible during normal playback Press Edit to exit the Edit menu Creating a New Thumbnail The New Thumbnail feature allows you to change the image used in the disc menu to identify each Title You can select any individual frame in the Title to be used as the new Thumbnail The default thumbnail...

Страница 27: ...it to exit the Edit menu Finalizing a Disc DVD R only Finalizing a DVD R allows it to be played in virtually any DVD player It also prevents further writing to the disc Use the buttons to select Finalize and press Play Enter FINALIZE appears briefly on screen and the DVD R will be formatted for maximum compatibility and closed to further writing Press Edit to exit the Edit menu Erasing a Title DVD...

Страница 28: ...rce is powered on and cued to the correct playback position If you are recording from a cable box make sure it is set to the right channel 1 Press Open Close on the remote control or front panel to open the disc tray 2 Insert a DVD R or DVD RW into the disc tray If you are using a DVD R it must be not be finalized Once a DVD R is full or finalized it can not be recorded on again 3 The unit will ta...

Страница 29: ...ng Use the 0 9 buttons or the buttons to set the length in hours and press e g for a 30 minute recording press 0 Use the 0 9 buttons or the buttons to set the length in minutes and press e g for a 30 minute recording press 3 0 Set Input Source Use the buttons to select one of the following inputs Ch Records from television Use the 0 9 or Channel buttons to select the channel and press e g for chan...

Страница 30: ...so alert you if you have entered overlapping events To edit an event simply select it and press Play Enter To delete an entry press Clear 10 Press On Standby on the remote control to put the R6530 in Standby mode 11 When the starting time for the recording is reached the unit will automatically begin recording according to your settings To stop a Timer Recording in progress simply press the On Sta...

Страница 31: ...emote control or front panel to open the disc drawer 2 Place the disc in the drawer with the label side facing up and playback side facing down If the disc has two sides place the disc with the desired playback side facing down 3 Press Open Close again to close the disc drawer 4 Press Play Enter on the remote control or front panel Many discs will load and begin playing automatically when the disc...

Страница 32: ... disc menu for a DVD R RW recorded on this DVD Recorder 1 Insert a DVD R RW disc 2 The disc menu for the loaded DVD R RW will appear automatically with the earliest recorded show appearing at the top of the list If you are in Live mode press Disc Live to switch to Disc mode If you are in Disc mode press Disc Menu or Title 3 The DVD R RW disc menu includes Thumbnails The default thumbnail image is ...

Страница 33: ...io CD 1 Press Open Close on the remote control or front panel to open the disc drawer 2 Place the CD in the drawer with the label side facing up and playback side facing down 3 Press Open Close again to close the disc drawer 4 The CD Track List menu appears and the first Track on the CD begins playing 5 Use the buttons to select any individual Track and press Play Enter 6 Other options during CD p...

Страница 34: ...d at a bit rate of at least 128 kbps If there are any gaps blank data on multi session discs you may experience playback problems 5 Use the buttons to select any individual Track and press Play Enter 6 To browse to the next or previous page use the buttons 7 Other options during MP3 playback Press Volume to adjust the playback volume Press Pause Step to freeze playback Press Play Enter to resume n...

Страница 35: ...zoom in and out of images at variable levels of magnification press Zoom repeatedly While an image is zoomed use the arrow buttons to move around the image 5 To stop the slideshow and view thumbnails of each picture 9 per screen press Stop once To view an image use the arrow buttons to highlight it then press Play Enter To advance to the previous or next page press Prev or Next or highlight the on...

Страница 36: ...tons to change the selected item to the desired setting and press Play Enter 3 Press Display or Go To again to turn off the display Zoom 1 Press Zoom repeatedly during DVD playback to progressively increase decrease the scale of the on screen image 2 While in Zoom mode use the and the buttons to move around the zoomed image Title When you play a DVD or DVD R RW with multiple Titles you can select ...

Страница 37: ...t among all available audio formats 3 Press Play Enter again 4 Press Audio to exit The AUDIO button also allows you to select among all available audio channels while watch ing TV Press Audio repeatedly while watching the built in TV tuner to switch between MAIN The primary audio channel that corresponds with what is shown on screen SAP Second Audio Program A second independent audio channel that ...

Страница 38: ...r 2 Use the buttons to select the desired Repeat mode DVD Off Chapter Title All CD Off Track or All 3 Press Play Enter again 4 Press Repeat 1 ALL to exit Progressive Scan If you connected the DVD Recorder to your TV via the Progressive Component Video Output you can use the Prog Scan button on the remote control to switch to Progressive Scan for superior video quality 1 While playback is stopped p...

Страница 39: ...gs see page 40 For Tuner Video settings see page 40 For Clock System settings see page 41 For Disc Media settings see page 42 For Recording settings see page 43 For Timer Recording see page 28 Setup Menu Navigation The following buttons are used to display and navigate within the Setup menu Setup Press to enter and exit the Setup menu Press to select and change menu items Press to select and chang...

Страница 40: ...elect English Spanish French or Default the disc s default language and press Play Enter Languages vary from disc to disc The disc itself may override your selection Audio Language Format Sets your preferred language for DVD audio soundtracks Use the buttons to select Audio and press Play Enter Use the buttons to select English Spanish French or Default the disc s default language and press Play E...

Страница 41: ...dd Del CH and press Play Enter Use the buttons to select the channel you wish to add or delete and press Play Enter TV Aspect Ratio Sets your preferred aspect ratio for DVD movies Use the buttons to select TV Aspect and press Play Enter Use the buttons to select from the following 16 9 Widescreen Select if you have a widescreen 16 9 television 4 3 Letterbox Select if you have a standard 4 3 televi...

Страница 42: ...ge 13 Use the buttons to select Modulator Output and press Play Enter Use the buttons to select Off Channel 3 or Channel 4 Select Off if you are using the Line Out connection and want the Antenna input signal to pass through to your TV Press Play Enter to confirm your selection Be sure to set your TV to the same channel you selected above Clock System Settings Use to set the clock parental control...

Страница 43: ...gle Mark and press Play Enter Use the buttons to select On or Off If you select On a camera icon will appear on screen whenever an alternative angle is available during DVD playback Factory Reset Resets all Setup menu options to their original settings Use the buttons to select Factory Reset Use the buttons to select Confirm or Cancel If you select Confirm all custom settings will be lost and the ...

Страница 44: ...gh Quality mode comparable to DVD quality SP 2 hrs Select for Standard Play mode LP 3 hrs Select for Long Play mode comparable to S VHS quality EP 4 hrs Select for Extended Play mode SLP 6 hrs Select for Super Long Play mode comparable to VHS quality Press Play Enter to confirm your selection Auto Chapter Enables Auto Chapter mode where the DVD Recorder will automati cally create new Chapters on y...

Страница 45: ...ton is pressed in Make sure the unit is not in Standby mode press On Standby on the remote control No picture Securely connect video cable Repair or replace damaged video cable Make sure the player is connected to the correct TV input Make sure the video input on the TV is set to view the DVD Recorder Make sure the Prog Scan button is set to the correct mode Progressive Scan Interlaced Scan Progre...

Страница 46: ...udio distortion Remote does not function Remove any obstacles between the remote and the player Move closer to the player when operating the remote Point the remote directly at the sensor on front panel of the player Replace the batteries Disc does not play Make sure there is a disc in the tray Turn the disc over Make sure the desired playback side is facing down on the disc tray The disc is skewe...

Страница 47: ...Ω sync C 0 286Vp p 75Ω Video In 2 1 0Vp p 75Ω sync RCA jack x 1 RF In 1 Antenna or CATV Input F Connec tor 75W Audio Analog Out 1 1 85V rms 10kΩ RCA jack L R x 1 Coaxial Digital Audio Out 0 5Vp p 75Ω RCA jack x 1 Optical Digital Audio Out Optical fiber transmitter Frequency Response 20Hz to 20kHz Signal to noise Ratio 90dB Total Harmonic Distortion Less than 0 05 General Power Requirements 100 240...

Страница 48: ... to http www govideo com to determine the nearest authorized Go Video service center What are the Exceptions This warranty does not cover 1 Normal maintenance service 2 Damage from misuse abuse neglect or accident natural disasters or Acts of God 3 Cabinetry decorative parts A C adapters knobs or buttons 4 The foreign country use of this product 5 Go Video product which has been electronically or ...

Страница 49: ...ious damage to the product Use only with a cart stand tripod bracket or table recommended by the manufacturer or sold with the product Any mounting of the product should follow the manufacturer s instructions and should use a mounting accessory recommended by the manufacturer A product and cart combination should be moved with care Quick stops excessive force and uneven surfaces may cause the prod...

Страница 50: ...ischarge unit size of grounding conductors location of antenna discharge unit con nection to grounding electrodes and requirements for the grounding electrode See figure 131 1 15 Lightning For added protection for this product during a lightning storm or when it is left unattended and unused for long periods of time unplug it from the wall outlet and disconnect the antenna or cable system This wil...

Страница 51: ...ll or ceiling only as recommended by the manufacturer 24 Heat The product should be situated away from heat sources such as radiators heat registers stoves or other products including amplifiers that produce heat Safety Regulatory Information Caution To prevent fire shock hazard or annoying interference use only the recommended accessories To prevent electric shock do not use this polarized plug w...

Страница 52: ...pment and receiver Connect the equipment into an outlet on a circuit different from that to which the receiver is connected Consult the dealer or an experienced radio TV technician for help Cuidado Para prevenir incendio riesgo de choque o interferencia enfadosa use solamente los accesorios recomendados Para prevenir electrochoque no use este enchufe polarizado con un cordón de extensión toma de c...

Страница 53: ...re may rise considerably inside the car After playing store the disc in its case On cleaning discs Before playing clean the disc with a cleaning cloth Wipe the disc from the center out Do not use solvents such as benzine thinner commercially available cleaners or anti static spray intended for vinyl LPs Recommended Media Although this DVD Recorder will work with virtually all brands of blank media...

Страница 54: ...54 R6530 DVD Recorder ...

Страница 55: ...xial Digital Audio Output 12 17 Commercials Hiding 7 25 Compatible Discs 5 Component Video Connections 16 Setting 42 Composite Video Input 12 Composite Video Output 8 12 Connections Advanced 15 Alternative Cable Box 19 Audio Video Receiver 17 Basic 13 Cable Box 18 Camcorder 20 Component Video 16 Other Audio Video 20 Progressive Scan 16 Satellite Receiver 20 S Video 15 VCR 20 Video Game 20 Copy Pro...

Страница 56: ...rovision 6 Make Disc Compatible 27 Modulator Output 42 MP3 5 MP3 Indicator 9 MP3 Playback 34 Mute Button 11 N Next Button 10 O On Standby Button 10 On Screen Menu Language 40 Open Close Button 8 10 31 33 34 Optical Digital Audio Output 12 17 Out to TV 12 Output Format 16 42 P Password 43 Pause Indicator 9 Pause Step Button 11 Photo CD Playback 35 Play Full Title 27 Play Enter Button 10 Play Pause ...

Страница 57: ...l 14 Show Chapter 7 26 Skip Button 11 Slow Button 11 SLP 22 24 SP 22 24 Stop Button 8 11 Subtitle Button 10 37 Subtitle Language 40 S Video Connections 16 S Video Input 12 S Video Output 8 12 System Settings 42 T Technical Specifications 47 Thumbnails 7 26 Time Setting 14 Timer Recording 28 Timer Recording Indicator 9 Title 6 Title Button 11 36 Troubleshooting 45 Tuner Video Settings 41 TV Aspect ...

Страница 58: ...58 R6530 DVD Recorder ...

Страница 59: ......

Страница 60: ......

Отзывы: