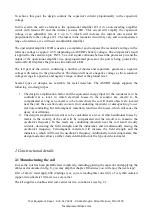
Figure 2: coil-carrier, complete
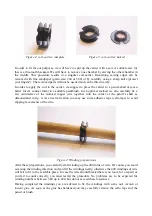
Figure 3: coil-carrier, halved
In order to fit for our purposes, we will have to split up the carrier with a saw. A suitable saw for
this is a fine-tooth hacksaw. We will have to remove one chamber by sawing the other chamber in
the middle. This procedure results in a singular coil-carrier. Remaining sawing edges can be
removed with fine sandpaper (grain size: 240 or 300) or by carefully using a sharp knife (protect
your fingers!). The removed parts will not be needed and can be thrown away.
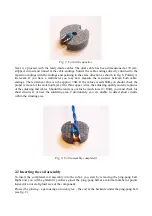
In order to apply the coil to the carrier, we suggest to place the carrier to a pencil-shaft or (even
better for it's conical form) to a suitable paintbrush. In an optimal method we also carefully fix a
few centimetres of the isolated copper wire together with the carrier at the pencil's shaft as
demonstrated in fig. 4. As an extra fixation you may use some adhesive tape (cello tape) to avoid
slipping movements of the wire.
Figure 4: Winding preparations
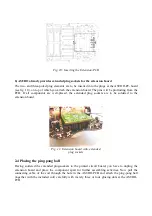
After these preparations, you carefully start winding up the 400 turns of wire. Of course you avoid
reversing the winding direction and you fill the windings neatly, otherwise the 400 windings of wire
will fail to fit in the available place. In case the wire should break (there is no room for a repair) or
you fail to count correctly, you must restart the procedure. No problems are to be expected for
winding numbers between 380 up to 420, but do not exceed these tolerances.
Having completed the windings you are advised to fix the windings with some
nail varnish
or
instant glue
. As soon as the glue has hardened you may carefully remove the cello tape and the
pencil or brush.


