background image

1 Basic description of the design

The minesweeper extension will enable the ASURO robot to detect metallic objects underneath the 
halved Ping-pong ball-glider. This will allow you – of course within the scope of the robot's and the 
kit's possibilities - to develop the scenario of a robotic mine detector respectively treasury hunter or 
a simplified version of a detector and tracer for cables, reinforcing bars and I-beams. 
To avoid abundant explanations for the physical theories for magnetic fields and complex AC-
currents, the following chapters strictly document the basic description of the design and the user's 
manual. 
An operational amplifier (Opamp) has been applied to stimulate oscillations in the resonant circuit 
consisting of a capacitor (C) and an inductor (L) applying an open pot core. Application of the 
magnetically open pot core allows the magnetic field to expand into the surrounding free field and 
to be influenced by neighbouring metallic objects. 

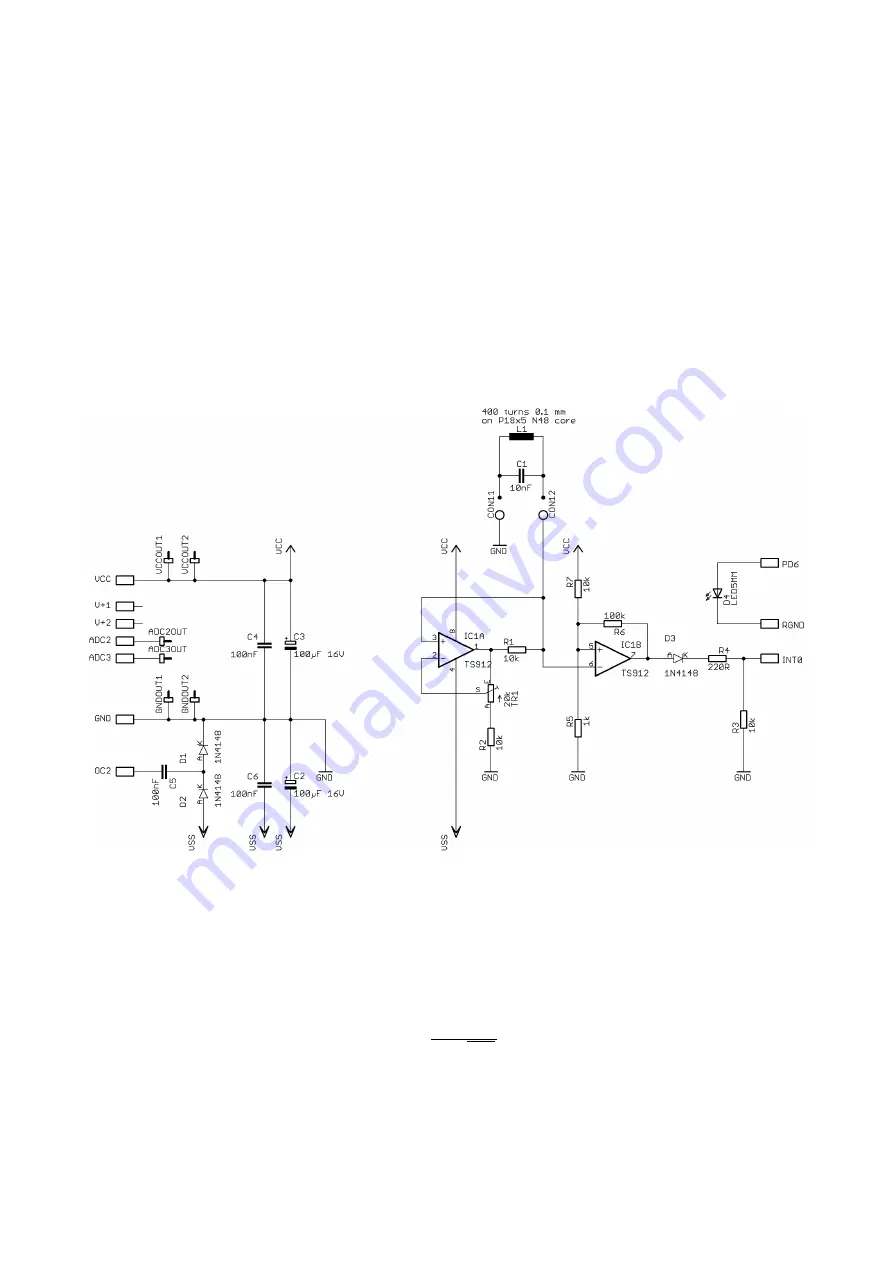
Fig. 1 displays the schematic diagram. The resonant circuit consists of inductance L1 and capacitor 
C1. The design allows resonant behaviour by cyclically exchanging the capacitor's electric field 
energy and the inductor's magnetic field energy. The design's transfer frequency depends on the 
values for the capacitor and for the inductor. Assuming negligible losses, the resonator's frequency 
may be calculated by the following formula:

f

0

=

1

2

L C

Exchanging the capacitor's electric field energy and the inductor's magnetic field energy cannot be 
performed without losses and the losses will cause the oscillation to decay within a few cycles. We 
continually have to feed energy into the system to compensate losses. In analogy to a children's 
swing, the system will have to apply the correct phase in feeding the energy into the circuit.

Figure 1: Schematics for the "Minesweeper"-Extension

Содержание ARX-MSP

Страница 1: ...ARX MSP Minesweeper Kit 99 Washington Street Melrose MA 02176 800 517 8431 TestEquipmentDepot com...

Страница 2: ...y open pot core allows the magnetic field to expand into the surrounding free field and to be influenced by neighbouring metallic objects Fig 1 displays the schematic diagram The resonant circuit cons...

Страница 3: ...e equivalent energy input for the resonator is to be controlled at a level in which electrical losses in the resonator are exactly to be compensated as long as no metal is to be located near the coil...

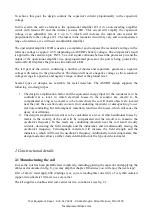
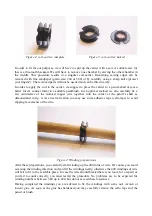
Страница 4: ...centimetres of the isolated copper wire together with the carrier at the pencil s shaft as demonstrated in fig 4 As an extra fixation you may use some adhesive tape cello tape to avoid slipping moveme...

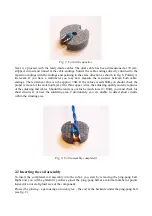
Страница 5: ...y the heated top for some time until the isolation has been removed and a thin layer of soldering tin is covering the wire Warning the generated smoke may cause damage to your health and should not be...

Страница 6: ...f the isolation layer at the thin copper wires the soldering quality and any ruptures of the soldering and cables Should the resistance value be much lower 10 you must check for short circuits at or n...

Страница 7: ...cing the photo transistors T9 and T10 as well as the LED D11 from the PC board These activities require a removal of the ping pong ball The easiest way to proceed is to heat the components which are t...

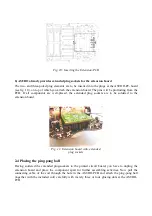
Страница 8: ...ed the extended plug sockets are to be soldered to the extension board 2 4 Placing the ping pong ball Having soldered the extended plug sockets to the printed circuit board you have to unplug the exte...

Страница 9: ...et be careful to apply the correct polarity D1 D2 D3 1N4148 be careful to apply the correct polarity C4 C5 C6 100nF ceramic R1 R2 R3 R7 10k 5 brown black orange gold R4 220 5 red red brown gold R5 1k...

Страница 10: ...ocedure Having attached the ping pong ball including the coil and having completed the PCB assembly you can now insert the PCB into the deactivated robot Please check the isolation of the components c...

Страница 11: ...tion on top of a plastic or wooden box respectively on a table without nails or screws and turn the trimmer counter clockwise until the LED extinguishes You may have to repeat the calibration procedur...

Страница 12: ...eventing good conductivity or the thin copper wire of the coil has been disrupted at the assembly phase The last problem often occurs in the neighbourhood of the capacitor At much lower measured resis...

Отзывы: