28
q
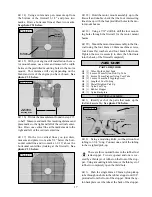
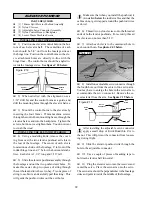
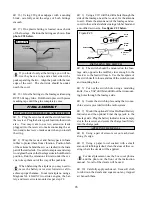
C) Check the rudder. Looking from behind
the airplane, move the rudder stick to the right. The
rudder should move to the right. If it does not, flip
the servo reversing switch on your transmitter to
change the direction.
q
D) Check the throttle. Moving the throttle
stick forward should open the carburetor barrel. If it
does not, flip the servo reversing switch on your trans-
mitter to change the direction.
q
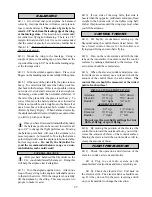
E) From behind the airplane, look at the ai-
leron on the right wing half. Move the aileron stick
to the right. The aileron should move up and the other
aileron should move down. If it does not, flip the
servo reversing switch on your transmitter to change
the direction.
q
2) Check Control Surface Throw.
q
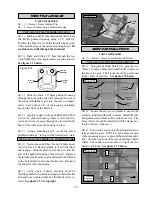
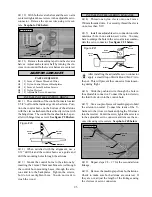
A) The Rudder should move 3/4” left and
3/4” right from center. If it moves too far, turn both
the adjustable control horns out away from the rud-
der. Do the opposite if there is not enough throw.
q
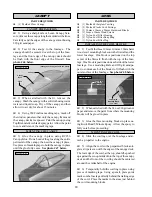
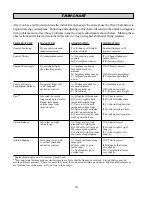
B) Both elevator halves should move 5/16”
up and 5/16” down from center. If they move too far,
move the pushrod clevises to a hole in the elevator
horns away from the elevator halves. Do the oppo-
site if there is not enough throw. Both elevator halves
should also travel the same amount throughout their
total movement.
q
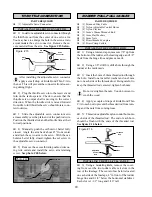
C) The ailerons should move 5/16” up and
5/16” down from center. If the ailerons move too
much, move the clevises to a hole in the clevises far-
ther away from the ailerons. Do the opposite if there
is not enough throw. It is important that both ailerons
move the same amount, both up and down.
q
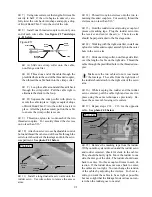
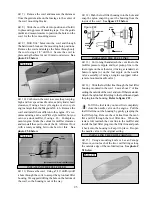
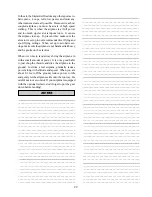
D) Once the control throws and movements
are set, tubing must be added to the clevises to ensure
they do not release in the air. Cut a piece of fuel line
into 1/4” pieces. Unsnap the clevises and slip one
piece over each clevis. Snap the clevises back in place
and slide the tubing up over them.
q
1) Completely charge your transmitter and re-
ceiver batteries before your first day of flying.
PREFLIGHT CHECK
q
2) Check every bolt and every glue joint in the
Skyraider to ensure that everything is tight and well
bonded. This should include all of the control sur-
face hinges as well.
q
3) Double check the balance of the airplane. Do
this with the fuel tank empty.
q
4) Check the control surfaces. All should move
in the correct direction and not bind in any way.
q
5) If your radio transmitter is equipped with dual
rate switches double check that they are on the low
rate setting for your first few flights.
q
6) Check to ensure the control surfaces are
moving the proper amount for both low and high
rate settings.
q
7) Check the receiver antenna. It should be fully
extended and not coiled up inside the fuselage.
q
8) Properly balance the propeller. An out of
balance propeller will cause excessive vibration which
could lead to engine and/or airframe failure.
q
9) Check the operation of the retracts. There
should be no binding present when the retracts are
moving up and down.
q
10) When the retracts are in the full up or full
down position the retract servo should be idle. Also
check to ensure the retracts lock in both the up and
down positions.
FLYING
The Skyraider is designed for those pilots who are
experienced in flying sport models. It is in no way a
trainer. If you do not feel comfortable that you are
able to test fly the airplane don't hesitate to ask some-
one for help getting it tested and trimmed out. Typi-
cally, sport airplanes such as the Skyraider, require
some different flying techniques that you might not
be familiar with. It is very important to let the air-
plane get up to flying speed before lifting off. Pull-
ing the plane off the ground too fast will cause the
airplane to stall and crash. You should allow the plane
to roll out until the tail is completely off the ground
and flying. Allow the airplane to roll out about 50
feet more and gently pull it off the ground and into a
shallow climb to altitude.


