Page 5 of 11
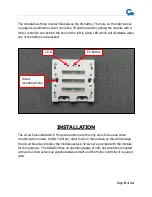
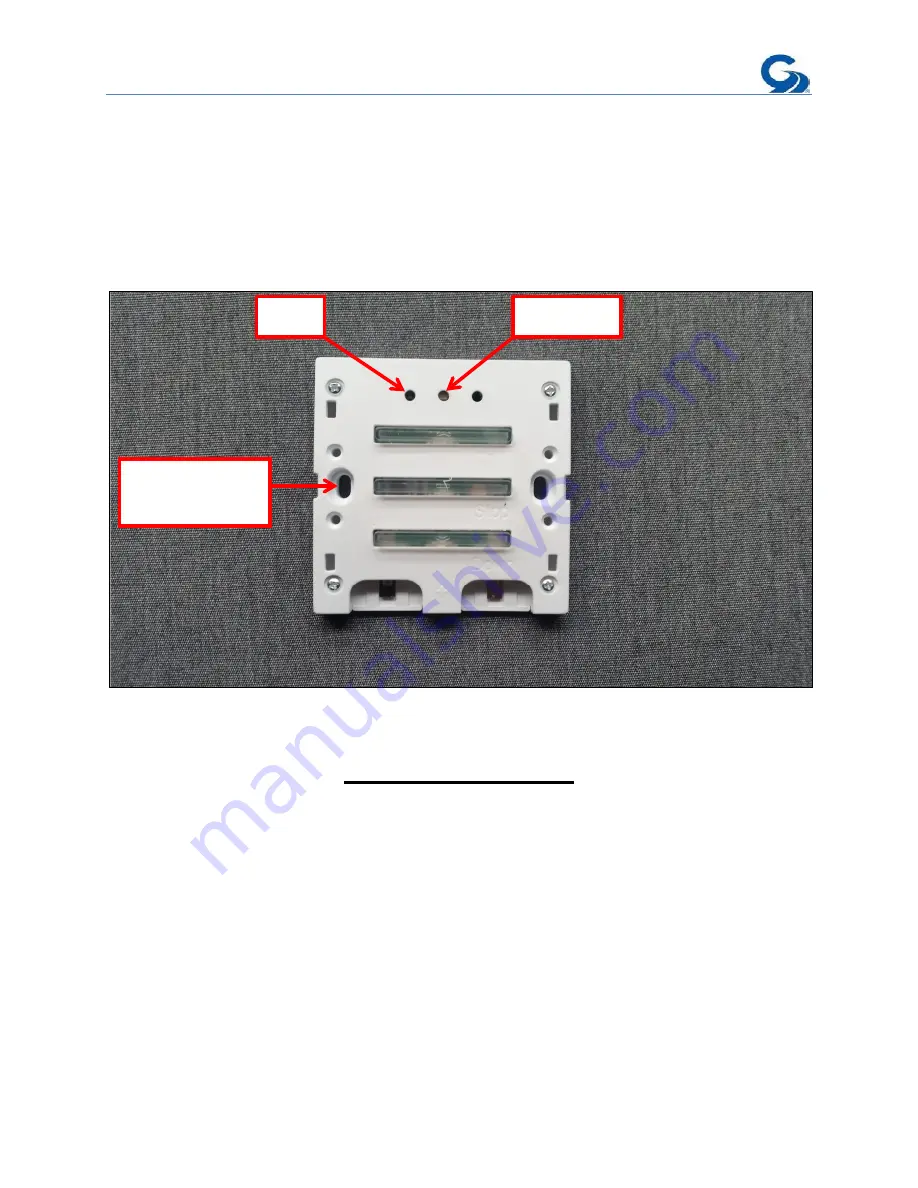
The module has three circular holes above the IN button. The hole on the right serves
no purpose, behind the center one is the P2 button used for pairing the module with a
motor controller and behind the hole on the left is a Red LED which will illuminate when
any of the buttons are pressed.
INSTALLATION
The screw holes indicated in the picture above are the only ones to be used when
mounting the module. Do NOT drill any other holes in this module as this will damage
the circuit board and render the module useless. Screws are provided with the module
for this purpose. The 98GC229 has an operating range of 100’ but should be mounted
with as few obstructions as possible between itself and the Motor Controller it is paired
with.
L.E.D
P2 Button
Screw
mounting holes

